Dinner · Part 2 of 3: Instructions
Crispy Fried Chicken Nuggets with Creamy Pepper Sauce Step-by-step instructions
- Prep
- Cook
- Total
- Serves
- 4
Before you start
Before you start, set up your workstation. Cut the chicken into chunks and have all your ingredients measured and ready. Line a plate with parchment paper for the shaped nuggets, and have a wire rack lined with paper towels ready for draining the fried nuggets.
Fill a deep skillet or Dutch oven with about 2 inches of oil and attach a deep-fry thermometer. Make sure your club soda is ice-cold from the fridge. Clear your counter space so you can move efficiently from blending to shaping to frying.
Ingredients at a glance (13)
- 2 lb boneless, skinless chicken breast, cut into chunks
- 1 large egg
- 1 tbsp garlic powder
- 1 tsp smoked paprika
- 1 tsp black pepper
- 1 tsp salt
- 1 cup all-purpose flour
- 1/2 cup cornstarch
- 1 1/2 cups all-purpose flour
- 1 tsp baking soda
- 1 1/2 cups ice-cold club soda
- 4 cups vegetable oil, for frying
- Creamy pepper sauce (store-bought or homemade), for serving
Instructions
Prepare the Chicken Mixture
- Blend the Chicken MixtureIn a food processor, combine the chicken breast chunks, egg, garlic powder, smoked paprika, black pepper, and salt. Pulse until the mixture is finely ground and holds together when pressed, but not pasty. Stop and scrape down the sides as needed.Look for The mixture should be cohesive but still have some texture.Tip Do not overprocess; you want a slightly coarse texture.
- Shape and Chill the NuggetsTransfer the chicken mixture to a work surface. Shape into nugget patties, about 2 inches wide and 1/2 inch thick. Place them on a plate lined with parchment paper. Refrigerate for 20 minutes to help them hold their shape during breading and frying.Look for The patties should be firm and hold together.Tip Chilling is key; it prevents the nuggets from falling apart in the hot oil.
At the end of this phase, you should have a cohesive, slightly textured chicken mixture that holds together when pressed. The seasonings should be well distributed, and the mixture should smell aromatic. The shaped nuggets should be firm after chilling, not mushy. If they feel too soft, return them to the fridge for a few more minutes.
Batter and Fry
- Make the Wet BatterIn a large bowl, whisk together the 1 1/2 cups flour and baking soda. Whisk in the ice-cold club soda until the batter is smooth and the consistency of thin pancake batter. Keep it cold until ready to use.Look for The batter should be lump-free and bubbly.Tip The colder the batter, the crispier the crust.
- Dredge and Batter the NuggetsIn a shallow dish, combine the all-purpose flour and cornstarch for dredging. Working in batches, dredge the chilled nuggets in the flour mixture, shaking off any excess. Then dip each nugget into the wet batter, allowing any excess to drip off.Look for Each nugget should be evenly coated with a thin layer of batter.Tip Keep one hand dry for dredging and one wet for batter to avoid clumping.
- Heat the Frying OilIn a deep skillet or Dutch oven, heat the vegetable oil over medium-high heat until it reaches 375°F (190°C) on a deep-fry thermometer. Adjust the heat to maintain the temperature.Look for The oil should shimmer and a small piece of batter sizzles immediately.Tip Use a thermometer for accuracy; too low oil makes greasy nuggets, too high burns them.
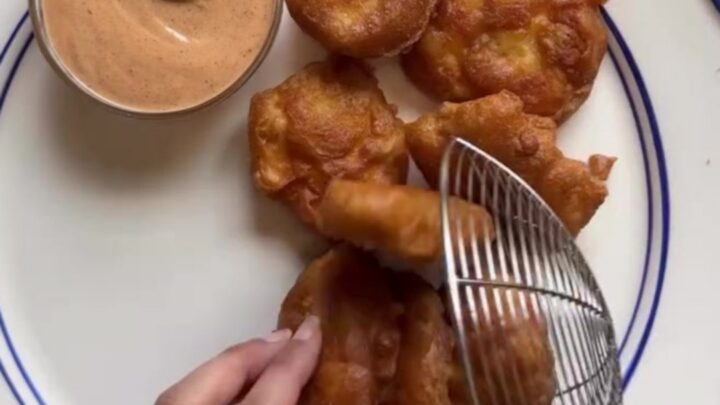
- Fry the NuggetsCarefully add the battered nuggets to the hot oil in batches, without crowding. Fry for 3 to 4 minutes, turning occasionally, until golden brown and cooked through. The internal temperature of the chicken should reach 165°F (74°C). Transfer to a wire rack lined with paper towels to drain.Look for The nuggets should be deep golden brown and crispy.Safe temperature 165°F (74°C) internal temperature (poultry)Tip Do not overcrowd the pan; fry in small batches to keep the oil temperature steady.
The batter should be smooth and bubbly, and the nuggets should be evenly coated. When frying, the oil should sizzle immediately, and the nuggets should turn golden brown in about 3 to 4 minutes.
The kitchen will smell of fried chicken, and the nuggets should look blistered and crunchy. Check the internal temperature to ensure they are cooked through.
Serve and Enjoy
- Serve with Creamy Pepper SaucePile the hot crispy nuggets on a serving platter lined with checkered paper. Serve immediately with the creamy pepper sauce on the side for dipping. Add crinkle-cut fries and Texas toast if desired.Look for The nuggets are crunchy and juicy inside.Tip Serve right away for the best crunch.
The nuggets should be piled high on a serving platter, with the creamy pepper sauce ready for dipping. The crust should be audible when you bite into it—crunchy and shattering. The chicken inside should be steaming and juicy. Serve immediately while they are at their peak crispness.
Common mistakes
One common mistake is overcrowding the pan, which lowers the oil temperature and results in greasy, soggy nuggets. Fry in small batches, giving each nugget room to float. Another mistake is overprocessing the chicken, which makes it pasty and tough. Pulse just until the mixture comes together.
Also, ensure the oil is at the correct temperature; if it's too low, the batter absorbs oil, and if it's too high, the outside burns before the inside cooks. Finally, don't skip the chilling step—it's crucial for keeping the nuggets intact.
How to tell it’s done
The nuggets are done when they are deep golden brown and crispy, and the internal temperature reaches 165°F (74°C) on an instant-read thermometer. The crust should be blistered and crunchy, and the chicken inside should be juicy and opaque.
If you don't have a thermometer, cut one open to check there is no pink, and the juices run clear. Remember that the nuggets continue to cook slightly after removal from the oil, so it's okay to pull them at 165°F (74°C) exactly.
- Poultry: 165°F (74°C) in the thickest part
- Egg dishes: 160°F (71°C) in the thickest part
Up next · Part 3 of 3
4 variations · storage & make-ahead · 5 answers · printable card
Tips, FAQ & printable recipe (Part 3)← Back to the ingredients (Part 1)