Desserts · Part 2 of 3: Instructions
Crispy Edge Gooey Center Two-Chip Bakery Cookies Step-by-step instructions
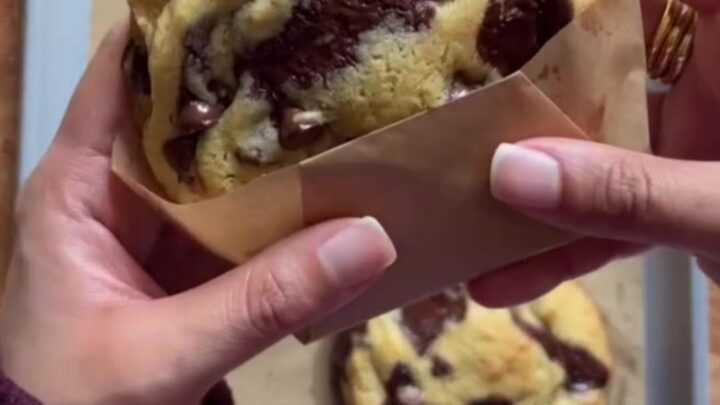
- Prep
- Cook
- Total
- Serves
- 18
Before you start
Before starting, set the butter out to soften at room temperature for about 30 minutes. Measure all ingredients and have them ready. Line two baking sheets with parchment paper. Preheat the oven to 375°F (190°C) about 15 minutes before baking.
Whisk the flour, baking soda, and cornstarch together in a bowl so they are ready to add. Crack the eggs into a small bowl and measure the vanilla extract. This mise en place ensures the dough comes together quickly and the cookies bake evenly.
Ingredients at a glance (11)
- 1 cup unsalted butter, softened
- 1 cup dark brown sugar, packed
- 1/2 cup granulated sugar
- 2 large cold eggs
- 2 tsp vanilla bean extract
- 2 1/4 cups all-purpose flour
- 1 tsp baking soda
- 2 tsp cornstarch
- 1 cup milk chocolate chips
- 1 cup dark chocolate chunks
- Flaky sea salt, for finishing, to taste
Instructions
Creaming and Dry Mix
- Cream Butter and SugarsIn a large bowl, beat the softened butter with the dark brown sugar and granulated sugar until light and fluffy, about 2 to 3 minutes. Add the cold eggs one at a time, beating well after each addition, then beat in the vanilla bean extract until fully incorporated.Look for The mixture turns pale and airy, and the sugar granules are no longer visible.Safe temperature 160°F (71°C) internal temperature (egg dishes)Tip Cold eggs help the dough stay thick, which prevents spreading during baking.
- Mix Dry IngredientsIn a separate bowl, whisk together the all-purpose flour, baking soda, and cornstarch until evenly combined. This ensures the leavening and thickener are distributed throughout the dough.Look for The dry mixture looks uniform with no visible lumps of baking soda.Tip Whisking the dry ingredients helps avoid overmixing the dough later.
After this phase, you should have a fluffy, pale butter-sugar mixture with the eggs fully incorporated. The dry ingredients are whisked and ready. The mixture smells sweet and buttery, and the texture is light and airy. Check that there are no lumps of sugar or butter, and that the eggs are fully beaten in—no streaks of yolk. This is the foundation for the cookie texture.
Folding the Dough
- Fold in Dry IngredientsGradually add the flour mixture to the butter mixture, folding with a rubber spatula or mixing on low speed just until no streaks of flour remain. Be careful not to overmix, as this can develop gluten and make the cookies tough.Look for The dough comes together into a cohesive mass, soft but not sticky.Tip Stop mixing as soon as the flour disappears to keep the cookies tender.
- Add ChocolateFold in the milk chocolate chips and dark chocolate chunks with a spatula until they are evenly distributed throughout the dough. The dough will be thick and chunky.Look for The chocolate is scattered evenly, with no large pockets of dough without chocolate.Tip Reserve a few chocolate pieces to press onto the tops of the dough balls before baking.
The dough comes together into a thick, cohesive mass with no streaks of flour. It should be soft but not sticky, and the chocolate pieces are evenly distributed. The dough smells of vanilla and chocolate. Check that you haven't overmixed—the dough should not be stretchy or elastic. If it is, you've developed too much gluten. The dough is ready to scoop.
Baking and Finishing
- Scoop Dough BallsUsing a large cookie scoop or two spoons, scoop the dough into balls about 3 tablespoons each. Place them on parchment-lined baking sheets, spacing them about 3 inches apart to allow for spreading.Look for The dough balls are tall and round, about 2 inches in diameter.Tip For extra gooey centers, keep the dough balls slightly mounded in the middle.
- Bake at 375°FBake the cookies in a preheated 375°F (190°C) oven for 11 minutes, or until the edges are golden and caramelized while the centers still look slightly underdone. The cookies will continue to set as they cool on the baking sheet.Look for The edges are deeply golden and the centers are puffed but still soft.Safe temperature 160°F (71°C) internal temperature (egg dishes)Tip Rotate the baking sheets halfway through for even browning.
- Finish with Sea SaltImmediately after removing the cookies from the oven, sprinkle each with a pinch of flaky sea salt. Let the cookies cool on the baking sheet for 5 minutes, then transfer to a wire rack to cool completely.Look for The salt crystals glisten on the warm cookies, melting slightly into the surface.Tip The salt enhances the chocolate flavor and balances the sweetness.
The cookies emerge from the oven with golden, caramelized edges and puffed, soft centers. The chocolate is melted and glossy. The aroma is intensely buttery and chocolatey.
Check that the edges are set and the centers are slightly underdone—they will finish cooking as they cool. Sprinkle with sea salt immediately. The cookies should be soft to the touch in the center but hold together when lifted.
Common mistakes
One common mistake is overmixing the dough after adding the flour, which develops gluten and results in tough cookies. Another is using warm or melted butter, which causes the cookies to spread too much and become thin and crispy throughout.
Also, don't skip the cornstarch—it's key to the tender center. Finally, pulling the cookies out too early can leave the centers raw, while baking too long dries them out. Aim for exactly 11 minutes, and remember that the cookies continue to bake on the sheet after removal.
How to tell it’s done
The cookies are done when the edges are deep golden brown and the centers are puffed but still look slightly underdone—they will continue to set as they cool on the hot baking sheet.
The internal temperature of the cookies should reach at least 160°F (71°C) to ensure the eggs are fully cooked. To check, insert an instant-read thermometer into the center of a cookie; it should read 160°F. The edges will be crisp and caramelized, and the centers will be soft and gooey.
- Egg dishes: 160°F (71°C) in the thickest part
Up next · Part 3 of 3
4 variations · storage & make-ahead · 5 answers · printable card
Tips, FAQ & printable recipe (Part 3)← Back to the ingredients (Part 1)