Desserts · Part 2 of 3: Instructions
Dark Chocolate Halva Dubai Bar with Crispy Kataifi Step-by-step instructions
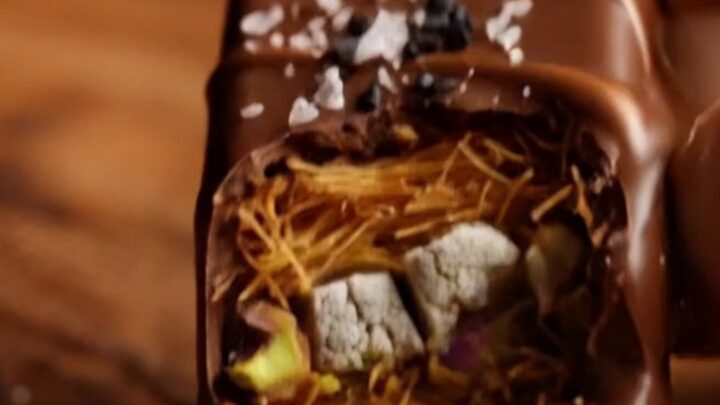
- Prep
- Cook
- Total
- Serves
- 8
Before you start
Before starting, set out all ingredients and equipment. Chop the dark chocolate finely and measure the kataifi, tahini, halva, and honey. Have the bar molds ready on a sheet pan. If using a double boiler, fill the bottom pot with an inch of water and bring to a simmer.
For the filling, crumble the halva into small pieces and set aside. Make sure the kataifi is thawed if frozen, and pat dry with a paper towel if it feels damp. This recipe moves quickly once the chocolate is melted, so having everything within reach is key.
Ingredients at a glance (8)
- 12 oz 70% dark chocolate, finely chopped
- 2 cups kataifi (shredded phyllo), roughly chopped
- 2 tbsp ghee
- 3/4 cup roasted sesame tahini
- 1/2 cup vanilla halva, crumbled
- 1/4 cup honey
- 1/2 tsp flaky sea salt
- 1 tbsp sesame seeds
Instructions
Toast and Mix
- Toast the KataifiHeat the ghee in a large skillet over medium heat. Add the chopped kataifi and cook, stirring constantly, until golden and crisp, about 5 to 7 minutes. Remove from heat and let cool slightly.Look for The kataifi turns deep golden and sounds crackly when stirred.Tip Keep stirring to prevent burning; the shreds color quickly.
- Make the FillingIn a medium bowl, combine the toasted kataifi, tahini, crumbled halva, and honey. Fold until the mixture holds together when pressed. Set aside.Look for The filling is thick, sticky, and clumps easily.Tip Taste and add a pinch of salt if you prefer a more savory edge.
The kataifi should be golden brown and smell nutty from the ghee. When you stir it, it should sound crackly. The filling should be cohesive and slightly sticky, with the halva and tahini evenly distributed.
It should hold together when pressed between your fingers, but not be wet or oily. If it seems too dry, add an extra teaspoon of honey. If it’s too wet, add a tablespoon of toasted kataifi.
Temper and Mold
- Temper the ChocolateMelt two-thirds of the chopped chocolate in a heatproof bowl set over simmering water, stirring until it reaches 115°F (46°C). Remove from heat, add the remaining chocolate, and stir until melted and the temperature drops to 89°F (32°C).Look for The chocolate is smooth, glossy, and about 89°F (32°C).Tip Use an instant-read thermometer for accuracy; proper tempering gives a sharp snap.
- Line the MoldsSpoon a thin layer of tempered chocolate into each bar mold, using a pastry brush to coat the bottom and sides evenly. Tap the mold gently to release air bubbles. Place in the refrigerator for 5 minutes to set.Look for The chocolate layer is firm but not fully hard.Tip Work quickly so the chocolate stays in temper.
- Fill and CapPress the halva-kataifi filling firmly into the chocolate-lined molds, leaving a small gap at the top. Spoon the remaining tempered chocolate over the filling, spreading it to the edges to seal completely. Tap again to settle.Look for The filling is fully encased and the top is smooth.Tip Make sure the edges are well sealed to prevent leakage.
- Chill the BarsTransfer the molds to the refrigerator and chill until the chocolate is completely set, about 20 minutes. The bars should release cleanly from the molds.Look for The chocolate is firm, and the bars pop out without bending.Tip If the chocolate sticks, place the mold on a warm towel for a few seconds.
The chocolate should be smooth, glossy, and at the correct temperature. The molds should have an even, thin layer of chocolate on the bottom and sides, with no visible gaps. After chilling, the chocolate should be firm to the touch. The filled bars should look neat, with the filling fully covered by the top layer of chocolate. Tap the mold to ensure there are no air bubbles.
Finish and Serve
- Sprinkle and ServeUnmold the bars onto a cutting board. Sprinkle with flaky sea salt and sesame seeds. Let stand for a few minutes before cutting or serving.Look for The top is glossy with a light crunch of salt and seeds.Tip Use a sharp knife and cut with a gentle sawing motion for clean edges.
The bars should release cleanly from the molds and have a shiny, smooth surface. The sea salt and sesame seeds should stick to the top. When you break a piece, the filling should be crisp and the chocolate should snap. The aroma should be rich with chocolate, toasted sesame, and honey. If you cut the bar, the edges should be clean and the layers visible.
Common mistakes
One common mistake is overheating the chocolate, which can cause it to seize or become dull. Always melt gently and use a thermometer. Another issue is under-toasting the kataifi; if it’s not cooked long enough, it will be chewy rather than crisp.
Make sure the filling is pressed firmly into the molds so there are no air pockets. Finally, don’t skip the tempering step—it’s what gives the bar its professional finish and snap. If the chocolate is too thick when capping, warm it slightly with a hair dryer or by placing the bowl over warm water for a few seconds.
How to tell it’s done
The bar is done when the chocolate is fully set and the filling is firm. To test, gently press the top of the bar—it should feel solid and not give under your finger. When unmolded, the bar should release cleanly and have a glossy, shiny surface.
If you tap the bar lightly, it should sound hollow and crisp. The filling should be crunchy and hold together when you break the bar, not crumble into separate pieces. The chocolate should snap cleanly rather than bend.
Up next · Part 3 of 3
4 variations · storage & make-ahead · 5 answers · printable card
Tips, FAQ & printable recipe (Part 3)← Back to the ingredients (Part 1)