Dinner · Part 2 of 3: Instructions
Crispy Coconut Shrimp with Sweet Chili Lime Glaze Step-by-step instructions
- Prep
- Cook
- Total
- Serves
- 4
Before you start
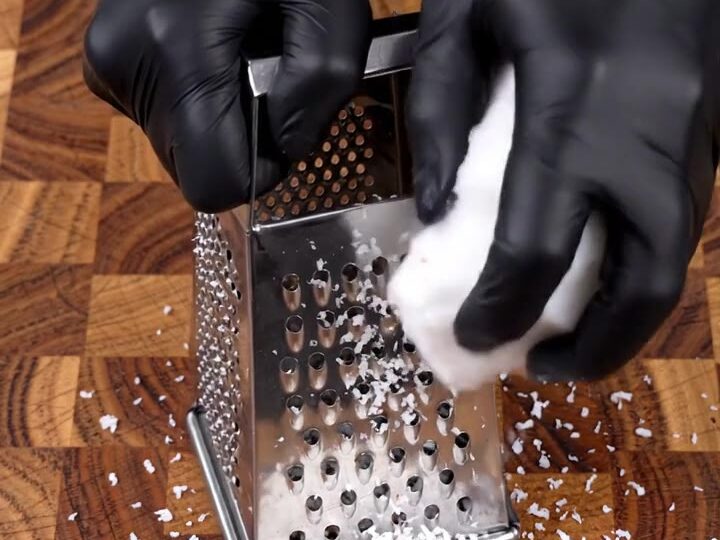
Before you start, set up your workspace: place a box grater, a cutting board, and a chef’s knife on the counter. Grate the fresh coconut meat into a bowl and set aside. Butterfly the shrimp if not already done, and pat them dry with paper towels.
Measure out the flour, beaten eggs, panko, and grated coconut into three separate shallow dishes. Have the sweet chili sauce, lime juice, and lime zest ready for the glaze. Heat the oil in a large cast iron skillet over medium-high heat while you coat the shrimp.
Ingredients at a glance (12)
- 1 1/2 lb jumbo shrimp, peeled and deveined, tails on
- 1 cup fresh white coconut meat, grated
- 1 cup panko breadcrumbs
- 2 large eggs, beaten
- 1/2 cup all-purpose flour
- 1/2 tsp kosher salt
- 1 cup vegetable oil, for frying
- 1/2 cup sweet chili sauce
- 2 tbsp fresh lime juice
- 1 tsp lime zest
- 1/4 cup fresh cilantro, chopped
- lime wedges, for serving
Instructions
Prep and Coat
- Prepare the shrimp and coatingButterfly the shrimp by slicing down the back almost all the way through, then open them flat. Pat dry with paper towels. Season lightly with salt. Set up three shallow bowls: one with flour, one with beaten eggs, and one with panko mixed with the grated coconut.Look for The shrimp are butterflied and lie flat; the coating station is ready.Tip Keep the tails on for easy handling when frying and serving.
- Coat the shrimpDredge each butterflied shrimp in flour, shake off excess, dip into the beaten eggs, then press into the coconut-panko mixture, ensuring both sides are well coated. Place coated shrimp on a plate while coating the rest.Look for The shrimp are evenly coated with a thick, craggy crust.Tip Press the coating firmly so it adheres during frying.
At the end of this phase, the shrimp are butterflied, seasoned, and coated in a thick, craggy layer of coconut and panko. The coating should adhere firmly when you press it, and the shrimp should look dry and ready for the hot oil.
The oil is heating up, and the coating station is set up. Check that the oil is shimmering and a test piece of panko sizzles immediately.
Fry and Glaze
- Heat the oilHeat the vegetable oil in a large cast iron skillet over medium-high heat until it reaches 350°F (175°C) on a deep-fry thermometer. The oil should shimmer and a pinch of panko sizzles immediately when dropped in.Look for The oil is hot and shimmering, with a light ripple.Tip Use a thermometer to keep the temperature steady; adjust the heat as needed.
- Fry the shrimpWorking in batches to avoid crowding, lower the coated shrimp into the hot oil with tongs. Fry for 2 to 3 minutes per side, turning once, until the crust is deep golden amber and the shrimp are pink and opaque. Transfer to a paper-towel-lined plate.Look for The crust is golden brown and crisp; the shrimp are pink and curled slightly.Safe temperature 145°F (63°C) internal temperature (shellfish)Tip Do not overcrowd the skillet; the oil temperature will drop and make the crust greasy.
- Make the glazeIn a small bowl, whisk together the sweet chili sauce, lime juice, and lime zest until well combined. Set aside.Look for The glaze is glossy and smooth with a bright citrus aroma.Tip Taste and adjust with more lime juice if you prefer a tangier glaze.
The shrimp are frying in batches until the crust is a deep golden amber and the shrimp are pink and opaque. The kitchen smells of toasted coconut and sweet chili. The glaze is whisked and ready. Check that the shrimp are cooked through to 145°F (63°C) and that the oil temperature stays steady at 350°F (175°C).
Finish and Serve
- Glaze and serveDrizzle the sweet chili lime glaze over the fried shrimp, then sprinkle with chopped cilantro. Serve immediately with lime wedges on the side for squeezing.Look for The shrimp are glistening with glossy sauce and bright green cilantro.Tip Serve right away so the crust stays crisp.
The fried shrimp are arranged on a serving platter, drizzled with the glossy sweet chili lime glaze, and topped with fresh cilantro. The glaze glistens and the cilantro adds a bright green contrast. Serve immediately with lime wedges on the side for squeezing. The shrimp should be eaten right away while the crust is still crisp.
Common mistakes
A common mistake is overcrowding the skillet, which lowers the oil temperature and results in soggy, greasy shrimp. Fry in batches and give each shrimp room to float. Another pitfall is using stale or too-finely ground coconut, which can burn before the shrimp cooks.
Also, don’t skip the flour dredge — it helps the egg and panko stick to the shrimp and prevents the crust from sliding off during frying. Finally, resist the urge to flip the shrimp too often; let the first side get deeply golden before turning.
How to tell it’s done
The shrimp are done when the crust is deep golden amber and the shrimp are pink and opaque throughout. To be sure, insert an instant-read thermometer into the thickest part of a shrimp; it should read at least 145°F (63°C).
The coating should feel crisp and shatter when bitten, not chewy or greasy. If the oil temperature drops too low, the crust will absorb oil and become heavy — keep the oil at 350°F (175°C) and fry in small batches to maintain the right temperature.
- Shellfish: 145°F (63°C) in the thickest part
Up next · Part 3 of 3
4 variations · storage & make-ahead · 5 answers · printable card
Tips, FAQ & printable recipe (Part 3)← Back to the ingredients (Part 1)