Desserts · Part 2 of 3: Instructions
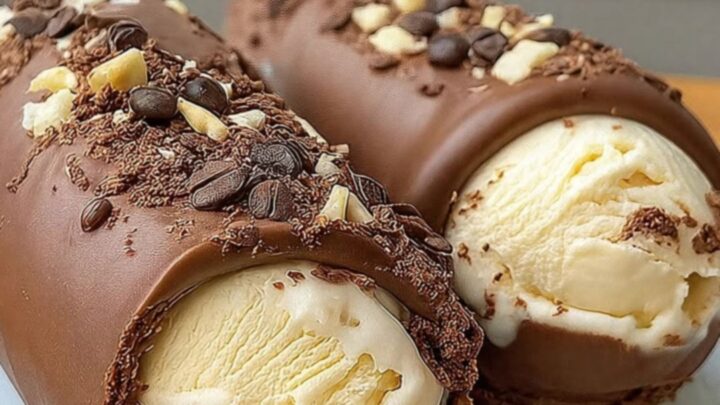
Crispy Chocolate Ice Cream Logs for a Perfect Dessert Step-by-step instructions
- Prep
- Cook
- Total
- Serves
- 4
Before you start
Before beginning, ensure that your workspace is cool and clear of any excess heat sources that might melt the chocolate prematurely. Have your piping bag ready and your silicone mat laid flat on a sturdy surface.
It is helpful to have your toppings pre-measured and placed in small bowls for easy access during the final assembly phase. Keep your freezer space cleared so that the logs can be placed on a flat tray immediately after assembly to firm up without being disturbed by other items.
Ingredients at a glance (5)
- 2 cups semisweet chocolate chips
- 2 pints vanilla ice cream, softened slightly
- 1/2 cup chopped nuts
- 1/4 cup mini chocolate chips
- 2 tbsp cocoa nibs
Instructions
Shell Creation
- Prepare the chocolate shellMelt the semisweet chocolate chips until smooth. Spread the melted chocolate onto a silicone baking mat in thin, even layers. Allow it to set slightly before rolling into cylindrical shapes to form the hollow logs.Look for The chocolate should be pliable enough to roll without cracking excessively.Tip Ensure the layer is thin enough for a clean snap when finished.
The chocolate should be spread to a consistent, paper-thin layer across the silicone mat. It should appear glossy and smooth, with no thick clumps that could alter the texture. Check that the edges are even so that the resulting roll is uniform in size. Once the chocolate begins to lose its shine and feels slightly tacky to the touch, it is at the perfect stage to be rolled into the cylindrical shape.
Ice Cream Filling
- Fill with ice creamTransfer the slightly softened vanilla ice cream into a piping bag. Pipe the ice cream generously into the center of each hollow chocolate log, ensuring they are filled to the edges.Look for The ice cream should be smooth and fill the cavity completely.Tip Work quickly so the ice cream does not melt completely during assembly.
The ice cream should be smooth and easily pipeable, with no large ice crystals. When piping into the chocolate rolls, ensure the filling reaches both ends of the log for a complete presentation.
The logs should remain intact during this process, showing no signs of cracking or crumbling. If the chocolate shell begins to soften from the warmth of the ice cream, place the assembly in the freezer for a few minutes before continuing.
Final Chilling
- Garnish and freezeImmediately sprinkle the chopped nuts, mini chocolate chips, and cocoa nibs over the exposed ice cream ends. Place the logs in the freezer for at least one hour to firm up the structure before serving.Look for The logs are ready when the shell is firm and snaps cleanly when cut.Tip Serve immediately after removing from the freezer for the best texture.
The logs should be garnished immediately while the ice cream is still soft enough for the toppings to adhere to the surface. After applying the nuts and chips, the logs must be placed in the freezer on a level surface. Check that they are not touching other items, which could cause them to lose their shape. After sixty minutes, the chocolate should be firm and the ice cream should be completely set.
Common mistakes
A common mistake is using chocolate that is too thick, which results in a shell that is difficult to bite into and lacks the desired snap. Another issue is letting the ice cream melt too much before piping, which makes it runny and prevents it from setting properly inside the log.
Finally, failing to chill the finished logs for long enough will lead to a messy presentation, as the chocolate may not be firm enough to support the weight of the ice cream filling.
How to tell it’s done
The logs are ready when the chocolate shell has completely hardened and provides a distinct, audible snap when cut with a sharp knife. The ice cream should be firmly set within the shell, holding its shape even after being sliced.
There is no internal temperature to monitor for this frozen dessert, but ensure the freezer is set to a low enough temperature to maintain the integrity of the ice cream throughout the duration of the chilling process.
Up next · Part 3 of 3
2 variations · storage & make-ahead · 3 answers · printable card
Tips, FAQ & printable recipe (Part 3)← Back to the ingredients (Part 1)