Dinner · Part 2 of 3: Instructions
Crispy Chipotle Chicken Wraps with Creamy Chipotle Sauce Step-by-step instructions
- Prep
- Cook
- Total
- Serves
- 4
Before you start
Before you start, dice the chicken into uniform 1-inch cubes so they cook evenly. Mince the chipotle peppers and garlic. In a small bowl, whisk together the sauce ingredients. Have all your ingredients measured and ready.
Let the chicken marinate in the refrigerator for at least 15 minutes, but no more than 2 hours, to keep it safe and flavorful. Warm the tortillas just before assembling to make them pliable.
Ingredients at a glance (17)
- 2 lb boneless skinless chicken breasts, diced
- 3 tbsp chipotle peppers in adobo sauce, minced
- 2 tbsp olive oil
- 1 tsp garlic powder
- 1 tsp onion powder
- 1 tsp ground cumin
- 1 tsp smoked paprika
- 1 tsp salt
- 2 tbsp lime juice
- 1/2 cup sour cream
- 1/4 cup mayonnaise
- 2 tbsp chipotle adobo sauce
- 1 garlic clove, minced
- 1 tbsp lime juice
- 2 cups shredded mozzarella cheese
- 4 large flour tortillas
- 2 tbsp butter, softened
Instructions
Marinate and Sauce
- Marinate the ChickenIn a large bowl, combine the diced chicken, minced chipotle peppers in adobo, olive oil, garlic powder, onion powder, ground cumin, smoked paprika, salt, and lime juice. Toss well to coat every piece evenly. Cover and refrigerate for at least 15 minutes, or up to 2 hours, to let the flavors meld.Look for The chicken is evenly coated with a reddish-brown spice mixture.Tip For more heat, add an extra tablespoon of adobo sauce to the marinade.
- Make the Creamy Chipotle SauceIn a small bowl, whisk together the sour cream, mayonnaise, chipotle adobo sauce, minced garlic, and lime juice until smooth. Season with a pinch of salt if desired. Set aside.Look for The sauce is smooth, pale orange, and creamy.Tip Taste and adjust the lime or adobo to your preference.
The chicken should be evenly coated with a dark, spicy marinade, and the sauce should be smooth and creamy with a balanced smoky-tangy flavor. The aromas of chipotle and lime should be vibrant. Taste the sauce and adjust the lime or adobo to your preference before moving on.
Sear and Assemble
- Sear the ChickenHeat a large skillet over medium-high heat until smoking hot. Add the marinated chicken in a single layer, working in batches if needed. Sear without moving for 3-4 minutes until charred on one side, then flip and cook another 3-4 minutes until the chicken is cooked through and reaches 165°F (74°C) in the center.Look for The chicken is golden-brown with charred edges and juices run clear.Safe temperature 165°F (74°C) internal temperature (poultry)Tip Don't overcrowd the pan; sear in batches for the best browning.
- Rest and Assemble WrapsTransfer the cooked chicken to a cutting board and let rest for 5 minutes. Warm the tortillas briefly in a dry skillet or microwave. Lay a tortilla on a work surface, spread a generous amount of the creamy chipotle sauce down the center, top with a portion of the chicken, and sprinkle with shredded mozzarella. Fold in the sides and roll tightly.Look for The tortillas are pliable and the filling is neatly enclosed.Tip Don't overfill; leave room at the edges for a tight seal.
The chicken should have a golden-brown char on the outside and be cooked through, with juices running clear.
The tortillas should be warm and pliable, and the wraps should be tightly rolled with the filling secure. The cheese should be generously distributed so it melts throughout.
Toast and Serve
- Toast the WrapsWipe out the skillet and place over medium heat. Spread a thin layer of butter on the outside of each wrap. Place the wraps seam-side down in the skillet and toast for 2-3 minutes per side, until golden brown and crispy on all sides. Press gently with a spatula to ensure even browning.Look for The wraps are deeply golden and crisp, with cheese melting inside.Tip Use medium heat to avoid burning the tortilla before the cheese melts.
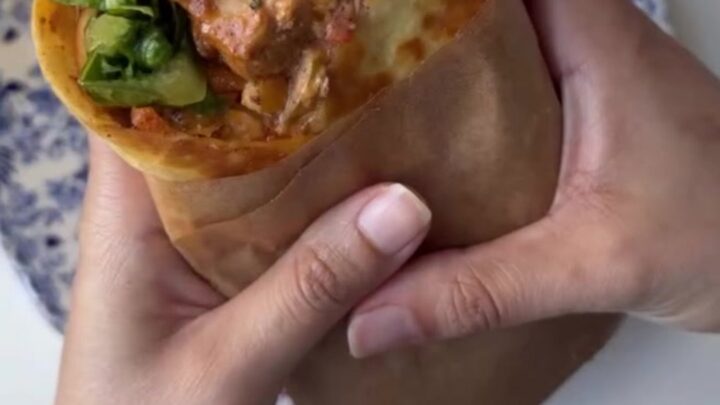
- Slice and ServeTransfer the toasted wraps to a cutting board and let rest for 2 minutes. Slice each wrap diagonally and serve with the remaining creamy chipotle sauce on the side for dipping.Look for The wraps are cut into neat halves, revealing the gooey cheese and juicy chicken.Tip Use a sharp knife to slice cleanly without squishing the filling.
The wraps should be deeply golden and crisp on all sides, with the cheese visibly melted and slightly oozing from the seams. The kitchen should smell of toasted butter and smoky chipotle. Let them rest briefly, then slice diagonally to reveal the gooey, juicy filling.
Common mistakes
One common mistake is overcrowding the skillet when searing the chicken. This causes the chicken to steam instead of brown, resulting in a less flavorful crust.
Another is overfilling the tortillas, which makes them difficult to roll and can cause them to burst during toasting. Use medium heat when toasting to avoid burning the outside before the cheese melts inside.
How to tell it’s done
The chicken is done when it reaches an internal temperature of 165°F (74°C) and the juices run clear. The wraps are done when they are golden brown and crispy on all sides, with the cheese fully melted and oozing out.
Let the wraps rest for a couple of minutes before slicing to allow the cheese to set slightly, making them easier to cut.
- Poultry: 165°F (74°C) in the thickest part
Up next · Part 3 of 3
4 variations · storage & make-ahead · 5 answers · printable card
Tips, FAQ & printable recipe (Part 3)← Back to the ingredients (Part 1)