Dinner · Part 2 of 3: Instructions
Crispy Chicken Shawarma Wrap with Garlic Toum Step-by-step instructions
- Prep
- Cook
- Total
- Serves
- 4
Before you start
Before you start, make sure the chicken thighs are trimmed of excess fat. In a small bowl, mix all the marinade spices (garlic powder, smoked paprika, cumin, coriander, turmeric, salt, and pepper) so they're ready to whisk with the wet ingredients. Juice the lemon and measure the yogurt and olive oil.
If using store-bought toum, take it out of the fridge to come to room temperature—it spreads more easily. Prepare the fries (bake or air-fry them) and slice the pickles. Have your flatbreads, panini press, and pastry brush within reach. The marinade needs at least 30 minutes, so plan accordingly.
Ingredients at a glance (16)
- 2 lb boneless skinless chicken thighs
- 2 tsp garlic powder
- 2 tsp smoked paprika
- 1 tsp ground cumin
- 1 tsp ground coriander
- 1/2 tsp ground turmeric
- 1/2 cup plain Greek yogurt
- 2 tbsp fresh lemon juice
- 2 tbsp olive oil
- 1 tsp kosher salt
- 1/2 tsp black pepper
- 1 cup garlic toum sauce, store-bought or homemade
- 4 large Lebanese flatbreads
- 2 cups crispy french fries, cooked
- 1/2 cup pickled wild cucumbers, sliced
- 2 tbsp rendered chicken drippings (from searing)
Instructions
Marinate and Sear
- Marinate the chickenIn a large glass dish, whisk together the garlic powder, smoked paprika, ground cumin, ground coriander, turmeric, Greek yogurt, lemon juice, olive oil, kosher salt, and black pepper until smooth. Add the boneless chicken thighs and turn to coat thoroughly. Cover and refrigerate for at least 30 minutes, or up to overnight.Look for The marinade is thick and fragrant, and every thigh is evenly coated.Tip For deeper flavor, marinate overnight. Bring the chicken to room temperature for 20 minutes before cooking, but no longer.
- Sear the chickenHeat a cast-iron skillet over high heat until smoking. Add the marinated chicken thighs in a single layer (work in batches if needed). Sear for 4 minutes per side, until deeply charred on the edges and cooked through. Transfer to a cutting board and let rest for 5 minutes.Look for The chicken is browned and charred in spots, and the internal temperature reaches 165°F (74°C).Safe temperature 165°F (74°C) internal temperature (poultry)Tip Do not overcrowd the skillet—this ensures a good sear. Use tongs to flip gently.
- Slice the chickenAfter resting, carve the chicken into thin, succulent strips against the grain. Set aside and keep warm.Look for The strips are juicy and tender with crispy edges.Tip Slicing against the grain shortens the muscle fibers, making each bite more tender.
At the end of this phase, the chicken is marinated and seared to perfection. The kitchen smells of warm spices and charred meat. The chicken is deeply browned with crispy edges, and when sliced, it's juicy and tender.
You should have thin strips of perfectly cooked chicken ready for assembly. If the chicken isn't fully cooked, return it to the skillet for another minute or two. The marinade should be fully absorbed, and the chicken should be at 165°F (74°C).
Assemble the Wraps
- Warm the flatbreadsWarm the Lebanese flatbreads in a dry skillet over medium heat for about 30 seconds per side, until pliable and lightly toasted. Keep them covered with a clean towel to stay soft.Look for The bread is warm, flexible, and slightly toasted but not crisp.Tip Warming makes the bread easier to roll without cracking.
- Spread the toumLay one flatbread on a work surface. Spread a generous layer of garlic toum sauce over the entire surface, leaving a 1-inch border at the edges.Look for The toum is thick and creamy, covering the bread evenly.Tip Don't skimp—the garlic sauce is essential for flavor and moisture.
- Layer the fillingsArrange a portion of the sliced chicken in a line down the center of the bread. Top with a handful of crispy french fries and a few slices of pickled wild cucumbers.Look for The fillings are piled evenly, leaving room at the ends for rolling.Tip Keep the filling in a compact log shape so the wrap rolls tightly.
- Roll the wrapFold the bottom edge over the filling, then fold in the sides, and roll tightly into a cylinder. Repeat with the remaining flatbreads and fillings.Look for The wrap is snug and secure, with no gaps.Tip Roll firmly but not so tight that the bread tears.
The flatbreads are warm and pliable, each spread with a generous layer of creamy garlic toum. The chicken, fries, and pickles are arranged neatly in the center, and the wraps are rolled into tight, secure cylinders. The rolls look neat and appetizing, with no filling escaping. The touch of the bread is soft and slightly tacky from the toum. Before pressing, check that all wraps are evenly filled and tightly rolled.
Press and Serve
- Heat the pressPreheat a ribbed panini press or grill pan over medium-high heat. Brush the outside of each wrap with rendered chicken drippings.Look for The press is hot and the wraps are glossy with drippings.Tip The drippings add rich flavor and help achieve a crispy crust.
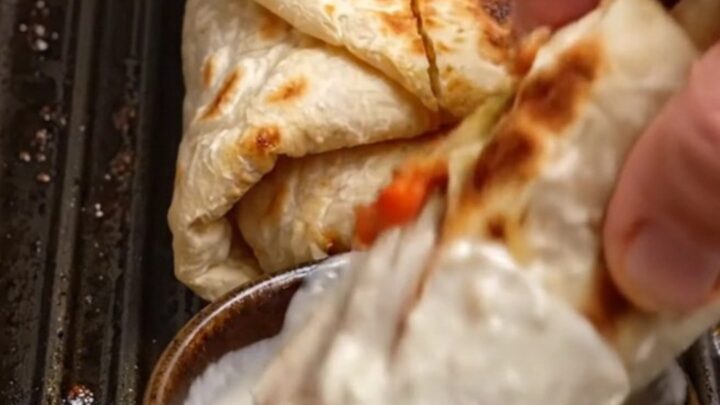
- Press the wrapsPlace the wraps on the hot press, seam-side down. Press for 2-3 minutes, until golden and crisp. Flip and press for another 2-3 minutes, until charred in spots and heated through.Look for The wraps are deeply golden with crisp, charred ridges.Tip If using a grill pan, weight the wraps with a heavy skillet to mimic a press.
- Rest and serveTransfer the pressed wraps to a cutting board and let rest for 2 minutes. Slice each wrap diagonally in half and serve immediately with extra garlic toum sauce for dipping.Look for The wraps are crisp outside and steaming inside.Tip Resting lets the juices settle, preventing soggy bread.
The wraps are pressed until golden brown and crisp, with beautiful char marks from the panini press. The aroma is irresistible—toasted bread, garlic, and charred chicken. When you slice one open, you see layers of juicy chicken, crispy fries, and creamy toum. The exterior is crunchy, and the interior is hot and flavorful. Serve immediately with extra toum on the side for dipping.
Common mistakes
One common mistake is overcrowding the skillet when searing the chicken. If the pan is too full, the chicken steams instead of sears, resulting in a pale, rubbery texture. Sear in batches if necessary. Another mistake is rolling the wrap too loosely, which causes the filling to fall out.
Roll tightly and tuck the ends securely. Also, don't skip pressing the wrap—this step is what creates the crispy exterior. If the press isn't hot enough, the wrap will be soft and chewy. Finally, avoid using too much toum; a thick layer is good, but too much can make the wrap soggy.
How to tell it’s done
The chicken is done when it reaches an internal temperature of 165°F (74°C) on an instant-read thermometer. It should be deeply browned and charred on the edges, with no pink in the center. After resting, the slices should be juicy and tender.
The wraps are done when they are golden brown and crispy on both sides, with visible grill marks and a satisfying crunch when pressed. The toum should be warm and slightly melted into the filling. If you cut into a wrap, the chicken should be steaming hot and the fries should still have some crunch.
- Poultry: 165°F (74°C) in the thickest part
Up next · Part 3 of 3
4 variations · storage & make-ahead · 5 answers · printable card
Tips, FAQ & printable recipe (Part 3)← Back to the ingredients (Part 1)