Dinner · Part 2 of 3: Instructions
Crispy Chicken Shawarma Wrap with Garlic Toum Step-by-step instructions
- Prep
- Cook
- Total
- Serves
- 4
Before you start
Before starting, gather all ingredients and equipment. If using store-bought toum, have it ready. If making homemade toum, prepare it in advance. Marinate the chicken at least 30 minutes ahead; overnight is even better.
Cook the french fries according to your preferred method and keep them warm. Have the pita breads at room temperature so they are pliable. Set up your workspace with a cutting board, knife, and a griddle or skillet for pressing.
Ingredients at a glance (16)
- 2 lb boneless, skinless chicken thighs
- 1/2 cup plain yogurt
- 3 tbsp olive oil
- 4 cloves garlic, minced
- 2 tbsp lemon juice
- 2 tsp ground cumin
- 2 tsp ground coriander
- 2 tsp smoked paprika
- 1/2 tsp ground cardamom
- 1/4 tsp ground cinnamon
- 1 tsp salt
- 1/2 cup garlic toum sauce
- 4 large pita breads
- 2 cups cooked french fries
- 1/2 cup pickled turnips or pickles, sliced
- Extra garlic toum sauce, for serving
Instructions
Marinate and Sear
- Marinate the ChickenIn a large bowl, whisk together the yogurt, olive oil, minced garlic, lemon juice, cumin, coriander, smoked paprika, cardamom, cinnamon, and salt. Add the chicken thighs and turn to coat thoroughly. Cover and refrigerate for at least 30 minutes, or up to 24 hours for deeper flavor.Look for The marinade should be thick and fragrant, clinging to the chicken.Tip For best results, marinate overnight. The yogurt tenderizes the chicken while the spices infuse.
- Sear the ChickenHeat a large cast iron skillet over high heat until smoking. Add the marinated chicken thighs in a single layer, working in batches if needed. Sear for 4-5 minutes per side until deeply charred and cooked through. The internal temperature should reach 165°F (74°C). Transfer to a cutting board and let rest for 5 minutes.Look for The chicken should have deep golden-brown char marks and be firm to the touch.Safe temperature 165°F (74°C) internal temperature (poultry)Tip Don't overcrowd the pan; give each piece room to sear properly.
- Slice the ChickenSlice the rested chicken into thin strips against the grain. Keep the strips warm while you prepare the wraps.Look for The strips should be juicy and tender, with crispy edges.Tip Slicing against the grain ensures every bite is tender.
At the end of this phase, the chicken should be deeply browned with charred spots, and the kitchen will smell of warm spices and garlic.
The chicken should be firm to the touch and reach 165°F (74°C). Let it rest before slicing to keep it juicy.
Assemble and Press
- Assemble the WrapsLay a pita flat on a work surface. Spread a generous layer of garlic toum sauce over the center. Pile with sliced chicken, a handful of french fries, and some pickled turnips or pickles.Look for The fillings should be piled high but still easy to roll.Tip Don't overstuff; leave room to fold the edges.
- Roll the WrapsFold the bottom edge of the pita over the filling, then fold in the sides and roll tightly into a snug cylinder.Look for The wrap should be compact and secure, with no filling falling out.Tip Tuck the filling in firmly as you roll to avoid gaps.
- Press on a Hot GriddleHeat a griddle or large skillet over medium-high heat. Place the wraps seam-side down and press with a spatula. Cook for 2-3 minutes per side until golden brown and crispy all over.Look for The wrap should be golden and crackly, with visible grill marks.Tip Press firmly but gently to avoid squeezing out the filling.
The wraps should be tightly rolled and then pressed on the griddle until golden and crispy. The pita will have a toasted, crackly texture, and the filling should be heated through. The aroma of garlic and toasted bread will fill the air.
Slice and Serve
- Rest and SliceTransfer the pressed wraps to a cutting board and let rest for 2 minutes. Slice each wrap in half on a diagonal, exposing the crispy layers.Look for The cut halves should show distinct layers of chicken, fries, and pickles.Tip Resting helps the wraps hold together when sliced.
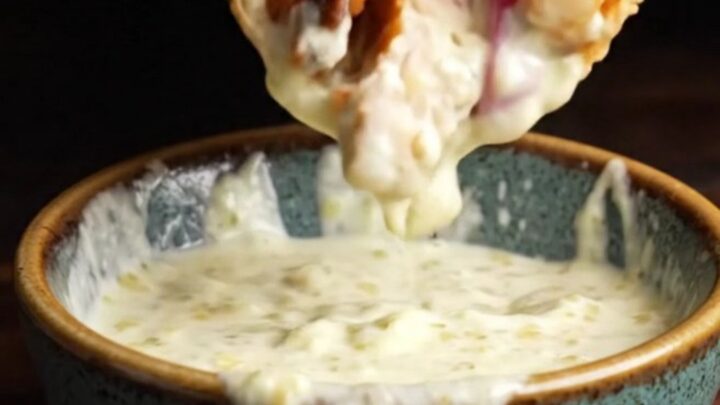
- Serve with Extra ToumServe the wraps immediately with extra garlic toum sauce on the side for dunking.Look for The sauce should be thick and garlicky, perfect for dipping.Tip Warm the toum slightly if desired, or serve cold for contrast.
After slicing, the layers of chicken, fries, and pickles should be visible, with the toum sauce peeking through. The wraps should be crisp on the outside and juicy inside. Serve immediately with extra toum for dunking.
Common mistakes
Avoid over-marinating the chicken in yogurt for more than 24 hours, as it can become mushy. Don't skip the resting step after searing the chicken; it allows the juices to redistribute.
When rolling the wraps, be careful not to overstuff, or they will be difficult to press and may fall apart. Also, ensure the griddle is hot enough to crisp the pita quickly without burning.
How to tell it’s done
The chicken is done when it reaches an internal temperature of 165°F (74°C) and is charred on the outside. The wraps are ready when they are golden brown and crispy on both sides, with the filling heated through.
The pita should crackle when pressed. If you're unsure, cut into a wrap to check that the chicken is piping hot and the fries are crisp.
- Poultry: 165°F (74°C) in the thickest part
Up next · Part 3 of 3
4 variations · storage & make-ahead · 5 answers · printable card
Tips, FAQ & printable recipe (Part 3)← Back to the ingredients (Part 1)