Appetizers · Part 2 of 3: Instructions
Crispy Chicken Mozzarella Croquettes with Chipotle Garlic Dip Step-by-step instructions
- Prep
- Cook
- Total
- Serves
- 6
Before you start
Before starting, make sure the potatoes are boiled and cooled enough to handle. Shred the poached chicken and have all the vegetables diced and ready. Set up the breading station with three shallow dishes: one with flour, one with beaten eggs, and one with panko.
Heat the oil in a deep skillet or Dutch oven and have a wire rack ready for draining the fried croquettes. The chipotle garlic dip can be prepared ahead and refrigerated until serving time.
Ingredients at a glance (16)
- 4 large russet potatoes, boiled and mashed
- 1 lb shredded poached chicken breast
- 1/2 cup diced bell peppers
- 1/4 cup sliced green onions
- 1/2 cup boiled carrots, diced
- 1 tsp garlic powder
- 1 tsp salt
- 1 1/2 cups shredded mozzarella cheese
- 2 cups panko breadcrumbs
- 2 large eggs, beaten
- 1/2 cup all-purpose flour
- 4 cups vegetable oil, for frying
- 1/2 cup mayonnaise
- 1 tbsp chopped chipotle pepper in adobo sauce
- 1 clove garlic, minced
- 1 tbsp lime juice
Instructions
Make the Filling
- Boil and Mash the PotatoesPlace the potatoes in a large pot and cover with cold water. Bring to a boil over high heat, then reduce to a simmer and cook until fork-tender, about 15 to 20 minutes. Drain and let cool slightly. Peel the potatoes while still warm, then transfer to a large bowl and mash until smooth. Add the shredded chicken, diced bell peppers, green onions, carrots, garlic powder, salt, and mozzarella. Mix until evenly combined.Look for The mixture should hold together when pressed but not be sticky.Tip For the smoothest mash, pass the potatoes through a ricer or mash thoroughly with a potato masher.
- Shape the CroquettesScoop about 1/4 cup of the potato mixture and shape into a log or oval about 3 inches long and 1 inch thick. Repeat with the remaining mixture. Place the shaped croquettes on a baking sheet lined with parchment paper. Refrigerate for 10 minutes to firm up.Look for The croquettes should be compact and hold their shape.Tip Wet hands slightly to prevent sticking when shaping.
At the end of this phase, you should have a smooth, well-combined potato mixture that holds together when pressed. The vegetables should be evenly distributed, and the mozzarella should be mixed throughout. The mixture should be cool enough to handle but still pliable.
Bread and Dip
- Set Up the Breading StationPlace the flour in a shallow dish. Beat the eggs in a second shallow dish. Put the panko breadcrumbs in a third shallow dish. Working one at a time, dredge each croquette in the flour, shaking off excess, then dip in the beaten egg, letting any excess drip off, and finally coat thoroughly with panko, pressing gently to adhere.Look for Each croquette should be evenly coated with a thick layer of panko.Tip Use one hand for dry ingredients and the other for wet to keep the coating light.
- Make the Chipotle Garlic DipIn a small bowl, stir together the mayonnaise, chopped chipotle pepper, minced garlic, and lime juice until smooth. Cover and refrigerate until ready to serve.Look for The dip should be creamy with a smoky, spicy aroma.Tip Adjust the amount of chipotle to control the heat level.
The croquettes should be uniformly coated with a thick layer of panko, with no bare spots. The dip should be smooth and creamy, with a balanced smoky and tangy flavor. The breading should adhere firmly to the croquettes.
Fry and Serve
- Heat the OilPour the vegetable oil into a deep skillet or Dutch oven and heat over medium-high heat until it reaches 350°F (175°C) on an instant-read thermometer. Adjust the heat to maintain the temperature.Look for The oil should shimmer and a small piece of bread sizzles immediately when dropped in.Tip Use a thermometer for accuracy; the oil temperature will drop when adding the croquettes.
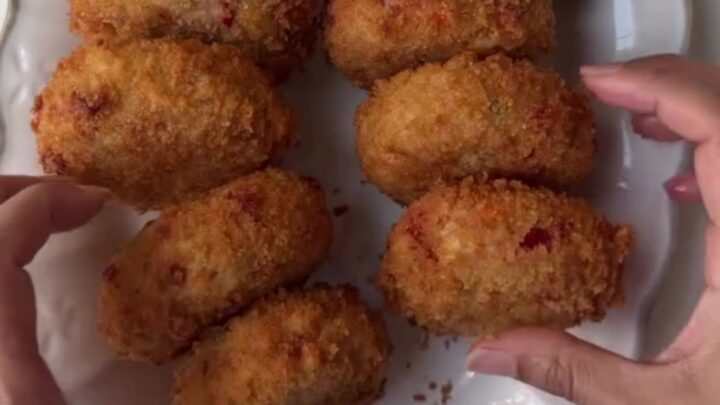
- Fry the CroquettesCarefully add the breaded croquettes to the hot oil in batches, without crowding. Fry for about 4 minutes, turning occasionally, until golden brown and crispy all over. Using a slotted spoon, transfer the croquettes to a wire rack set over a baking sheet to drain.Look for The croquettes should be deep golden brown and sound crisp when tapped.Safe temperature 165°F (74°C) internal temperature (poultry)Tip Fry in small batches to keep the oil temperature steady.
- Serve with the DipLet the croquettes rest for 2 minutes on the wire rack. Serve warm with the chipotle garlic dip on the side for dunking.Look for The croquettes should be hot and the cheese molten inside.Tip Serve immediately for the best crispy texture.
The croquettes should be fried to a deep golden brown, with a crisp crust that crackles when bitten. The chicken should be fully cooked to 165°F (74°C). The dip should be served cold alongside the hot croquettes.
Common mistakes
One common mistake is overcrowding the pan, which lowers the oil temperature and results in greasy, soggy croquettes. Fry in small batches, leaving plenty of space between each piece.
Another pitfall is under-mashing the potatoes, leaving lumps that can cause the croquettes to fall apart during frying.
Ensure the potatoes are thoroughly mashed and the mixture is well combined. If the croquettes are too soft to handle, refrigerate them for 15 to 20 minutes before breading to help them firm up.
How to tell it’s done
The croquettes are done when they are deep golden brown and crisp on all sides, which takes about 4 minutes of frying. The internal temperature of the chicken should reach 165°F (74°C) to ensure it is safely cooked.
To test, insert an instant-read thermometer into the center of a croquette; it should read at least 165°F. The crust should feel firm and sound crunchy when tapped. Let the croquettes rest for a couple of minutes before serving so the cheese sets slightly and the filling is piping hot.
- Poultry: 165°F (74°C) in the thickest part
- Egg dishes: 160°F (71°C) in the thickest part
Up next · Part 3 of 3
4 variations · storage & make-ahead · 5 answers · printable card
Tips, FAQ & printable recipe (Part 3)← Back to the ingredients (Part 1)