Dinner · Part 2 of 3: Instructions
Crispy Chicken Lavash Wrap with Garlic Sauce Step-by-step instructions
- Prep
- Cook
- Total
- Serves
- 4
Before you start
Before you start, cut the chicken into uniform 1-inch cubes so they cook evenly. Measure out all the spices and have them ready in a small bowl. Grate the garlic for the sauce and juice the lemon.
Dice the tomatoes and shred the mozzarella if not using pre-shredded. Lay out the lavash sheets on a clean work surface so assembly goes quickly. Have the butter ready and a large skillet nearby. The entire process moves fast, so being organized makes it seamless.
Ingredients at a glance (17)
- 2 lb boneless skinless chicken breasts, cut into 1-inch cubes
- 2 tbsp olive oil
- 2 tsp smoked paprika
- 1 tsp garlic powder
- 1 tsp onion powder
- 1 tsp dried oregano
- 1 tsp salt
- 1/2 tsp black pepper
- 1/2 cup Greek yogurt
- 1/4 cup mayonnaise
- 2 cloves garlic, grated
- 1 tbsp lemon juice
- 1/4 tsp salt
- 4 sheets lavash (large thin flatbreads)
- 1 cup diced tomatoes
- 1 1/2 cups shredded mozzarella cheese
- 2 tbsp butter
Instructions
Sear and Sauce
- Marinate and Sear the ChickenIn a large bowl, toss the chicken cubes with olive oil, smoked paprika, garlic powder, onion powder, dried oregano, salt, and black pepper until evenly coated. Heat a large skillet over medium-high heat. Add the chicken in a single layer and sear for 5–7 minutes, turning occasionally, until golden brown and cooked through. The chicken is done when it reaches 165°F (74°C) in the thickest piece.Look for The chicken turns golden and releases a smoky, spiced aroma.Safe temperature 165°F (74°C) internal temperature (poultry)Tip Do not overcrowd the pan; sear in batches if needed.
- Make the Garlic SauceIn a small bowl, whisk together the Greek yogurt, mayonnaise, grated garlic, lemon juice, and salt until smooth and creamy. Set aside. The sauce can be made while the chicken cooks.Look for The sauce is thick, pale ivory, and fragrant with garlic.Tip For a sharper garlic flavor, let the sauce rest for 10 minutes before serving.
The chicken is golden brown and cooked through, releasing a smoky, spiced aroma. The garlic sauce is smooth, creamy, and fragrant with fresh garlic and lemon. The kitchen smells like a warm, savory embrace. Before moving on, taste the sauce and adjust salt or lemon if needed.
Roll and Toast
- Assemble the WrapsLay a lavash sheet on a clean work surface. Spread a generous layer of garlic sauce over the center, leaving a border around the edges. Add a quarter of the cooked chicken, a sprinkle of diced tomatoes, and a handful of shredded mozzarella. Fold the sides inward and roll tightly into a snug cylinder. Repeat with the remaining lavash and filling.Look for Each wrap is a tight, neat cylinder with filling visible at the ends.Tip Do not overfill; the wrap should close easily without tearing.
- Toast the Wraps in ButterMelt the butter in a large cast-iron skillet over medium-high heat. Place the wraps seam-side down in the skillet, pressing firmly with a spatula. Cook for 2 minutes per side, until the lavash is deeply golden and shatteringly crisp, and the cheese is melted. Work in batches if needed.Look for The wraps sizzle and turn golden-brown with a crisp, crackly sound when pressed.Tip Press gently but firmly to ensure even browning and good cheese melt.
The wraps are tightly rolled, seam-side down, and sizzling in the butter. They turn a deep golden brown with crisp, crackly edges. The cheese is visibly melted and slightly oozing. The sound of the crispy exterior when pressed is unmistakable. Ensure all sides are evenly toasted.
Rest and Serve
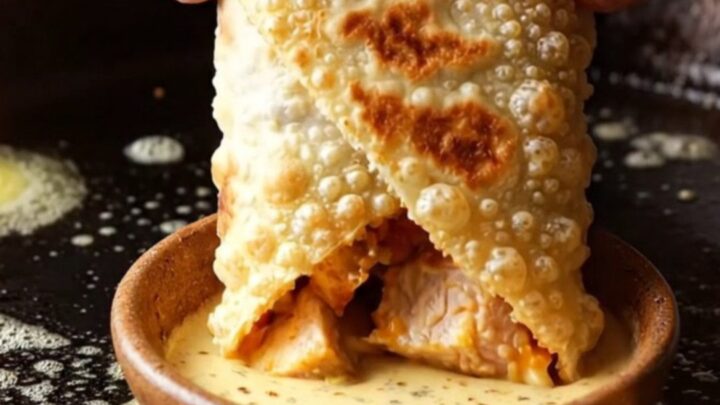
- Rest and Serve with Extra SauceTransfer the toasted wraps to a cutting board and let them rest for 2 minutes. This helps the cheese set slightly and makes slicing easier. Cut each wrap in half on a diagonal and serve immediately with the remaining garlic sauce for dipping.Look for The cut halves reveal juicy chicken, melted cheese, and glossy sauce.Tip Serve the sauce on the side so everyone can dip as they eat.
The toasted wraps rest on a cutting board, releasing a buttery, savory steam.
When cut, the cross-section reveals juicy chicken, melted mozzarella strings, and bright tomato pieces, all glistening with garlic sauce. The crunch is audible even as you slice. Serve immediately with extra sauce.
Common mistakes
A common mistake is overcrowding the skillet when searing the chicken, which causes it to steam rather than brown. Sear in batches if necessary. Another pitfall is overfilling the wraps, making them difficult to roll and prone to tearing. Stick to the amounts suggested.
Also, be careful not to toast the wraps too slowly; if the heat is too low, they will dry out before crisping. Use medium-high heat and press firmly to ensure even browning. Finally, don't skip the rest time after toasting — it helps the wraps hold together when sliced.
How to tell it’s done
The chicken is done when it reaches an internal temperature of 165°F (74°C) and is no longer pink in the center. The wraps are done when the lavash is golden brown and crisp on both sides, and the cheese is fully melted.
To test, press the center of a wrap with a spatula — it should feel firm and make a crackling sound. Let the wraps rest for 2 minutes before cutting so the cheese sets slightly and the filling stays intact.
- Poultry: 165°F (74°C) in the thickest part
Up next · Part 3 of 3
4 variations · storage & make-ahead · 5 answers · printable card
Tips, FAQ & printable recipe (Part 3)← Back to the ingredients (Part 1)