Dinner · Part 2 of 3: Instructions
Crispy Chicken Hash Brown Casserole Step-by-step instructions
- Prep
- Cook
- Total
- Serves
- 6
Before you start
Before starting, ensure all ingredients are measured and ready. Thaw the frozen shredded potatoes completely in the refrigerator or on the counter, then press them between paper towels to remove any excess moisture.
If you are cooking the chicken fresh, boil or bake it beforehand so it is ready to shred. Grease your ceramic baking dish thoroughly with cooking spray or butter. Having everything prepped and organized ensures a seamless assembly process.
Ingredients at a glance (4)
- 3 cups cooked chicken, shredded
- 30 oz shredded potatoes, thawed and drained
- 2 cups shredded cheddar cheese, divided
- 2 cups creamy ingredients (such as sour cream or cream soup)
Instructions
Pre-cooking and Shredding the Chicken
- Prep the chickenIf starting with raw chicken, cook the chicken until it reaches an internal temperature of 165°F (74°C). Shred the cooked chicken into bite-sized pieces using two forks on a clean cutting board.Look for The chicken should be opaque throughout with no pink remaining.Safe temperature 165°F (74°C) internal temperature (poultry)Tip Using a meat thermometer is the most reliable way to ensure the chicken is cooked safely.
- Dry the potatoesEnsure the shredded potatoes are completely thawed. Press them firmly between paper towels to remove any excess moisture, which prevents the casserole from becoming soggy.Look for The potatoes should feel dry to the touch and not clump together heavily.Tip Properly drying the potatoes is the key to achieving a crispy texture rather than a mushy one.
At the end of this phase, the chicken breasts should be fully cooked, completely opaque throughout, and reach a safe internal temperature. The meat should shred easily with two forks, yielding tender, bite-sized pieces.
Ensure the shredded chicken is kept warm and covered so it does not dry out while you prepare the creamy base. The chicken should smell savory and clean, ready to absorb the rich flavors of the casserole sauce.
Mixing and Assembling the Casserole Base
- Combine the baseIn a large mixing bowl, combine the creamy ingredients with half of the shredded cheddar cheese. Stir until the mixture is smooth and evenly blended.Look for The mixture should look uniform with the cheese evenly distributed throughout.Tip Ensure the creamy ingredients are at room temperature for easier mixing.
- Fold in chicken and potatoesAdd the shredded chicken and the dried shredded potatoes to the bowl. Gently fold all the ingredients together with a spatula until the potatoes and chicken are thoroughly coated.Look for The mixture should be thick and cohesive, with no dry pockets remaining.Tip Be gentle when folding to avoid crushing the shredded potatoes into a paste.
The creamy base should look smooth and uniform, with the initial cheese evenly distributed throughout the creamy ingredients. Once the potatoes and chicken are folded in, every shred should be thoroughly coated in the thick, creamy sauce. The mixture should look thick, cohesive, and ready for the baking dish, with no dry pockets of potatoes remaining. It should fill the baking dish evenly, flat on top, ready to bake.
Baking to Golden, Crispy Perfection
- Assemble in dishTransfer the chicken and potato mixture into a greased 9x13-inch ceramic baking dish, spreading it into an even, flat layer to ensure uniform cooking.Look for The surface should be flat and level to ensure even baking.Tip Do not pack the mixture down too tightly, or the casserole will bake up dense instead of fluffy.
- Bake and melt cheeseBake at 350°F (177°C) for 35 minutes. Sprinkle the remaining cheddar cheese over the top and bake for 10 more minutes, until the cheese is melted, golden-brown, and bubbling at the edges.Look for The edges should be sizzling and the top cheese layer deeply browned and bubbly.Tip Let the casserole rest for ten minutes before serving to help the sauce set.
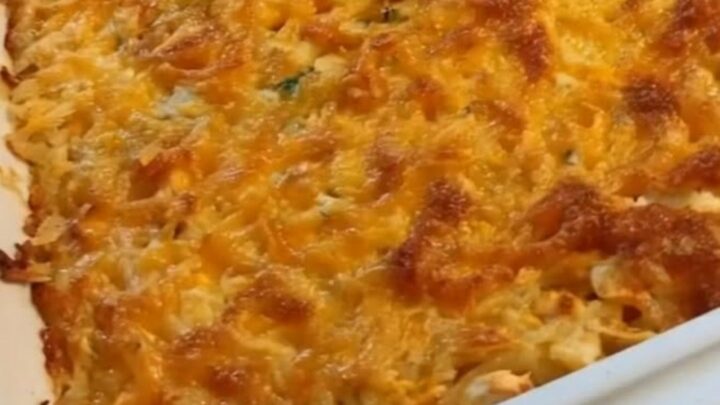
The finished casserole should be bubbling vigorously around the edges, with a deeply golden-brown, melted cheese topping. The top crust should feel slightly firm and crispy when gently tapped with a spoon, and steam should rise from the center when scooped. The entire kitchen should be filled with the rich, comforting aroma of melted cheddar and baked potatoes. Let it rest briefly before serving to allow the layers to set.
Common mistakes
One common mistake is using wet or partially frozen shredded potatoes, which releases too much moisture during baking and results in a watery, soggy casserole. Always thaw and dry the potatoes thoroughly.
Another error is adding all the cheddar cheese at the very beginning; this causes the cheese to overcook, separate, and become greasy or burnt. Adding the cheese in the final ten minutes guarantees a perfect melt. Lastly, avoid over-mixing the potatoes, which can break them down and make the texture gummy.
How to tell it’s done
The casserole is perfectly done when the center is piping hot, the edges are bubbling with golden grease, and the cheese topping is completely melted and deeply browned.
To be absolutely sure of doneness and safety, insert an instant-read thermometer into the center of the casserole; it must register at least 165°F (74°C) to ensure the chicken and other ingredients are fully heated through and safe to enjoy. The top should have a distinct, audible crunch when tapped with a serving spoon.
- Poultry: 165°F (74°C) in the thickest part
Up next · Part 3 of 3
2 variations · storage & make-ahead · 3 answers · printable card
Tips, FAQ & printable recipe (Part 3)← Back to the ingredients (Part 1)