Dinner · Part 1 of 3: Ingredients
Crispy Chicken Caesar Pasta Salad
- Prep
- Cook
- Total
- Serves
- 4
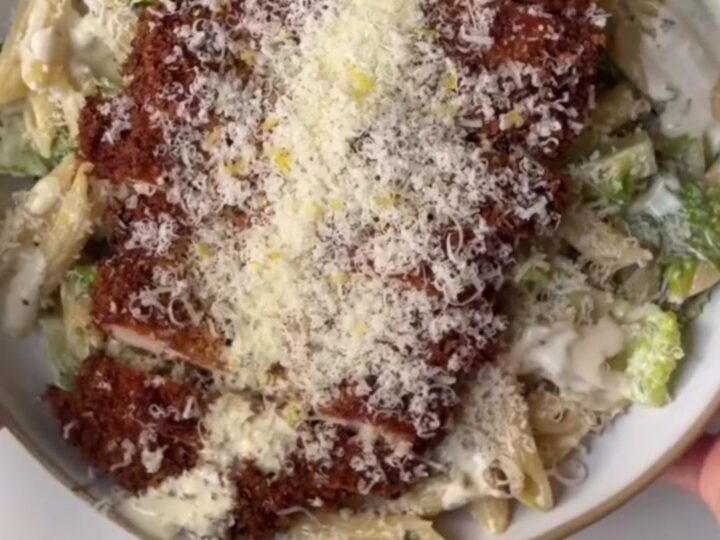
This crispy chicken Caesar pasta salad brings together everything you love about a classic Caesar—crunchy romaine, creamy dressing, and shaved Parmesan—plus tender pasta and golden, panko-crusted chicken strips.
The contrast of warm, crunchy chicken against cool, crisp lettuce and al dente pasta makes every forkful exciting. It’s a complete meal in one bowl, perfect for a weeknight dinner or a casual gathering. The recipe comes together quickly, with simple steps and ingredients you can find at any supermarket.
When a craving hits for something crunchy, creamy, and satisfying, this crispy chicken Caesar pasta salad answers the call. The video shows a beautiful bowl of glossy pasta and romaine tossed in Caesar dressing, topped with hot, crunchy chicken strips and shaved Parmesan.
This recipe recreates that dish with a straightforward breading and frying method that delivers a shatteringly crisp crust. The pasta adds heartiness, making it a full dinner rather than a side salad. Serve it warm or at room temperature—either way, it’s a crowd-pleaser.
Ingredients
- 1 1/2 lb boneless, skinless chicken breasts
For the chicken
- 1/2 cup all-purpose flour
- 2 large eggs
- 1 1/2 cups panko breadcrumbs
- 1 tbsp lemon zest
- 1 tsp dried Italian herbs
- 1/2 tsp kosher salt
- 1/4 tsp black pepper
- 1/2 cup vegetable oil, for frying
For the salad
- 6 cups chopped romaine lettuce
- 8 oz short pasta (such as penne or rotini)
- 3/4 cup Caesar dressing
For serving
- 1/4 cup shaved Parmesan cheese
Why this recipe works
The panko coating, seasoned with lemon zest and herbs, creates an ultra-crispy crust that stays crunchy even after being sliced. Frying in hot oil quickly seals the crust and locks in the chicken’s juices, so every strip is tender inside and crackling outside. The lemon zest brightens the flavor without overpowering the Caesar dressing.
Tossing the pasta and romaine with dressing while the chicken is still warm means the salad absorbs the dressing’s flavors without wilting the lettuce. The romaine stays crisp because it’s added just before serving, and the warm chicken contrasts beautifully with the cool greens. This method ensures every bite has texture and flavor.
Notes and substitutions
Use boneless, skinless chicken breasts and pound them to an even thickness so they cook evenly. Panko breadcrumbs are key for maximum crunch; they are lighter and flakier than regular breadcrumbs.
If you prefer, you can use chicken tenders or thighs, adjusting the cooking time as needed. The lemon zest and dried herbs in the coating add a subtle aromatic note that complements the Caesar dressing.
For the dressing, use a good-quality Caesar dressing—either store-bought or homemade. If you want a lighter version, you can use a yogurt-based Caesar, but the flavor will be tangier.
Short pasta like penne or rotini works best because it holds the dressing well. Shaved Parmesan is the final touch; avoid pre-grated cheese, which doesn’t have the same texture.
- chicken breasts: chicken tenders or boneless thighs (adjust cooking time as needed)
- panko breadcrumbs: regular breadcrumbs or crushed cornflakes for extra crunch
- Caesar dressing: homemade Caesar or creamy Italian dressing
- short pasta: gluten-free pasta or whole wheat pasta
Equipment
- Large skillet
- Meat thermometer
- Three shallow dishes
- Large pot
- Large salad bowl
- Tongs
- Chef's knife
- Cutting board
Up next · Part 2 of 3
6 steps · 15 min of cooking · what to look for at each stage
Step-by-step instructions (Part 2)