Dinner · Part 2 of 3: Instructions
Crispy Chicken Caesar Pasta Salad Step-by-step instructions
- Prep
- Cook
- Total
- Serves
- 4
Before you start
Before starting, pound the chicken breast to an even thickness for quick, even cooking. Set up a breading station with flour, beaten egg, and panko breadcrumbs. Boil the campanelle pasta according to package directions, then drain and rinse under cold water to stop the cooking.
Chill the pasta in the refrigerator while preparing the chicken. Have the romaine chopped, the Parmesan grated, and the dressing measured so everything is ready to assemble.
Ingredients at a glance (12)
- 1 lb boneless, skinless chicken breast
- 1/2 cup all-purpose flour
- 1 large egg, beaten
- 1 cup panko breadcrumbs
- 1/2 cup vegetable oil, for frying
- 250 g campanelle pasta, boiled and chilled
- 2 cups chopped romaine lettuce
- 1/2 cup grated Parmesan cheese
- 1/2 cup creamy Caesar dressing
- 2 tbsp olive oil
- Shaved Parmesan curls, for serving
- Freshly cracked black pepper, for serving
Instructions
Frying the Chicken
- Prepare the ChickenPlace the chicken breast between two sheets of plastic wrap and pound to an even 1/2-inch thickness. Set up a breading station with three shallow dishes: one with flour, one with the beaten egg, and one with panko breadcrumbs. Season the flour with salt and pepper.Look for The chicken is evenly thin and the breading station is ready with no clumps.Tip Pounding ensures even cooking and a crispy crust. Pat the chicken dry before breading.
- Bread the ChickenDredge each chicken breast in the flour, shaking off any excess. Dip into the beaten egg, letting the excess drip off, then press firmly into the panko breadcrumbs until fully coated. Set the breaded chicken on a plate while preparing the skillet.Look for The chicken is evenly coated with no bare spots.Tip Press the breadcrumbs gently so they adhere; let the breaded chicken rest for 5 minutes before frying.
- Fry the ChickenHeat the vegetable oil in a large skillet over medium-high heat until shimmering. Carefully place the breaded chicken in the skillet and cook for 4 to 5 minutes per side, until golden brown and the internal temperature reaches 165°F (74°C). Transfer to a cutting board and let rest for 3 minutes.Look for The crust is deep golden brown and the chicken is cooked through.Safe temperature 165°F (74°C) internal temperature (poultry)Tip Use a meat thermometer to check the temperature; do not overcrowd the pan.
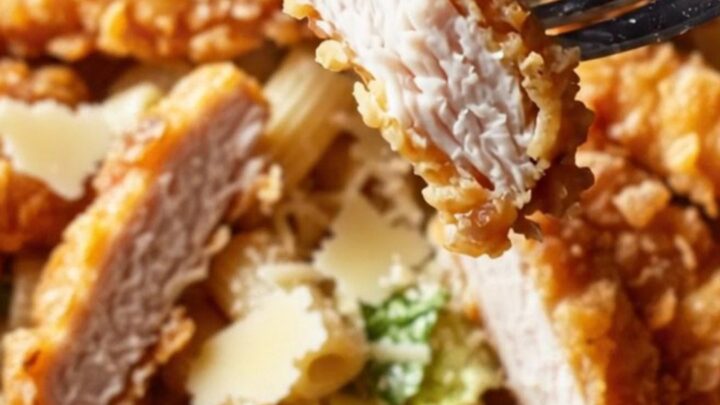
The chicken should be golden brown and crisp, with an internal temperature of 165°F (74°C). The crust should crackle when sliced, and the meat should be juicy and tender.
The oil should be hot enough that the chicken sizzles immediately when added, but not so hot that it browns too quickly.
Assembling the Salad
- Slice the ChickenOnce the chicken has rested, slice it into thick, crunchy strips. The crust should crackle as the knife cuts through. Set the strips aside while assembling the salad.Look for The strips are juicy inside and the crust stays crisp.Tip Slice against the grain for tender pieces.
- Combine Salad BaseIn a large wooden bowl, combine the chilled campanelle pasta, chopped romaine lettuce, and grated Parmesan cheese. Toss gently to distribute the ingredients.Look for The pasta and lettuce are evenly mixed.Tip Chilling the pasta keeps the salad crisp and prevents wilting.
- Add Dressing and TossPour the creamy Caesar dressing and olive oil over the pasta mixture. Toss with salad spoons until every piece is coated and glistening.Look for The salad is evenly dressed without pooling at the bottom.Tip Add the dressing gradually; you may not need all of it.
The pasta and romaine should be evenly mixed, and the dressing should coat every piece without pooling at the bottom. The salad should look glossy but not overdressed. The grated Parmesan should be distributed throughout, adding a salty, nutty flavor.
Final Assembly
- Top with Chicken and GarnishArrange the warm crispy chicken strips over the dressed pasta salad. Shower with shaved Parmesan curls and finish with freshly cracked black pepper.Look for The chicken is warm and the cheese curls are visible.Tip Serve immediately so the chicken stays crisp.
The warm chicken strips should be arranged on top of the dressed salad, with shaved Parmesan curls and cracked black pepper as a finishing touch. The salad should look vibrant and inviting, with the chicken still crisp and the cheese curls visible. Serve immediately for the best texture.
Common mistakes
One common mistake is overcrowding the skillet when frying the chicken, which lowers the oil temperature and results in a soggy crust. Fry in batches if necessary. Another is adding the dressing too early, which can make the salad watery; toss just before serving.
Also, avoid over-tossing the salad after adding the chicken, as the crispy coating may fall off. Finally, using warm pasta can wilt the romaine, so be sure to chill the pasta thoroughly.
How to tell it’s done
The chicken is done when it reaches an internal temperature of 165°F (74°C) in the thickest part, and the crust is deep golden brown. The pasta should be tender but still firm to the bite.
The salad is ready to serve when the ingredients are evenly coated with dressing and the chicken strips are arranged on top. If serving chilled, keep the chicken separate until serving to maintain its crunch.
- Poultry: 165°F (74°C) in the thickest part
- Egg dishes: 160°F (71°C) in the thickest part
Up next · Part 3 of 3
4 variations · storage & make-ahead · 5 answers · printable card
Tips, FAQ & printable recipe (Part 3)← Back to the ingredients (Part 1)