Dinner · Part 2 of 3: Instructions
Crispy Chicken Birria Empanadas with Molten Cheese Step-by-step instructions
- Prep
- Cook
- Total
- Serves
- 8
Before you start
Before anything hits the oil, three components must be ready: the birria chicken fully cooked and shredded, the guajillo consomé made, and the pickled red onions done. Grate the cheese coarse and chill the shreds.
Press or buy eight 6-inch masa discs and stack them between plastic or a damp towel. Set out a heavy Dutch oven, a deep-fry thermometer, a slotted skimmer, a fork and a paper towel-lined sheet pan.
Ingredients at a glance (7)
- 1 1/2 lb smoky chipotle-guajillo shredded chicken thigh (cooked birria chicken, made ahead or store-bought)
- 12 oz Monterey Jack cheese, coarsely shredded
- 8 six-inch masa empanada discs (store-bought or made ahead), kept covered
- 6 cups peanut oil, for frying
- 2 cups guajillo consomé, warmed (made ahead or store-bought)
- 1/2 cup pickled red onions (store-bought or made ahead)
- 1/4 cup fresh cilantro leaves
Instructions
Build the filling
- Warm and season the birria chickenPlace the shredded chipotle-guajillo chicken thigh in a skillet over medium heat with a few spoonfuls of guajillo consomé. Stir often until the meat is steaming hot all the way through, coated in glossy red chile fat and easy to mound by the spoonful. Heat it to at least 165°F (74°C) at the center, then transfer it to a bowl and keep it covered.Look for The chicken glistens with rendered chile fat and steam rises the moment a fork lifts a clump.Safe temperature 165°F (74°C) internal temperature (poultry)Tip A few tablespoons of consomé loosen the meat without making the filling watery enough to soak the masa.
- Grate the cheese coarseGrate the Monterey Jack on the large holes of a box grater, then toss the shreds with a spoon so they do not clump. Coarse shreds melt into long stretches inside the hot empanada instead of disappearing into the chicken, and they stay distinct enough to give every bite a visible, gooey seam of cheese.Look for The shreds fall apart loosely in the bowl rather than packing into a dense ball.Tip Chill the grated cheese until assembly so the shreds handle cleanly and do not smear on the masa.
- Set up the filling stationLine up the warm chicken, the chilled cheese and the covered masa discs in that order. Have a fork ready for crimping and a small bowl of consomé nearby for sealing stubborn edges. Working in an assembly line keeps the filling hot, the discs pliable and the crimping fast, so the first empanada never sits raw while the last one is filled.Look for Every component sits within arm's reach and the discs still feel soft and bendable.Tip Portion the chicken into eight equal mounds before starting so each empanada gets the same filling.
By the end of this phase, the shredded chicken is steaming hot, glossy with chile fat and mounding cleanly off a spoon, and the Monterey Jack sits in loose, chilled coarse shreds that do not clump. Taste a pinch of the chicken: it should be smoky, slightly tangy and well salted on its own, since the masa shell will not season it.
Fill, fold and crimp
- Fill each masa discSpoon about 3 oz of the warm birria chicken in a log shape just below the center of a 6-inch masa disc, leaving a generous half-inch border all around. Top with about 1.5 oz of Monterey Jack. Resist the urge to overfill: a stuffed disc cannot fold flat, and any masa-to-masa seam buried in filling will split during frying.Look for The filling sits in a neat horizontal band with clean masa visible on both sides.Tip Wet fingers wipe any chicken fat off the border so the edges seal against dough, not grease.
- Fold and crimp with a forkFold the disc over into a half-moon, press out any air around the filling, then press the edge flat with a fingertip. Crimp the whole seam firmly with the tines of a fork, dipping the fork in a little consomé if the masa feels dry. A tight, double-checked crimp is what keeps molten cheese inside the shell instead of bubbling into the oil.Look for The crimped edge shows deep, even fork marks with no gaps or thin spots.Tip Set each folded empanada under a damp towel while shaping the rest so the masa stays supple.
- Check every seam twiceHold each empanada over the bowl and look along the curved seam for pinholes, cracks or uncrimped stretches. Press any weak spot flat and run the fork over it again. Weigh it gently in the palm: a well-sealed empanada feels plump but firm, with no filling shifting toward one end. Only flawless shells go anywhere near the hot oil.Look for No cheese or chicken peeks through the crimp, and the edge holds when squeezed lightly.Tip Uncrimped pinholes are the number one cause of cheese leaks, so this minute of checking pays for itself.
Each disc now holds a neat horizontal band of chicken with cheese on top, folded into a plump half-moon with a deep, even fork crimp running the full curve of the seam.
No cheese or chicken peeks through anywhere, the edges hold when the empanada is squeezed gently in the palm, and no filling shifts toward one end. The finished empanadas rest under a damp towel without touching, and every single seam has been checked twice before anything moves toward the stove.
Fry, dip and serve
- Heat the oil to 365°FPour the peanut oil into a heavy Dutch oven to a depth of about 2 inches and clip on a deep-fry thermometer. Heat over medium until it holds a steady 365°F (185°C). Adjust the flame as needed; the oil should shimmer around the thermometer bulb, never smoke, and a crumb dropped in should sizzle instantly and rise.Look for The thermometer reads a steady 365°F and the oil surface shimmers without smoking.Tip Fry no more than three empanadas at once so the temperature does not drop below 350°F.
- Fry until golden and blisteredLower the empanadas into the oil one at a time with a slotted skimmer, away from your body. Fry for about 4 minutes, turning once, until the shells bubble, blister and turn deep golden brown and audibly crisp. The masa should look freckled and puffed, the way a good birria taco shell does straight out of the pot.Look for Deep golden color with blistered bubbles across the surface and a hard, tapping-crisp crust.Tip Keep the oil between 355°F and 365°F; cooler oil turns masa greasy, hotter oil browns it before the cheese melts.
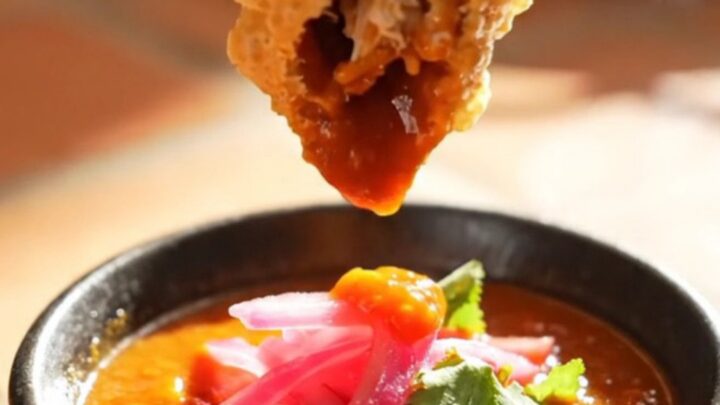
- Drain, dip and serve hotLift the empanadas onto a paper towel-lined sheet pan and let them drain for a minute. Warm the remaining guajillo consomé in a small pot. Halve one empanada while the cheese is still molten, dunk the open half into the steaming consomé, then top with pickled red onions and fresh cilantro leaves. Serve the rest the same way, straight away.Look for The cheese stretches when the empanada is pulled apart and the consomé steams on contact.Tip Cut one empanada in half for the table; the stretchy cheese cross-section is the best part of the dish.
The oil holds a steady 365°F, and the empanadas come out deep golden and blistered after about four minutes, audibly crisp when tapped with the skimmer. They drain briefly on a paper towel-lined pan while the consomé warms to a gentle steam.
Common mistakes
The three most common failures are all preventable. Overfilling is the first: more than about 3 oz of chicken and 1.5 oz of cheese makes the disc impossible to fold flat, and a folded-over lump of filling splits the seam in the oil.
The second is a lazy crimp; a thin or gapped edge is exactly where molten cheese escapes, so check every seam twice and re-crimp weak spots. The third is frying at the wrong temperature.
How to tell it’s done
A finished empanada is deep golden brown with blistered bubbles across its surface, and it taps and crackles like a fried taco shell when lifted with the skimmer.
Inside, the Monterey Jack is completely melted and stretches in long strands when the empanada is pulled apart, and the chicken is steaming hot at the center. The poultry was heated to at least 165°F (74°C) at the start, and four minutes at 365°F keeps the whole filling at temperature through frying.
- Poultry: 165°F (74°C) in the thickest part
Up next · Part 3 of 3
4 variations · storage & make-ahead · 5 answers · printable card
Tips, FAQ & printable recipe (Part 3)← Back to the ingredients (Part 1)