Dinner · Part 2 of 3: Instructions
Crispy Chicken Alfredo Wraps: Golden Pan-Fried Delight Step-by-step instructions
- Prep
- Cook
- Total
- Serves
- 4
Before you start
Before starting, gather all your ingredients and equipment. Dice the chicken breast into small, uniform pieces and chop the yellow onion. Measure out the spices and have the Alfredo sauce and shredded mozzarella ready.
Warm the tortillas slightly in the microwave or in a dry skillet to make them more pliable and easier to roll. Set a large skillet on the stove and have the butter measured and ready for pan-frying. Having everything prepped and within reach makes the cooking process smooth and efficient.
Ingredients at a glance (12)
- 1 lb boneless skinless chicken breast, diced
- 1 tsp garlic powder
- 1 tsp paprika
- 1 tsp Italian seasoning
- 1/2 tsp onion powder
- 1 tbsp lemon juice
- 2 tbsp olive oil, divided
- 1/2 cup diced yellow onion
- 1 cup Alfredo sauce
- 4 large flour tortillas
- 1 1/2 cups shredded mozzarella cheese
- 2 tbsp butter
Instructions
Season and Sear the Chicken
- Season and Sear the ChickenIn a medium bowl, toss the diced chicken with garlic powder, paprika, Italian seasoning, onion powder, lemon juice, and 1 tablespoon of the olive oil until evenly coated. Heat the remaining 1 tablespoon olive oil in a large skillet over medium-high heat. Add the seasoned chicken and diced yellow onion. Cook, stirring occasionally, until the chicken is golden on the edges and cooked through, about 6–8 minutes. The chicken is done when it reaches an internal temperature of 165°F (74°C).Look for The chicken should be golden brown on the edges and the onions translucent.Safe temperature 165°F (74°C) internal temperature (poultry)Tip Cut the chicken into even pieces so they cook uniformly.
- Add the Alfredo SauceReduce the heat to low. Pour the Alfredo sauce over the cooked chicken and onions, stirring to combine. Let the sauce warm through and bubble gently for 1–2 minutes, allowing the flavors to meld. The sauce should coat the chicken nicely without being too thin.Look for The sauce should be warm and slightly thickened, coating the chicken.Tip If the sauce seems too thick, add a splash of milk or chicken broth.
The chicken should be golden brown on the edges and the onions translucent. The spices will be fragrant and the chicken will look juicy and well-coated. The mixture should be sizzling gently in the pan, and the chicken should be cooked through to 165°F (74°C) before moving on to the next phase.
Assemble and Pan-Fry the Wraps
- Assemble the WrapsLay the large flour tortillas on a clean work surface. Divide the chicken Alfredo mixture evenly among the tortillas, placing it in the center. Top each with shredded mozzarella cheese. Fold in the sides of each tortilla and roll tightly into a burrito shape, ensuring the filling is enclosed.Look for The wraps should be firm and tightly rolled, with no filling leaking.Tip Warm the tortillas briefly in the microwave to make them more pliable.
- Pan-Fry the WrapsMelt the butter in a large skillet over medium heat. Place the wraps seam-side down in the skillet, working in batches if needed. Cook for 2–3 minutes per side, until golden brown and crispy. Use a spatula to gently press down on the wraps so they brown evenly. The cheese inside should be melted and the exterior crisp.Look for The wraps should be golden brown and crispy on both sides.Tip Do not overcrowd the skillet; cook in batches to keep the crust crisp.
The tortillas should be tightly rolled with no filling spilling out. The wraps should be golden brown and crispy on both sides, with the cheese melted and the exterior visibly crisp. The butter should be sizzling as the wraps cook, and the kitchen will smell rich and buttery.
Slice and Serve
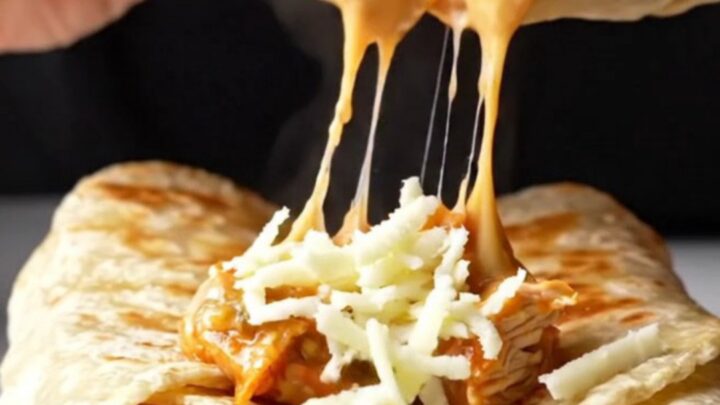
- Slice and ServeTransfer the crispy wraps to a cutting board and let them rest for 1–2 minutes. Slice each wrap in half diagonally to reveal the cheesy, creamy filling. Serve warm, with extra Alfredo sauce for dipping if desired.Look for The cheese should be melted and stretchy when the wrap is sliced.Tip Use a serrated knife to slice cleanly without squishing the filling.
The wraps should be sliced cleanly in half, revealing the creamy, cheesy filling. The cheese should be melted and stretchy, and the filling should be steaming hot. The exterior should stay crispy even after slicing, offering a satisfying crunch with every bite.
Common mistakes
One common mistake is overfilling the tortillas, which makes them difficult to roll and can cause them to burst during cooking. Stick to about 1/2 cup of filling per wrap, depending on the size of your tortillas.
Another pitfall is cooking the wraps over too high heat, which burns the outside before the inside is heated through. Use medium heat and give the wraps enough time to brown evenly.
Finally, avoid cutting the wraps immediately after cooking—letting them rest for a minute prevents the filling from oozing out.
How to tell it’s done
The chicken is fully cooked when it reaches an internal temperature of 165°F (74°C) and is no longer pink in the center. The wraps are done when they are golden brown and crispy on both sides, with the cheese melted and bubbling inside.
When you slice a wrap in half, the cheese should stretch and the filling should be hot and steamy. If you're unsure, let the wraps rest for a minute after pan-frying—this helps the cheese set slightly and makes slicing easier.
- Poultry: 165°F (74°C) in the thickest part
Up next · Part 3 of 3
4 variations · storage & make-ahead · 5 answers · printable card
Tips, FAQ & printable recipe (Part 3)← Back to the ingredients (Part 1)