Dinner · Part 2 of 3: Instructions
Crispy Cheesy Hasselback Potatoes for a Perfect Side Dish Step-by-step instructions
- Prep
- Cook
- Total
- Serves
- 4
Before you start
Before beginning, ensure the oven is fully preheated to the correct temperature. Wash and scrub the potatoes thoroughly, as the skins will be eaten. Have all ingredients measured out and the cheese shredded.
A clean, sturdy cutting board is essential for making the precise, consistent slices required for the hasselback technique. Clear enough space on the baking tray so the potatoes do not touch, allowing for better air circulation and crispier skins.
Ingredients at a glance (3)
- 4 large russet potatoes, scrubbed and dried
- 1 cup shredded mozzarella cheese
- 1 tbsp fresh chopped herbs (parsley or chives)
Instructions
Preparation and Slicing
- Slice the potatoesPreheat the oven to 425°F (220°C). Place each potato on a cutting board and make thin, vertical slices along the length of the potato, being careful not to cut all the way through the bottom. Keeping the base intact ensures the potato stays together while baking.Look for The slices should be thin and consistent throughout the potato.Tip Place the potato between two wooden spoons or chopsticks to act as a guide so the knife does not cut completely through.
The potatoes are sliced consistently and are ready for the oven. Each potato is intact at the base, and the slices are thin enough to allow for maximum crisping.
The oven has reached 425°F (220°C), providing a stable environment for the initial roasting phase that will set the foundation for the final crispy texture.
Initial Roasting
- Roast the potatoesArrange the potatoes on a baking tray. Place in the oven and roast for about 40 to 45 minutes, or until the edges are golden and the centers are tender when pierced with a fork.Look for The potatoes should be golden brown and crispy on the edges.Tip If the potatoes are not browning enough, increase the heat for the final five minutes of roasting.
The potatoes have developed a beautiful golden exterior and are tender on the inside. The skin is crispy, and the fragrance of roasted potatoes fills the kitchen. The potatoes are ready to receive the cheese topping that will complete the dish before the final melt.
Cheesy Finishing
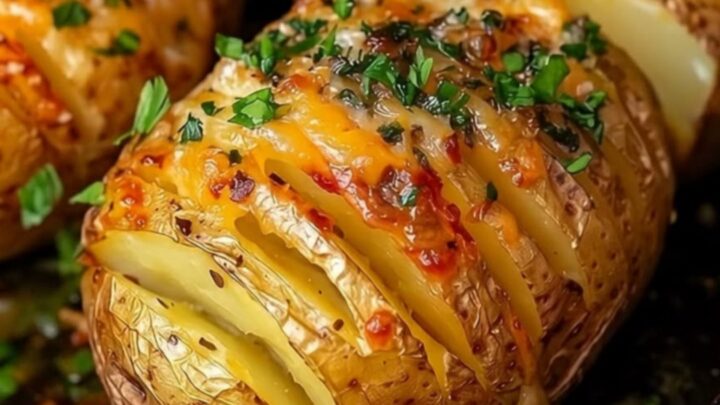
- Add cheese and finishRemove the baking tray from the oven. Carefully tuck the shredded mozzarella cheese into the slices of each potato. Return to the oven for 5 minutes, or until the cheese is melted and bubbling. Sprinkle with fresh herbs before serving immediately.Look for The cheese should be completely melted and stringy with a slight golden hue.Tip Use a small spoon to help push the cheese deep into the slits for maximum coverage.
The cheese is melted, bubbling, and perfectly integrated into the potato slices. The fresh herbs add a vibrant pop of color and aroma. The potatoes are ready to be removed from the oven and allowed to rest briefly, ensuring the cheese sets slightly for that perfect, pull-apart texture when served on the plate.
Common mistakes
A common mistake is slicing through the entire potato, which causes it to fall apart during roasting. Always use a guide for your knife. Another error is failing to ensure the potatoes are dry before roasting, which can lead to steaming instead of crisping.
Finally, adding the cheese too early in the cooking process can result in burnt dairy; wait until the potatoes are nearly tender before adding the cheese to ensure it melts without scorching.
How to tell it’s done
The potatoes are finished when they reach a tender consistency throughout. The skin should be deeply golden and slightly firm to the touch, while a fork should slide into the center of the potato with little to no resistance.
The cheese should be fully melted, bubbling, and slightly browned on the edges. Ensure the potatoes have reached an internal texture that is soft and creamy, which typically happens after the full roasting time is complete.
Up next · Part 3 of 3
2 variations · storage & make-ahead · 3 answers · printable card
Tips, FAQ & printable recipe (Part 3)← Back to the ingredients (Part 1)