Dinner · Part 2 of 3: Instructions
Crispy Cheesy Chicken Crescent Rolls Step-by-step instructions
- Prep
- Cook
- Total
- Serves
- 8
Before you start
Before you begin, ensure that your shredded chicken is fully cooked and cooled slightly if it was prepared recently. Preheat your oven to 375°F (190°C) so it is ready for the dough.
Prepare a baking sheet with parchment paper to prevent sticking. Gather all your ingredients and ensure your workspace is clean and clutter-free for efficient assembly of the rolls.
Ingredients at a glance (5)
- 1 can refrigerated crescent roll dough, store-bought or made ahead
- 2 cups cooked shredded chicken
- 1 cup shredded mozzarella cheese
- 2 tbsp melted unsalted butter
- 1 tsp dried herbs
Instructions
Filling preparation
- Prepare the fillingIn a medium mixing bowl, combine the cooked shredded chicken and shredded mozzarella cheese. Mix the ingredients until they are evenly distributed. Ensure the chicken is shredded into small pieces to make rolling easier.Look for The mixture should be cohesive and well combined.Tip Adding a pinch of black pepper or garlic powder to the filling can enhance the savory flavor profile.
At the end of this phase, you should have a uniform mixture of chicken and cheese. The texture should be consistent, ensuring each roll gets an equal amount of filling. If the mixture feels too dry, you can add a tablespoon of cream or a bit of melted butter to help bind the ingredients together before filling the dough triangles.
Roll assembly
- Assemble the rollsPreheat your oven to 375°F (190°C). Unroll the crescent roll dough and separate it into triangles. Place a spoonful of the chicken and cheese mixture onto the wide end of each triangle. Roll the dough up tightly starting from the wide base toward the point, tucking in the edges to ensure the filling stays inside.Look for The rolls should be tightly sealed to prevent cheese leakage.Tip Lightly pinch the side seams of the dough as you roll to keep the filling secure.
By the end of this phase, all eight crescent rolls should be securely rolled and placed on your prepared baking sheet.
Check that the points of the triangles are tucked underneath to prevent them from burning or unrolling during the bake. The rolls should look neat and uniform, ready for the final touch of the herb butter before they go into the oven.
Baking and finishing
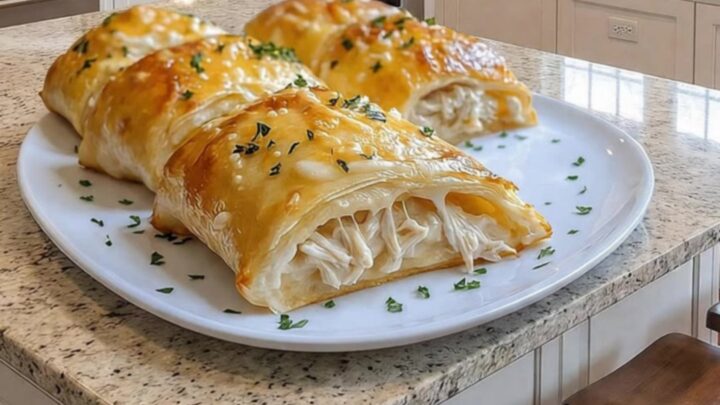
- Bake to perfectionPlace the rolls on a parchment-lined baking sheet. Mix the melted butter with the dried herbs and brush the tops of the rolls generously. Bake for 12 to 15 minutes or until golden brown. Ensure the internal temperature of the chicken reaches 165°F (74°C). Allow to rest for 5 minutes before serving.Look for The crust should be a deep golden brown and the cheese should be bubbling.Safe temperature 165°F (74°C) internal temperature (poultry)Tip Serve warm for the best stretchy cheese experience.
When finished, the rolls should be a beautiful, deep golden color and smell fragrant from the herbs. They should be firm to the touch but yield to a light press.
Let them sit for a few minutes on the pan to allow the cheese to set slightly, which makes them easier to handle and ensures the best texture when you take that first bite.
Common mistakes
A common mistake is overstuffing the crescent rolls, which can lead to the filling leaking out during the baking process. Start with a modest amount of chicken and cheese to ensure you can seal the edges properly.
Another error is failing to preheat the oven; the dough needs the initial blast of heat to rise correctly and achieve that signature flaky, crisp exterior texture.
How to tell it’s done
The crescent rolls are done when the pastry is puffed and golden brown on all sides. The cheese should be fully melted and slightly oozing from the edges. Using a food thermometer, check the center of the rolls to ensure the chicken filling has reached an internal temperature of 165°F (74°C), confirming it is safe and ready to eat.
- Poultry: 165°F (74°C) in the thickest part
Up next · Part 3 of 3
2 variations · storage & make-ahead · 3 answers · printable card
Tips, FAQ & printable recipe (Part 3)← Back to the ingredients (Part 1)