Dinner · Part 2 of 3: Instructions
Crispy Cheese Lace Dill Pickle Ranch Chicken Tacos Step-by-step instructions
- Prep
- Cook
- Total
- Serves
- 4
Before you start
Before beginning, ensure all ingredients are prepped and ready to go. Dice the pickles into small, uniform pieces to ensure they distribute evenly throughout the chicken mixture.
Shred the lettuce and keep it chilled until the final assembly to maintain its crunch. Have the ranch dressing and fresh dill measured and ready to whisk together, as the cooking process for the cheese shells moves quickly once the pan is hot.
Ingredients at a glance (6)
- 2 cups shredded cheddar cheese
- 1 lb ground chicken
- 1/2 cup diced pickles
- 1/2 cup ranch dressing
- 1 tbsp fresh chopped dill
- 1 cup shredded lettuce
Instructions
Cooking the chicken filling
- Prepare the sauce and fillingIn a small bowl, whisk together the ranch dressing and fresh chopped dill until well combined. In a separate pan over medium-high heat, cook the ground chicken until fully browned and cooked through, reaching an internal temperature of 165°F (74°C). Stir in the diced pickles and remove from heat.Look for Chicken is fully browned and no longer pink.Safe temperature 165°F (74°C) internal temperature (poultry)Tip Ensure the chicken is finely crumbled while cooking for better taco texture.
The chicken should be fragrant, fully browned, and well-mixed with the diced pickles. The mixture should be hot and cohesive, with the pickles providing a noticeable tangy scent. Check the internal temperature to ensure it reaches 165°F (74°C) before proceeding to the cheese shell preparation.
Creating the cheese shells
- Create the cheese shellsPlace small mounds of shredded cheddar cheese into a hot non-stick skillet. Let the cheese melt and bubble until the edges become golden brown and crispy, forming a lacy edge. Carefully flip the cheese crisps and cook for another minute until firm, then remove from the pan.Look for Cheese is bubbling and edges are lacy and golden brown.Tip Do not rush the melting process; the cheese needs time to crisp up properly.
The cheese should be bubbling across the entire surface in the pan, with the edges turning a distinct golden brown. The cheese should sound like it is frying rather than just melting. Once the edges are firm and crispy, the shell is ready to be flipped and then folded into its final taco shape.
Assembling the tacos
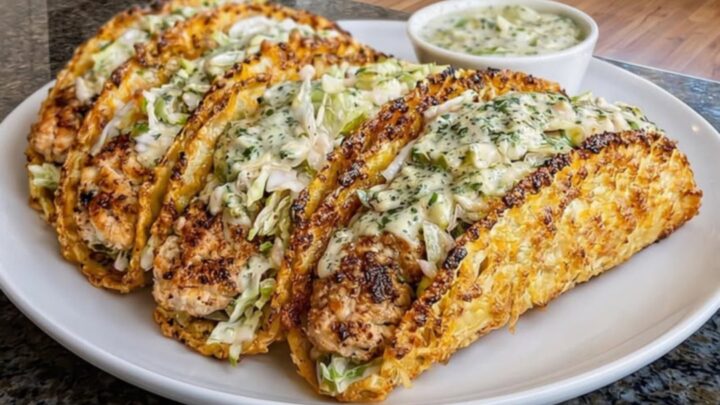
- Assemble the tacosGently fold the warm cheese crisps into a taco shape while they are still pliable. Fill each shell with the cooked chicken and pickle mixture. Top with fresh shredded lettuce and drizzle generously with the prepared dill pickle ranch sauce. Serve immediately while the shells remain crunchy.Look for Tacos are assembled and ready to serve.Tip Shape the cheese shells quickly before they cool and harden too much.
The final tacos should look visually appealing, with the golden, crispy cheese shell clearly visible holding the chicken.
The lettuce should add a pop of color, and the dill pickle ranch should be drizzled evenly over the top. The tacos should be served immediately to ensure the cheese shell maintains its signature crunch.
Common mistakes
A common mistake is using a pan that is not truly non-stick, which will cause the cheese to tear when flipping. Another error is removing the cheese from the pan too early; it must be allowed to cool slightly after being shaped to fully set and become crispy.
Avoid overcrowding the pan with too many cheese mounds at once, as this makes it difficult to flip and fold each shell accurately.
How to tell it’s done
The ground chicken is done when it is fully browned and reaches an internal temperature of 165°F (74°C). For the cheese shells, doneness is visual: look for a deep golden-brown color and a lacy, crisp texture across the entire surface.
If the shells are still pale or soft, they require a few more seconds in the pan to achieve the desired rigidity.
- Poultry: 165°F (74°C) in the thickest part
Up next · Part 3 of 3
2 variations · storage & make-ahead · 3 answers · printable card
Tips, FAQ & printable recipe (Part 3)← Back to the ingredients (Part 1)