Desserts · Part 2 of 3: Instructions
Crispy Braided Puff Pastry Chocolate Pastries Step-by-step instructions
- Prep
- Cook
- Total
- Serves
- 8
Before you start
Before you start, make sure the puff pastry is thawed but still cold. If it’s frozen, transfer it to the refrigerator the night before or let it sit at room temperature for 20–30 minutes, checking frequently. Preheat the oven to 400°F (200°C) and line a baking sheet with parchment paper.
Have your pizza wheel or knife ready, and measure out the chocolate spread so it’s at room temperature for easy spreading. Clear a clean, lightly floured work surface. The entire process is quick, so having everything prepped helps you work efficiently, keeping the pastry cold and the braid neat.
Ingredients at a glance (3)
- 1 sheet puff pastry, thawed
- 1/2 cup hazelnut chocolate spread
- 1 tbsp powdered sugar, for dusting
Instructions
Assemble the Braid
- Prepare the PastryPreheat the oven to 400°F (200°C). Line a baking sheet with parchment paper. Gently unfold the thawed puff pastry sheet on a lightly floured surface. Using a rolling pin, lightly roll it to smooth out any creases, keeping it in a rectangle shape.Look for Pastry is smooth and pliable, about 1/4 inch thick.Tip Keep the pastry chilled if it becomes too soft to handle.
- Add the FillingSpread the hazelnut chocolate spread evenly down the center of the pastry in a strip about 2 inches wide, leaving the top and bottom edges clean. Ensure the spread is not too thick; about 1/4 inch is ideal.Look for A neat central strip of chocolate, with pastry visible on both sides.Tip If the spread is too stiff, warm it slightly for easier spreading.
- Cut the StripsUsing a pizza wheel or sharp knife, cut diagonal strips along both sides of the filling, about 1 inch apart. Cut from the edge of the pastry toward the filling, but stop before reaching the chocolate so the strips remain attached.Look for Even, evenly spaced diagonal strips on both sides.Tip Use a ruler for perfectly even strips if desired.
By the end of this phase, you should have a neat braided pastry on a parchment-lined baking sheet, with the chocolate filling completely enclosed. The pastry should still feel cold to the touch, and the strips should be evenly spaced, creating a woven pattern.
If any chocolate is peeking out, tuck it back in. The braid should be about 2 inches wide and 12 inches long, with sealed ends. This is the moment to make any adjustments before baking.
Bake Until Golden
- Braid the PastryStarting at one end, fold the top edge of the pastry over the filling. Then, alternately cross the left and right strips over the filling, slightly overlapping them to create a braid. Tuck the ends underneath to seal.Look for A neat braid pattern with the chocolate hidden inside.Tip Work quickly to keep the pastry cold; if it warms up, chill for 10 minutes before baking.
- Transfer to Baking SheetCarefully transfer the braided pastry onto the prepared baking sheet. Gently press the ends to seal. If desired, brush the top with a little beaten egg (not included) for shine, but this is optional.Look for Pastry holds its shape on the sheet.Tip Use a large spatula to move the pastry without disturbing the braid.
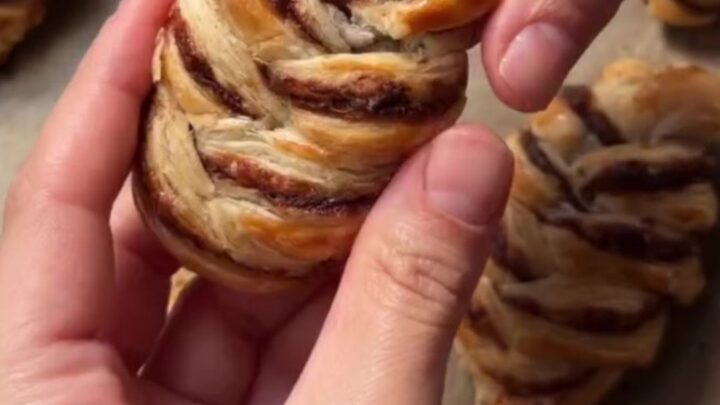
After baking, the pastry should be puffed to nearly double its original height, with a deep golden-brown color. The braided strips will have separated and crisped, and you may see tiny bubbles on the surface. The kitchen will smell of butter and chocolate. Tap the top—it should sound hollow. If it’s not deeply golden yet, bake for another 2–3 minutes, watching closely to prevent burning.
Finish and Serve
- Bake the PastryPlace the baking sheet in the preheated oven and bake for 18 minutes, until the pastry is puffed, deeply golden, and shatteringly crisp. Rotate the sheet halfway through if needed for even browning.Look for Pastry is golden brown, puffed, and the layers are visibly crisp.Tip Check at 15 minutes; ovens vary, and you want a deep golden color, not burnt.
- Cool and DustRemove from the oven and let cool on the baking sheet for 5 minutes. Dust generously with powdered sugar while still warm, so it melts slightly into the crevices.Look for The sugar creates a snowy, appetizing finish.Tip For a cleaner look, dust after cooling completely.
- Serve WarmServe the pastry warm or at room temperature. For the full experience, break it open to reveal the melted chocolate oozing out. Enjoy immediately, as the crispness is best fresh.Look for Molten chocolate flows from the flaky layers.Tip If reheating, warm in a 350°F oven for 5 minutes to restore crispness.
Once baked, the pastry is dusted with powdered sugar and ready to serve. The sugar creates a snowy contrast against the golden crust. When you break it open, the chocolate should be molten and flowing, with visible flaky layers. The texture should be shatteringly crisp, yet tender inside. Serve immediately for the best experience, as the crispness fades as it cools.
Common mistakes
One common mistake is overworking the pastry, which compresses the layers and makes it tough. Handle it as little as possible and use a light touch when rolling. Another issue is letting the pastry warm up too much before baking, which causes the butter to melt prematurely and the pastry to shrink or become greasy.
If the pastry feels soft, chill it for 10 minutes before baking. Also, be careful not to overfill with chocolate spread—too much filling can leak out and burn. Use a moderate amount and keep it centered.
How to tell it’s done
The pastry is done when it is puffed, deeply golden brown, and feels crisp when tapped. The braided strips should be separate and shatteringly crisp, not soft or doughy. If you break one open, the chocolate should be molten and oozing, but not scorching.
The internal temperature of the pastry itself isn’t a reliable test, so rely on visual cues: a uniform golden color across the surface and the visible flaky layers. Let it cool for 5 minutes before serving to allow the chocolate to set slightly, preventing burns while still remaining gooey.
Up next · Part 3 of 3
4 variations · storage & make-ahead · 5 answers · printable card
Tips, FAQ & printable recipe (Part 3)← Back to the ingredients (Part 1)