Appetizers · Part 1 of 3: Ingredients
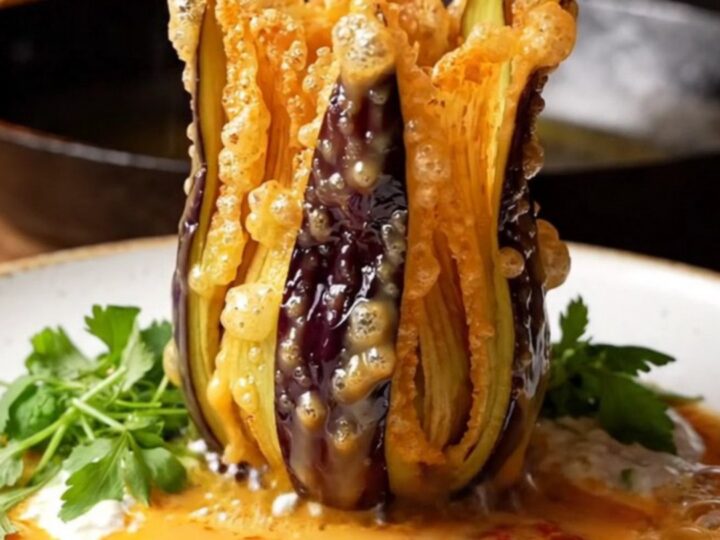
Crispy Blooming Eggplant Fan with Garlic Yogurt
- Prep
- Cook
- Total
- Serves
- 4
This crispy blooming eggplant fan is the kind of dish that stops a scroll mid-thumb. Golden, shatteringly crisp petals fan out from a single stem, then get draped in cool, garlicky yogurt and a sizzling butter sauce that hisses as it hits.
The first bite is pure theatre: a loud crunch followed by creamy, tangy, and gently spicy layers. It's an appetizer that feels like a special occasion but comes together in under an hour.
The blooming eggplant fan, or yelpaze patlıcan kızartması, is a Turkish classic that turns a humble vegetable into a showpiece. Thin slices are fanned like a peacock's tail, coated in a light seasoned crust, and fried until every petal is golden and crisp.
The magic happens at the table: cold garlic yogurt and a sizzling pepper-tomato butter are poured over the hot eggplant, creating a dramatic contrast of temperatures and textures. This recipe delivers that same visual and flavor impact at home, with straightforward steps and everyday ingredients.
Ingredients
- 4 slender purple eggplants
- 1 tbsp kosher salt, for the soaking water
- 1/2 cup all-purpose flour
- 1 tsp paprika, for the flour dusting
- 2 large eggs
- 1 tbsp cornstarch
- 1/2 tsp paprika, for the egg wash
- 2 cups vegetable oil, for frying
For the garlic yogurt
- 1 cup plain Greek yogurt
- 2 cloves garlic, minced
- 1/4 tsp kosher salt
For the pepper butter
- 3 tbsp unsalted butter
- 1 tbsp tomato paste
- 1 tsp red pepper flakes
Why this recipe works
The fan shape does more than look stunning — it maximizes surface area. Each thin slice crisps independently, so every bite is crunchy, not just the outer edge.
The stem keeps the slices attached, making the eggplant easy to hold and dip. Soaking in salted water first draws out any bitterness and helps the slices stay firm during frying, so they don't turn mushy.
The double coating is the secret to the crust. A dusting of seasoned flour gives the egg wash something to cling to, and the cornstarch in the egg wash crisps up into a delicate, shattering shell.
The hot oil quickly sets the coating, locking in moisture while the petals turn golden. The result is a crust that's sturdy enough to hold the toppings but light enough to shatter with each bite.
Notes and substitutions
Choose slender, firm eggplants with shiny skin and no blemishes. The slender shape makes it easier to slice into even petals and ensures they cook through quickly. Kosher salt is best for the soaking water; it dissolves easily and seasons the eggplant without making it salty. If using table salt, reduce the amount slightly.
Greek yogurt is ideal for the garlic sauce because it's thick and tangy, and it won't water down the dish. For the frying oil, choose a neutral oil with a high smoke point like vegetable, canola, or peanut. The pepper butter needs just three ingredients, but the quality matters: use a good tomato paste and fresh red pepper flakes for the brightest flavor.
- Greek yogurt: Plain whole-milk yogurt or labneh, if a thicker dip is preferred.
- vegetable oil: Canola, sunflower, or peanut oil, all with high smoke points.
- paprika: Smoked paprika for a deeper, smokier flavor.
- red pepper flakes: Aleppo pepper or a pinch of cayenne for extra heat.
Equipment
- sharp chef's knife
- cutting board
- large bowl
- paper towels
- wide skillet
- tongs
- small saucepan
- mixing bowl
Up next · Part 2 of 3
8 steps · 15 min of cooking · what to look for at each stage
Step-by-step instructions (Part 2)