Desserts · Part 2 of 3: Instructions
Crispy Biscoff Dubai Chocolate Bars You Can Make at Home Step-by-step instructions
- Prep
- Cook
- Total
- Serves
- 4
Before you start
Before starting, make sure the silicone bar mold is clean and dry. Chop the dark chocolate into small, uniform pieces so they melt evenly. Measure out the shredded phyllo dough and have it ready — it can be used straight from the freezer or thawed according to the package directions.
Set up a small skillet and a heatproof bowl for melting the chocolate. If using a thermometer, have it ready to check the chocolate temperature. The filling comes together quickly, so having all ingredients within reach makes the process smooth.
Ingredients at a glance (5)
- 12 oz dark chocolate, finely chopped
- 1 1/2 cups shredded phyllo dough (kataifi)
- 3 tbsp unsalted butter
- 1 cup Biscoff cookie butter (speculoos spread)
- 1/4 tsp sea salt
Instructions
Crisp and Mix
- Crisp the KataifiMelt the butter in a medium skillet over medium heat. Add the shredded phyllo dough and cook, stirring constantly, until golden brown and crispy, about 5 to 7 minutes. Remove from heat and let cool slightly.Look for The kataifi turns deep golden brown and feels dry and crisp to the touch.Tip Keep stirring to prevent burning; the shreds brown quickly once they start to color.
- Mix the Biscoff FillingIn a medium bowl, combine the warm crispy kataifi with the Biscoff cookie butter and sea salt. Fold gently until every strand is coated. The mixture should be thick and scoopable.Look for The filling clumps together when pressed but still has visible crispy strands.Tip If the mixture seems too dry, add a spoonful more cookie butter to bind it.
At the end of this phase, the kitchen smells of toasted butter and caramel. The kataifi is a deep golden brown, with a dry, crisp texture that crackles when pressed.
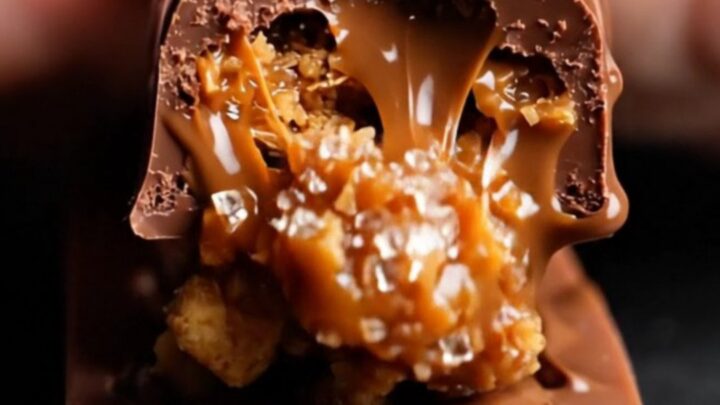
The Biscoff filling is thick, glossy, and studded with crispy strands. It should hold together when squeezed but still have visible texture. This is the base for the bars — it should be fragrant, buttery, and full of crunch.
Coat and Fill
- Temper the ChocolatePlace the chopped dark chocolate in a heatproof bowl. Melt two-thirds of it over a saucepan of barely simmering water, stirring until smooth. Remove from heat, add the remaining chocolate, and stir until melted and glossy. Check the temperature: it should be about 90°F (32°C).Look for The chocolate is smooth, shiny, and registers 90°F (32°C) on a thermometer.Tip Do not let water touch the chocolate; even a drop can cause it to seize.
- Coat the MoldsSpoon a generous amount of melted chocolate into each cavity of the silicone bar mold. Tilt and rotate the mold to coat all sides evenly, then tap out the excess chocolate. Place the mold on a baking sheet and set aside.Look for The chocolate forms a thin, even shell about 1/8 inch thick on all surfaces.Tip Work quickly; if the chocolate cools too much, re-warm it gently to 90°F (32°C).
- Fill and SealPress the Biscoff-kataifi mixture into the chocolate shells, leaving a small gap at the top. Spoon the remaining melted chocolate over the filling, spreading it to the edges to seal completely. Smooth the tops with a spatula.Look for The filling is completely covered by a thin layer of chocolate with no gaps.Tip Tap the mold gently on the counter to release any air bubbles.
The chocolate shells are thin, even, and glossy, coating every surface of the mold. The filling is pressed in firmly, leaving a small rim of chocolate at the top. The seal is smooth and complete, with no gaps or air bubbles. The bars look neat and professional, ready for the freezer. The chocolate should be fluid enough to coat but not so thin that it runs off the spatula.
Chill and Unmold
- Chill Until SetTransfer the mold to the freezer and chill for 15 minutes, or until the chocolate is completely firm. The bars should release easily from the silicone mold when ready.Look for The chocolate is firm to the touch and the bars lift out cleanly without bending.Tip Freezing for 15 minutes gives a clean snap; longer is fine but not necessary.
- Unmold and ServeRemove the mold from the freezer and gently press the bottom of each cavity to release the bar. Serve immediately, or store in the refrigerator until ready to eat. The bars will soften slightly at room temperature.Look for The bars release cleanly with a shiny, smooth chocolate surface.Tip If they stick, let them sit at room temperature for 2 minutes before unmolding.
After 15 minutes in the freezer, the bars are firm to the touch. When you press the bottom of the mold, each bar releases with a clean pop. The chocolate is hard, shiny, and snaps when broken. The filling is set but still slightly yielding, with a crisp crunch when bitten. The bars are ready to serve immediately, with a perfect balance of cold, crisp chocolate and warm, spiced filling.
Common mistakes
One common mistake is overheating the chocolate, which can cause it to seize and become grainy. Always melt gently over low heat, and never let water come into contact with the chocolate. Another issue is overfilling the molds — leave a small gap so the chocolate seal covers the filling completely; otherwise, the filling may leak out.
If the kataifi isn’t toasted enough, it will be chewy rather than crispy, so cook it until it’s deep golden brown and dry. Finally, don’t skip the freezer step; it’s essential for a clean release and a satisfying snap.
How to tell it’s done
The bars are done when the chocolate is completely firm to the touch and the bars release easily from the mold. After 15 minutes in the freezer, the chocolate should be hard and glossy, with no soft spots.
When you bite into a bar, it should crack loudly, and the filling should be cohesive but not hard — it should have a slight chew from the cookie butter and a crisp crunch from the kataifi. If the bars seem too soft, return them to the freezer for another 5 minutes. If they are too hard, let them sit at room temperature for a minute or two before serving.
Up next · Part 3 of 3
4 variations · storage & make-ahead · 5 answers · printable card
Tips, FAQ & printable recipe (Part 3)← Back to the ingredients (Part 1)