Appetizers · Part 2 of 3: Instructions
Crispy Baked Ham and Cheese Sticks Step-by-step instructions
- Prep
- Cook
- Total
- Serves
- 4
Before you start
Before you begin assembling the sticks, organize your workstation to make the process smooth and efficient. Set up a small bowl of water nearby to seal the wrappers and to help the herbs adhere, and line your baking sheet with parchment paper.
Lay out your ham slices, cheese sticks, egg roll wrappers, and Italian seasoning so everything is within arm's reach.
Ingredients at a glance (4)
- 8 egg roll wrappers
- 8 slices deli ham
- 8 mozzarella cheese sticks
- 1 tbsp Italian seasoning
Instructions
Wrapping and Assembly
- Preheat the ovenPreheat the oven to 400°F (200°C). Line a large baking sheet with parchment paper to prevent the cheese sticks from sticking and to ensure easy cleanup after baking.Look for The oven is fully preheated.Tip Using parchment paper is highly recommended as any escaped cheese will release easily without tearing the crispy wrappers.
- Wrap the cheese in hamLay one slice of deli ham flat on a clean work surface. Place one mozzarella cheese stick at one end of the ham slice, then roll the ham tightly around the cheese stick. Repeat this process for all eight cheese sticks and ham slices.Look for The cheese sticks are fully encased in the ham.Tip Wrapping the cheese in ham first creates a barrier that helps prevent the cheese from leaking out of the wrapper during baking.
- Wrap in egg roll wrappersPlace one egg roll wrapper on the work surface with a corner pointing toward you, forming a diamond shape. Position a ham-wrapped cheese stick horizontally in the center. Fold the bottom corner up over the filling, fold the left and right side corners tightly inward, and roll upward toward the top corner. Lightly moisten the top corner with water to seal the edge securely.Look for The rolls are wrapped tightly with no visible gaps.Tip Ensure the sides are tucked in snugly so the cheese stays contained as it melts in the oven.
By the end of this phase, all eight ham and cheese sticks should be tightly wrapped in their egg roll skins with the edges securely sealed.
The rolls should feel firm and compact, with no visible gaps or loose corners where cheese could escape during baking. They should be arranged seam-side down on the parchment-lined baking sheet, ready for the herbs.
Baking and Crisping
- Brush with herbsArrange the wrapped sticks seam-side down on the prepared baking sheet. Lightly brush the rolls with water, then press the Italian seasoning onto the surface so the herbs adhere well before baking.Look for The rolls are evenly coated with the herbs.Tip Using a pastry brush with a little water helps the dried herbs stick to the wrappers without needing extra fat.
- Bake the sticksPlace the baking sheet in the preheated oven and bake for 12 to 15 minutes. Halfway through the baking time, rotate the baking sheet to ensure all sides get golden and crispy.Look for The wrappers are deep golden brown and crispy.Tip Keep a close eye on them during the last few minutes of baking to prevent the cheese from bursting out.
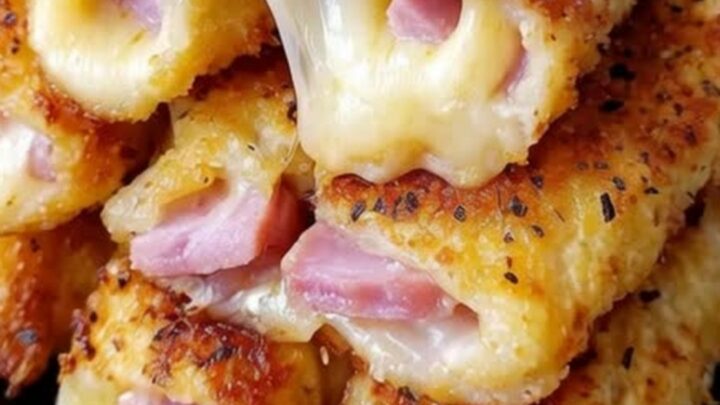
At the end of the baking phase, the rolls should be deep golden brown, with a bubbly, blistered exterior that crackles when lightly touched. You may see a tiny amount of cheese beginning to ooze slightly from the ends, which is a perfect indicator that the interior is completely melted and hot. The aroma of toasted herbs should fill the kitchen.
Cooling and Serving
- Cool slightly and serveRemove the baking sheet from the oven. Let the hot ham and cheese sticks rest on the baking sheet for 3 to 5 minutes before serving. This short cooling period allows the melted cheese to set slightly, making them easier to handle and preventing burns.Look for The rolls are cool enough to handle but still hot and melty inside.Tip Serve these warm with a side of marinara sauce or ranch dressing for dipping.
After resting for a few minutes, the rolls will be cool enough to touch safely, and the outer shell will have hardened to its peak crispness. The cheese inside will remain wonderfully hot and stretchy, ready to deliver a dramatic cheese pull when the sticks are broken in half.
Common mistakes
The most common mistake is wrapping the rolls too loosely or failing to seal the edges with water. Loose wrappers allow steam to build up inside, causing the cheese to burst out and leave you with empty, hollow shells.
Another mistake is skipping the parchment paper, which can cause any escaped cheese to glue the rolls to the baking sheet, tearing the crispy wrappers when you try to lift them.
How to tell it’s done
You will know these sticks are perfectly done when the wrappers turn a beautiful, even golden-brown color and develop a bubbly, blistered texture. They should feel hard and dry to the touch, not soft or doughy.
A tiny bubble of melted cheese starting to peek out of the edges is the ultimate sign that the cheese inside is completely melted and ready to eat.
Up next · Part 3 of 3
2 variations · storage & make-ahead · 3 answers · printable card
Tips, FAQ & printable recipe (Part 3)← Back to the ingredients (Part 1)