Appetizers · Part 2 of 3: Instructions
Crispy Baked Ham and Cheese Mozzarella Sticks Step-by-step instructions
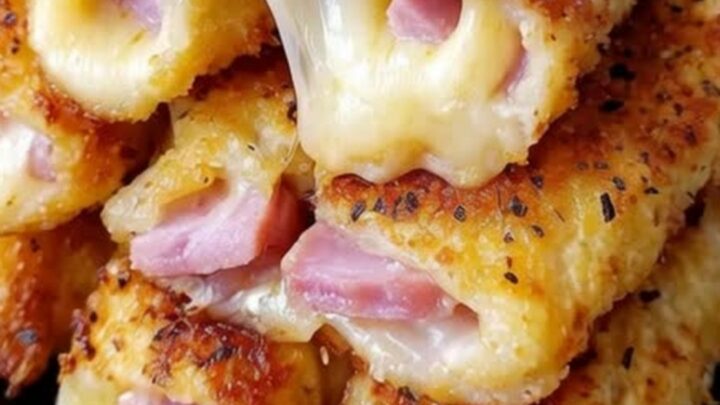
- Prep
- Cook
- Total
- Serves
- 6
Before you start
Before beginning the assembly, preheat the oven to 400°F (204°C) and line a large baking sheet with parchment paper or a silicone baking mat to prevent sticking. Clear a spacious, dry work area on the counter and set out the ingredients.
Place a small bowl of room temperature water nearby for sealing the wrappers, and cover the stack of eggroll wrappers with a damp paper towel to keep them from drying out.
Ingredients at a glance (5)
- 12 eggroll wrappers
- 12 slices deli ham
- 12 sticks mozzarella cheese sticks
- 2 tbsp vegetable oil
- 1 tsp dried Italian seasoning
Instructions
Wrapping and Assembly
- Prep the WrappersPlace the eggroll wrappers on a clean, dry work surface with one corner pointing toward you, forming a diamond shape.Look for The wrappers lie completely flat.Tip Keep a damp paper towel over unused wrappers to prevent drying.
- Assemble the FillingsPlace one slice of deli ham in the center of each wrapper, then top with one mozzarella cheese stick.Look for The fillings are centered perfectly.Tip Fold the ham if it exceeds the wrapper boundaries.
At the end of this initial wrapping phase, the ham and mozzarella cheese should be completely encased within the eggroll wrappers.
Each roll should feel firm, tight, and uniform, with no visible tears or gaps in the dough. The wrappers should feel slightly damp but not wet, holding their shape on the work surface before being transferred.
Coating and Arranging
- Roll and SealFold the bottom corner over the filling, tuck in the sides tightly, and roll upward, sealing the top corner with a splash of water.Look for The rolls are tight, sealed logs.Tip Ensure the edges are completely sealed to prevent cheese leakage.
- Arrange on SheetPlace the rolled sticks seam-side down on a parchment-lined baking sheet, leaving space between each stick.Look for The seam side is placed down.Tip Spacing allows hot air to circulate for maximum crispiness.
At this stage, the rolls are arranged seam-side down on the prepared baking sheet with ample space between them. They are lightly and evenly coated with oil, giving them a glossy sheen, and speckled with dried herbs. There should be no dry floury patches left on the wrappers, ensuring an even, golden bake.
Baking and Crispation
- Brush and SeasonBrush the top and sides of each roll evenly with vegetable oil, then sprinkle with dried Italian seasoning.Look for The rolls are evenly coated and seasoned.Tip A pastry brush works best for thin, even coverage.
- Bake to Golden BrownBake in a preheated oven at 400°F (204°C) for 12 to 15 minutes, turning halfway through, until the exterior is golden and crispy.Look for The rolls are golden-brown and bubbling.Tip Watch closely during the last few minutes to prevent excessive blowout.
By the end of the baking cycle, the eggroll wrappers should have transformed into a beautiful deep golden-brown color with visible tiny bubbles on the surface. They should sound dry and hollow when tapped with a utensil. A tiny amount of cheese may just begin to bubble out of the edges, indicating the interior is fully melted.
Common mistakes
The most common mistake is rolling the wrappers too loosely, which leaves air pockets inside. These air pockets expand during baking, causing the cheese to burst through the seams and leak onto the baking sheet.
Another frequent error is using too much water to seal the edges, which makes the dough soggy and prevents it from crisping up properly. Apply just enough moisture to make the wrapper tacky.
How to tell it’s done
Doneness is determined by the exterior color and texture of the rolls. They are finished when the wrappers are entirely crispy, rigid, and a uniform golden-brown. There should be no soft or pale spots on the dough.
Because this recipe contains pre-cooked ham and cheese, there is no raw protein to monitor, but the cheese must be fully melted and hot throughout, reaching a satisfyingly gooey state.
Up next · Part 3 of 3
2 variations · storage & make-ahead · 4 answers · printable card
Tips, FAQ & printable recipe (Part 3)← Back to the ingredients (Part 1)