Dinner · Part 2 of 3: Instructions
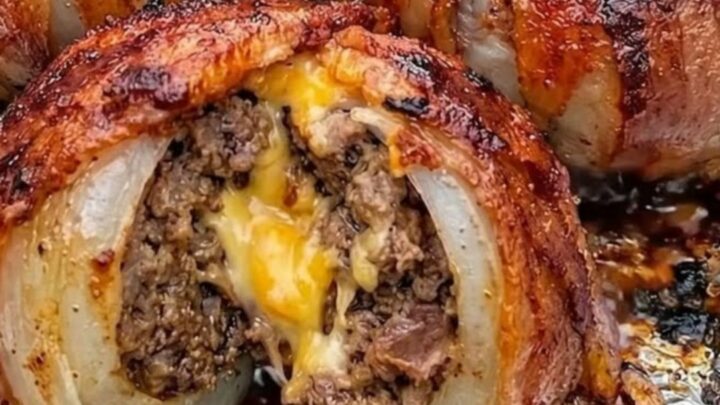
Crispy Bacon-Wrapped Stuffed Onion Bombs Step-by-step instructions
- Prep
- Cook
- Total
- Serves
- 4
Before you start
Before beginning, ensure the grill is clean and preheated to a medium-high temperature. Prepare the onions by slicing them in half and peeling away the outer skins.
Have all filling ingredients ready and chilled until the moment of assembly to maintain the best texture.
Keep a foil tray nearby for easy transfer to the grill, which helps catch any juices during the cooking process and makes cleanup much simpler for the cook.
Ingredients at a glance (4)
- 4 large yellow onions
- 1 lb ground beef
- 4 oz cheddar cheese, cubed
- 8 slices bacon
Instructions
Onion and filling prep
- Prepare the onions and fillingPeel the onions and cut them in half crosswise. Carefully separate the layers to create hollow shells. In a mixing bowl, season the ground beef with salt and pepper to taste, then mix well to combine the flavors.Look for Onion layers should be firm enough to hold the filling.Tip Use the smaller inner onion layers for another dish or chop them into the beef mixture.
The onions are hollowed out into sturdy shells, and the ground beef is well-seasoned and ready for assembly. Check that the onion halves fit together well enough to hold the filling securely.
Assembly of the bombs
- Assemble the bombsTake two onion halves and place a portion of the seasoned ground beef inside, pressing in a cube of cheddar cheese. Close the onion halves together to form a sphere. Wrap the entire onion sphere tightly with two strips of bacon, securing them if needed.Look for The bacon should wrap snugly around the onion for a secure fit.Tip Ensure the bacon overlaps slightly to prevent the cheese from leaking out during grilling.
Each onion bomb is tightly wrapped in bacon, forming a solid sphere. Ensure the bacon is secured around the onion so that the cheese and beef remain contained during the grilling process.
Grilling the bombs
- Grill to perfectionPlace the onion bombs into a foil tray and set on the preheated grill. Grill over medium-high heat until the bacon is crispy and the ground beef is fully cooked to an internal temperature of 160°F (71°C). Remove from heat and let rest for 5 minutes before slicing.Look for Bacon should be golden brown and crispy with a sizzling sound.Safe temperature 160°F (71°C) internal temperature (ground meat)Tip Keep the grill lid closed to ensure even heat distribution and melting of the cheese.
The bacon is crispy, golden, and sizzling. The internal temperature of the beef has reached 160°F (71°C). The onion bombs are tender, and the cheese center is fully melted and ready to serve.
Common mistakes
Avoid wrapping the bacon too loosely, as this can cause the bombs to fall apart on the grill. Also, ensure the onion spheres are completely closed; if there are gaps, the cheese filling will melt out into the tray rather than staying inside the onion.
Do not use extremely high heat, as this will burn the bacon before the ground beef and the onion interior are cooked through properly.
How to tell it’s done
The onion bombs are done when the bacon is deeply browned and crispy to the touch. The ground beef inside must reach an internal temperature of 160°F (71°C) to be safely consumed.
The onions should be tender when pierced with a fork, and the cheese center will be molten and gooey. Always check the thickest part of the meat to confirm it is fully cooked before removing the bombs from the heat.
- Ground meat: 160°F (71°C) in the thickest part
Up next · Part 3 of 3
2 variations · storage & make-ahead · 3 answers · printable card
Tips, FAQ & printable recipe (Part 3)← Back to the ingredients (Part 1)