Dinner · Part 1 of 3: Ingredients
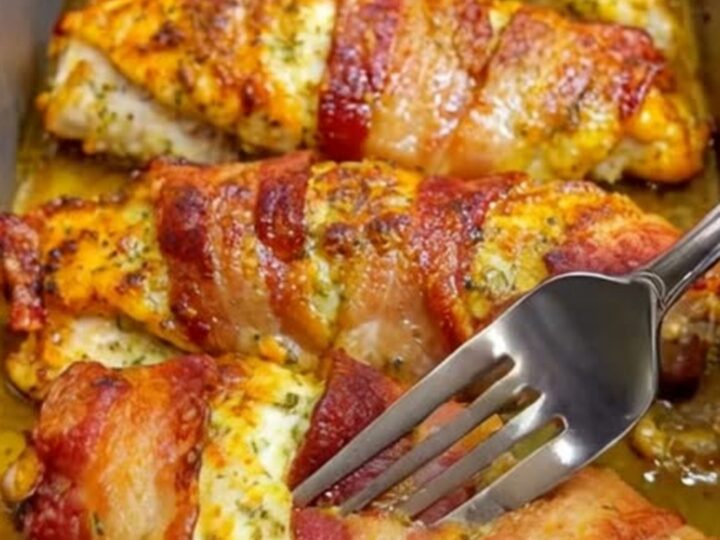
Crispy Bacon Wrapped Garlic Parmesan Chicken
- Prep
- Cook
- Total
- Serves
- 5
Sizzling, crispy bacon meets tender, juicy chicken in this ultimate comfort food dinner. This oven-baked masterpiece delivers maximum flavor with minimal effort, making it perfect for busy weeknights or impressive weekend meals. The combination of savory garlic, salty parmesan, and smoky bacon creates an irresistible crust that locks in all the natural chicken juices.
Preparing a satisfying dinner does not require hours of hands-on kitchen work. This recipe transforms simple boneless, skinless chicken breasts into a spectacular main course by wrapping them in thick-cut bacon and seasoning them with a robust garlic parmesan herb blend.
As the chicken bakes, the bacon fat renders down, baste-cooking the chicken from the outside while keeping the meat incredibly moist. The parmesan and garlic melt into a savory paste beneath the crispy bacon layer, ensuring every single bite is packed with rich, smoky, and cheesy flavor.
Ingredients
- 5 boneless skinless chicken breasts
- 1 tbsp garlic powder
- 1/2 cup grated parmesan cheese
- 1 tbsp dried Italian seasoning
- 10 slices thick-cut bacon
Why this recipe works
The science behind this cooking method lies in the protective barrier created by the thick-cut bacon. Chicken breasts are notoriously lean and prone to drying out quickly under high heat. By wrapping them tightly in bacon, the meat is shielded from direct oven heat, allowing it to cook evenly and retain its internal moisture.
The rendering bacon fat acts as a continuous self-basting mechanism, infusing the chicken with rich flavor while preventing the outer layers of the poultry from becoming tough or stringy.
Additionally, the dry seasoning mixture of garlic powder, dried herbs, and grated parmesan cheese creates a flavorful paste when combined with the rendering fat. This mixture adheres directly to the chicken surface beneath the bacon wrap.
As the oven heat circulates, the cheese caramelizes slightly, and the garlic toasts, forming a savory crust. This crust not only adds a distinct texture but also traps the steam inside the chicken rolls, resulting in an exceptionally juicy texture when cut.
Notes and substitutions
For the best results, select small to medium-sized chicken breasts of uniform thickness so they cook at the same rate. If the breasts are overly thick, slice them horizontally into even cutlets before wrapping.
Standard grated parmesan cheese works perfectly here as its fine texture adheres well to the chicken, though freshly grated parmesan can also be used. Avoid using pre-shredded parmesan blends that contain anti-caking agents, as they will not melt as smoothly into the seasoning crust.
Thick-cut bacon is highly recommended because it holds up well during the baking process and matches the cooking time of the chicken breasts. Standard thin bacon may burn before the chicken is fully cooked through. A sturdy metal baking pan or a rimmed baking sheet lined with a wire rack is the ideal equipment for this recipe. The wire rack elevates the chicken rolls, allowing the hot air to circulate completely underneath, which ensures the bacon gets crispy on all sides.
- thick-cut bacon: standard bacon slices, though cooking time may need to be adjusted slightly to prevent burning
- grated parmesan cheese: grated pecorino romano cheese for a sharper, saltier flavor profile
Equipment
- metal baking pan
- small mixing bowl
- meat thermometer
- tongs
Up next · Part 2 of 3
3 steps · 35 min of cooking · what to look for at each stage
Step-by-step instructions (Part 2)