Dinner · Part 2 of 3: Instructions
Crispy Bacon-Wrapped Beef Drumsticks Step-by-step instructions
- Prep
- Cook
- Total
- Serves
- 4
Before you start
Before beginning, bring the wrapped beef portions out of the refrigerator no more than 20 minutes ahead of cooking so the chill lifts slightly for even roasting. Fully preheat the oven to 400°F (200°C) to ensure an immediate sizzle upon entry.
Line a heavy rimmed baking sheet with parchment paper or foil for straightforward cleanup, and keep a digital meat thermometer close by. Wash, dry thoroughly, and finely chop the fresh parsley so the garnish is completely prepped for plating.
Ingredients at a glance (3)
- 4 pieces beef shanks, drumstick-style
- 8 strips bacon
- 1 tbsp fresh parsley, chopped
Instructions
Wrapping the Beef
- Season and WrapSeason the beef drumstick pieces lightly with salt and pepper. Take each strip of bacon and tightly wrap it around the beef, ensuring the meat is fully covered and the bacon is secure.Look for The bacon should look snug and uniform around the meat.Tip Pull the bacon slightly as you wrap to ensure it stays tight during cooking.
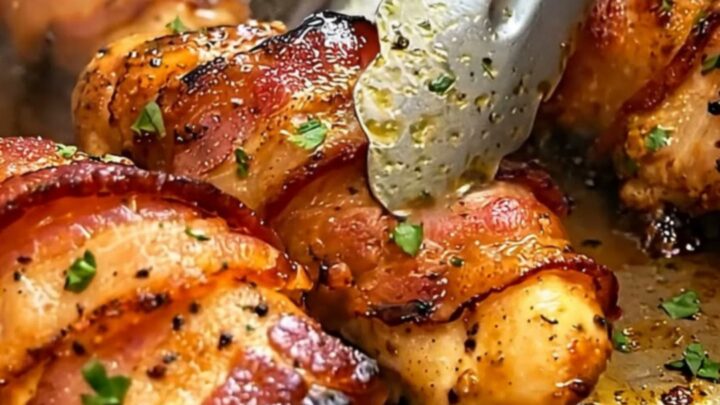
Each cut of beef should be encased tightly in spiral layers of bacon with loose ends tucked firmly beneath the weight of the meat. The parcels must feel compact and uniform in thickness, with the bacon adhering securely to the seasoned surface so it will hold together firmly when transferred onto the baking tray.
Roasting in the Oven
- Roast to PerfectionPlace the wrapped beef on a baking sheet. Roast in a preheated oven at 400°F (200°C) until the bacon is crispy and the beef is fully cooked to an internal temperature of at least 145°F (63°C). Let the meat rest for at least 3 minutes after removing from the oven.Look for The bacon should be deeply golden and the meat juices bubbling vigorously.Safe temperature 145°F (63°C) internal temperature (steaks, chops and roasts)Tip Turn the pieces halfway through roasting to encourage uniform browning on all sides.
The kitchen should fill with a robust, smoky aroma while the oven sizzles steadily. The bacon exterior will transition from translucent pink to a rich, glossy golden brown, showing bubbly caramelized drippings across the bottom of the pan. Check that an internal thermometer reads 145°F (63°C) before lifting the pan.
Resting and Garnishing
- Rest and GarnishSprinkle the chopped fresh parsley over the hot roasted beef right before serving.Look for The meat resting is complete and the herb garnish sits brightly on top.Tip Adding the parsley right at the end preserves its vibrant green hue and garden-fresh flavor.
The meat will appear glistening and fragrant as the sizzle settles into a quiet simmer during the mandatory resting rest.
Sprinkling chopped parsley across the top creates an immediate bright green contrast against the dark mahogany bacon crust, signaling that the portions are ready for immediate plating and service.
Common mistakes
A frequent pitfall is wrapping the bacon too loosely around the beef, which causes the strips to unravel and curl away as the fat shrinks in the oven.
Another mistake involves overcrowding the sheet pan; spacing the meat pieces at least two inches apart ensures hot air circulates freely to crisp the exterior rather than steaming it. Lastly, never skip the mandatory resting period, as cutting hot meat immediately drains valuable moisture and leaves the texture dry.
How to tell it’s done
The beef is safely cooked and tender once an instant-read probe thermometer inserted into the thickest center registers at least 145°F (63°C). At this precise stage, the surrounding bacon should be uniformly deep mahogany, brittle-crisp, and sizzling with rendered juices.
Allow the roasted meat to rest undisturbed on the warm tray for a minimum of 3 full minutes before slicing or serving, ensuring internal juices redistribute thoroughly rather than spilling onto the board.
- Steaks, chops and roasts: 145°F (63°C) in the thickest part, then a 3-minute rest
Up next · Part 3 of 3
2 variations · storage & make-ahead · 3 answers · printable card
Tips, FAQ & printable recipe (Part 3)← Back to the ingredients (Part 1)