Desserts · Part 2 of 3: Instructions
Crispy Antep Pistachio Burma Kadayıf with Kaymak Step-by-step instructions
- Prep
- Cook
- Total
- Serves
- 8
Before you start
Before starting, make sure the syrup is fully cooled; it can be made up to a day ahead and refrigerated. Take the kadayıf out of the refrigerator and let it sit at room temperature for 30 minutes so the strands separate easily.
Chop the pistachios finely and set aside. Have your baking pan and clarified butter ready. Heat the oven to 375°F (190°C) just before you begin assembling.
Ingredients at a glance (7)
- 10.5 oz fresh shredded kadayıf pastry
- 2/3 cup clarified butter, melted
- 1 1/4 cups finely chopped Antep pistachios
- 1 1/4 cups granulated sugar
- 3/4 cup water
- 1 tsp lemon juice
- 2/3 cup Turkish kaymak (clotted cream), for serving
Instructions
Prep and Assembly
- Prepare the Syrup and Pistachio FillingIn a small saucepan, combine the sugar and water. Bring to a boil over medium heat, stirring occasionally until the sugar dissolves. Stir in the lemon juice, then reduce the heat and simmer for 5 minutes until slightly thickened. Remove from heat and let the syrup cool completely. While the syrup cools, spread the shredded kadayıf on a clean work surface and gently separate the strands with your fingers. Chop the pistachios finely if not already chopped.Look for The syrup should be clear and lightly syrupy, not thick like honey. The kadayıf strands should be loose and airy.Tip Cool the syrup completely before pouring over the hot pastry to keep the pastry crisp.
- Fill and Twist the Kadayıf RopesLay a handful of kadayıf strands flat on the work surface, forming a long rectangle about 4 inches wide. Place a thick strip of chopped pistachios along the center of the rectangle, running the length. Carefully roll the kadayıf over the pistachios and twist the entire rope tightly, similar to twisting a rope or a candy wrapper. Repeat with the remaining kadayıf and pistachios, making about 8 to 10 ropes total.Look for The ropes should be tight and uniform, with pistachios visible along the twists.Tip Work with a few strands at a time; if the kadayıf dries out, cover it with a damp towel.
- Coil the Ropes into the PanLightly brush the bottom and sides of a 9-inch round baking pan with some of the melted clarified butter. Starting at the center, coil one twisted rope into a tight spiral. Continue coiling the remaining ropes around the center, fitting them snugly against one another to fill the pan completely. Pour the remaining melted clarified butter evenly over the entire surface, making sure every strand is coated.Look for The pan should be filled with tight spirals, with butter pooling slightly but not drowning the pastry.Tip Press the coils gently with your fingertips so they settle evenly in the pan.
At the end of this phase, you should have a pan filled with neat, tight spirals of kadayıf, with pistachios visible through the twists.
The butter should be evenly distributed, and the pastry should look shiny but not soaked. The syrup should be completely cool, and the pistachios should be finely chopped and ready.
Baking and Syruping
- Bake Until Deep Golden and CrispHeat the oven to 375°F (190°C). Place the pan on the middle rack and bake for 35 minutes, or until the pastry is deep amber-golden and crackling. Halfway through baking, rotate the pan for even browning. If excess butter pools in the pan during baking, carefully drain it off using a spoon or a baster, leaving just enough to keep the pastry moist.Look for The top should be deeply golden, and the edges should look crisp and slightly puffed.Tip Check at 30 minutes; ovens vary, and you want a deep golden color, not burnt.
- Cool Slightly and Pour the Cool SyrupRemove the pan from the oven and let it cool for 5 minutes. The pastry should still be hot but not scorching. Slowly pour the cool lemon syrup evenly over the entire surface, letting it soak into the twists. You should hear a satisfying sizzle as the syrup hits the hot pastry. Allow the kadayıf to absorb the syrup for at least 15 minutes before serving.Look for The syrup should bubble and hiss on contact, and the pastry should glisten as it absorbs.Tip Pour slowly and evenly; if you pour too fast, the syrup may pool on top instead of soaking in.
After baking, the pastry should be a deep amber-gold, with a crackling sound when you press it. The edges should be crisp and slightly puffed. When you pour the cool syrup, you should hear a distinct sizzle. The syrup should be absorbed within a few minutes, leaving a glossy, sticky surface.
Finishing and Serving
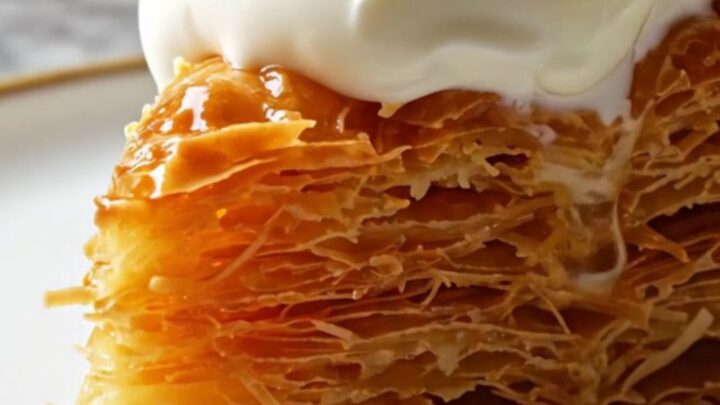
- Serve with Kaymak CreamOnce the kadayıf has absorbed the syrup and is warm or at room temperature, cut it into wedges with a sharp knife. Transfer each piece to a serving plate. Top each portion with a generous dollop of Turkish kaymak (clotted cream). Serve immediately, while the pastry is still crisp and the cream is cool.Look for The pastry should be glossy with syrup, and the kaymak should be thick and spreadable.Tip For the best texture contrast, serve the kadayıf warm with cold kaymak.
The finished kadayıf should be shiny with syrup, and the pieces should hold together when cut. The kaymak should be thick and spoonable. When you take a bite, the pastry should shatter with a crisp crunch, revealing the nutty pistachio filling. The contrast of warm pastry and cool cream is ideal.
Common mistakes
One common mistake is over-soaking the pastry with syrup while it's still too hot, which can make it soggy. Let the pastry cool for 5 minutes after baking, and pour the syrup slowly.
Another mistake is using too much butter, which can make the pastry greasy; drain excess butter during baking if needed. Also, avoid over-twisting the ropes so tightly that they become dense and doughy; twist firmly but gently.
How to tell it’s done
The kadayıf is done when the top is deeply golden brown and the edges look crisp and slightly caramelized. The pastry should feel firm to the touch and sound crackly when pressed.
If you lift a piece with a fork, the strands should be crisp and not bendy. The syrup should have been absorbed, leaving a glossy surface. There is no meat to check, so visual and textural cues are key.
Up next · Part 3 of 3
4 variations · storage & make-ahead · 5 answers · printable card
Tips, FAQ & printable recipe (Part 3)← Back to the ingredients (Part 1)