Appetizers · Part 2 of 3: Instructions
Crispy Accordion Halloumi Fries with Honey Za’atar Dip Step-by-step instructions
- Prep
- Cook
- Total
- Serves
- 4
Before you start
Before you start, take the halloumi out of the refrigerator and pat it dry with paper towels. This helps the oil and seasonings adhere and promotes better browning. Set up your cutting board and have chopsticks ready.
Prepare the dip by swirling the yogurt in a serving bowl and topping with honey, za'atar, and pomegranate seeds. Have all ingredients and equipment within reach, as the cooking process is quick.
Ingredients at a glance (6)
- 8 oz halloumi cheese
- 1 tbsp olive oil
- 1 tbsp za'atar
- 1 cup Greek yogurt
- 2 tbsp honey
- 1/4 cup pomegranate seeds
Instructions
Cutting and Seasoning
- Cut the Halloumi into Accordion FriesSlice the halloumi block into thick fries, about 1 inch wide. Place one fry between two chopsticks, then make straight cuts across the top, about 1/4 inch apart, stopping when the knife touches the chopsticks so the bottom stays intact. Flip the fry and make diagonal cuts on the reverse side, also stopping at the chopsticks. Gently stretch the fry to open the accordion pattern. Repeat with the remaining fries.Look for The fries stretch like an accordion with a zigzag pattern, and the base remains connected.Tip Chopsticks act as a guide to prevent cutting all the way through. Keep the cuts close together for a tighter accordion effect.
- Season the FriesBrush the accordion-cut halloumi fries with olive oil on all sides, making sure the oil gets into the crevices. Sprinkle with za'atar, turning to coat evenly.Look for The fries are evenly coated with oil and speckled with green za'atar.Tip Use your hands to gently rub the seasoning into the cuts for even flavor.
The halloumi fries are cut into thick strips with a zigzag pattern that stretches open.
They are lightly coated with olive oil and dusted with za'atar, which clings to the cut surfaces. The kitchen smells of fresh thyme and sumac. The fries are ready for the hot skillet.
Searing to Golden Perfection
- Sear the Halloumi FriesHeat a dry skillet over medium-high heat. Place the seasoned halloumi fries in the hot skillet in a single layer. Cook for 3 minutes without moving them, until the bottom is deeply golden and blistered. Flip and cook for 3 minutes more, until the other side is equally golden and the cheese is crisp at the edges.Look for The fries turn deep golden-brown with blistered, crispy edges and a squeaky, tender center.Tip Do not overcrowd the pan; cook in batches if needed. The cheese will release its own moisture as it heats.
- Flip and Finish CookingAfter the first side is deeply golden, carefully flip each fry using a spatula. Cook for another 3 minutes, pressing gently to ensure even browning. The halloumi should be blistered and crispy on all sides, with a molten, squeaky interior.Look for The fries are uniformly golden-brown and crisp, with no soft or pale spots.Tip If the pan looks dry, add a tiny drizzle of olive oil. Avoid moving the fries too often to let the crust form.
As the fries hit the hot skillet, they sizzle loudly. After 3 minutes, the bottoms are deeply golden and blistered. Flipping reveals an equally golden crust. The kitchen fills with a toasty, nutty aroma. The fries are crisp to the touch but still give slightly when pressed.
Dipping and Serving
- Make the Honey Za'atar Yogurt DipIn a small bowl, swirl the Greek yogurt. Drizzle the honey over the top, then scatter with za'atar and pomegranate seeds. Do not stir; leave the swirls visible for a beautiful presentation.Look for The dip shows ribbons of honey, green za'atar, and bright red pomegranate seeds over white yogurt.Tip Use a spoon to create a smooth swirl pattern. Add the honey just before serving to keep it glossy.
- Serve and EnjoyTransfer the hot halloumi fries to a serving platter. Place the honey za'atar yogurt dip alongside. Serve immediately, dipping the hot fries into the cool, sweet yogurt for a contrast of temperatures and textures.Look for The fries are hot and crispy, the dip is cool and creamy, with a sweet-savory aroma.Tip Serve right away while the halloumi is still hot and the crust is at its crunchiest.
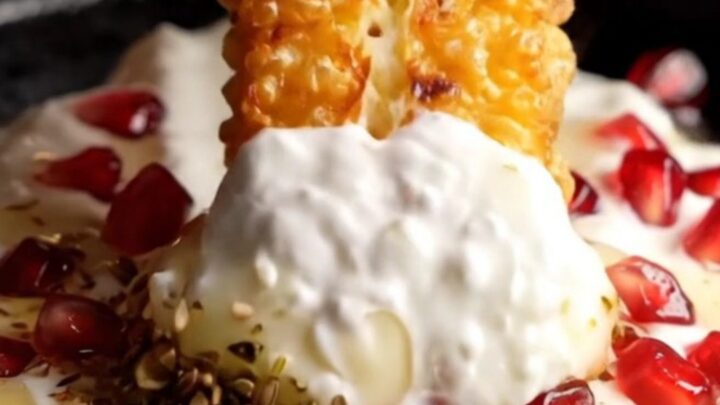
The finished fries are piled on a platter, steam rising from their crispy surfaces. The dip is a beautiful swirl of white yogurt, golden honey, green za'atar, and ruby pomegranate seeds. One bite offers a loud crunch, a squeaky chew, and a cool, sweet-tangy finish.
Common mistakes
One common mistake is cutting through the halloumi completely. Using chopsticks as a guide prevents this. Another is moving the fries too soon in the pan; let them sear undisturbed to develop a crust.
Overcrowding the pan causes steaming instead of browning, so cook in batches if needed. Finally, do not add salt to the dip—halloumi is already salty, and the honey and za'atar provide plenty of flavor.
How to tell it’s done
The halloumi fries are done when they are deeply golden-brown and blistered on all sides, with crispy edges. The interior should be hot and squeaky, not melted or runny.
Because halloumi is a cooked cheese, there is no internal temperature requirement, but the outside should be visibly caramelized. Serve immediately for the best texture.
Up next · Part 3 of 3
4 variations · storage & make-ahead · 5 answers · printable card
Tips, FAQ & printable recipe (Part 3)← Back to the ingredients (Part 1)