Desserts · Part 2 of 3: Instructions
Crinkle Top Fudgy Brownies with Browned Butter Step-by-step instructions
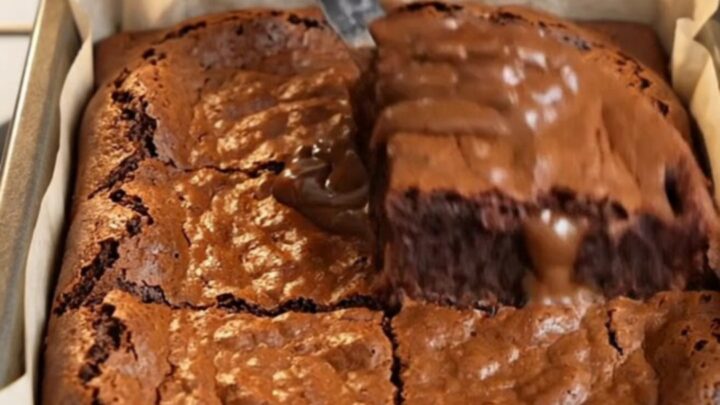
- Prep
- Cook
- Total
- Serves
- 16
Before you start
Preheat the oven to 350°F (175°C). Line an 8x8-inch baking pan with parchment paper, leaving overhang on two opposite sides. Chop the chocolate into uneven pieces.
Measure all ingredients before starting. The eggs should be at room temperature for the best volume when whipped. Set out the butter, sugar, flour, cocoa, vanilla, and salt so everything is within reach.
Ingredients at a glance (8)
- 1 cup unsalted butter
- 8 oz bittersweet chocolate, chopped
- 4 large eggs
- 1 1/2 cups light brown sugar, packed
- 2 tsp vanilla extract
- 1/2 tsp kosher salt
- 1 cup all-purpose flour
- 1/4 cup unsweetened cocoa powder
Instructions
Browned Butter and Whipped Eggs
- Brown the butter and melt chocolateMelt the butter in a medium saucepan over medium heat. Continue cooking, swirling the pan frequently, until the butter turns amber and smells nutty, about 5 minutes. Remove from heat and add the chopped chocolate. Stir until smooth and fully melted. Set aside to cool slightly.Look for Butter is amber with a nutty aroma; chocolate is fully melted and glossy.Tip Watch the butter closely after it foams — it can go from golden to burnt quickly.
- Whisk eggs and sugar to ribbon stageIn a large bowl, combine the eggs, brown sugar, vanilla, and salt. Beat with an electric mixer on high speed until pale, thick, and doubled in volume, about 5 minutes. The mixture should fall in a thick ribbon when the beaters are lifted.Look for Mixture is pale, frothy, and forms a ribbon that holds for a few seconds.Safe temperature 160°F (71°C) internal temperature (egg dishes)Tip Whipping the eggs long enough is the key to the shiny crinkle top.
The butter should be amber and smell nutty, with the chocolate melted smooth.
The egg mixture should be pale, thick, and doubled in volume, falling in a ribbon that holds for a few seconds. If the eggs are not pale enough, continue beating for another minute or two.
Folding and Panning
- Fold in chocolate mixture and dry ingredientsWith the mixer on low, slowly pour the cooled chocolate-butter mixture into the whipped eggs. Mix just until combined. Gently fold in the flour and cocoa powder with a rubber spatula until no streaks remain. The batter will be thick and glossy.Look for Batter is thick, glossy, and uniformly dark with no flour streaks.Safe temperature 160°F (71°C) internal temperature (egg dishes)Tip Fold gently to keep the air in the batter — that air creates the crackly top.
- Pour into prepared panLine an 8x8-inch baking pan with parchment paper, leaving overhang on two sides. Pour the batter into the pan and spread it into an even layer with the spatula.Look for Batter is evenly spread and reaches all corners of the pan.Tip Parchment overhang makes lifting the brownies out effortless after baking.
The batter should be thick, glossy, and uniform with no flour streaks. It should pour into the pan in a slow ribbon and spread evenly. The surface should look smooth and slightly shiny. If the batter seems too stiff, fold a little longer, but avoid overmixing.
Baking and Crinkling
- Bake until crinkle crust formsBake in a preheated 350°F (175°C) oven for 35 minutes, until the top is shiny with crinkles and a toothpick inserted in the center comes out with a few moist crumbs. The edges will be set and the center will look slightly underdone.Look for Top is shiny, cracked, and set; a toothpick has moist crumbs but no wet batter.Safe temperature 160°F (71°C) internal temperature (egg dishes)Tip Do not overbake — the center should remain fudgy. Start checking at 30 minutes.
- Cool and slice with a hot knifeLet the brownies cool in the pan on a wire rack for at least 20 minutes. Use the parchment to lift them out. Warm a chef's knife under hot water, dry it, and slice into 16 squares, wiping the blade between cuts.Look for Brownies are firm enough to slice cleanly; the knife glides through without tearing.Tip A hot, clean knife gives neat edges and reveals the gooey interior.
The top should be shiny with fine cracks, and the edges should be set. A toothpick inserted in the center should have moist crumbs, not wet batter. The kitchen will smell intensely chocolatey. Let the brownies cool in the pan before lifting out and slicing.
Common mistakes
Overbaking is the most common mistake — it turns the fudgy center dry. Check at 30 minutes and trust the toothpick test. Another issue is undermixing the flour, which leaves streaks. Fold gently but thoroughly.
If the chocolate-butter mixture is too hot when added to the eggs, it can cook them or deflate the foam. Let it cool slightly before combining. Finally, do not skip the five-minute whip — that is what creates the crinkle top.
How to tell it’s done
The brownies are done when the top is shiny with crinkles and the edges are set. A toothpick inserted into the center should come out with a few moist crumbs clinging to it — not wet batter.
The center will look slightly underdone, but it will set as it cools. For food safety, the eggs are fully cooked when the internal temperature reaches 160°F (71°C). Let the brownies cool completely in the pan before slicing for the cleanest cuts.
- Egg dishes: 160°F (71°C) in the thickest part
Up next · Part 3 of 3
4 variations · storage & make-ahead · 5 answers · printable card
Tips, FAQ & printable recipe (Part 3)← Back to the ingredients (Part 1)