Desserts · Part 2 of 3: Instructions
Creamy White Chocolate Hazelnut Slow Cooker Spread Step-by-step instructions
- Prep
- Cook
- Total
- Serves
- 8
Before you start
Before beginning, ensure that all of your ingredients are at room temperature, as this helps them incorporate more smoothly. Measure your hazelnut butter and white chocolate accurately, and have your sea salt and heavy cream ready to go.
Verify that your slow cooker is clean and positioned on a stable, heat-resistant surface with adequate space around it for ventilation. You will also want to have a whisk and a silicone spatula nearby, as these tools are critical for achieving the final glossy, smooth texture that defines this decadent spread.
Ingredients at a glance (4)
- 10 oz white chocolate chunks
- 1 cup hazelnut butter
- 1/4 tsp sea salt
- 1/2 cup heavy cream
Instructions
Initial Layering
- Combine ingredientsPlace the white chocolate chunks into the base of the slow cooker. Add the hazelnut butter, followed by the sea salt and the heavy cream. Ensure the slow cooker is set to a low heat setting to allow the ingredients to melt gently without scorching.Look for Ingredients should be layered evenly in the bottom of the slow cooker.Tip Adding the cream last helps it distribute more evenly as it warms.
At the end of this phase, the ingredients are neatly layered within the slow cooker. The white chocolate chunks form the base, topped by the hazelnut butter, salt, and cream. Everything is ready for the gentle, slow melting process to begin. Ensure the lid is securely in place to retain the necessary heat for a consistent result.
Melting and Emulsification
- Melt and incorporateCover the slow cooker and cook on low for approximately two hours. Once the time has elapsed, remove the lid and whisk the mixture thoroughly until completely smooth, glossy, and fully emulsified. If any lumps remain, continue whisking until the texture is perfectly uniform.Look for The mixture should look glossy and smooth with no visible white chocolate pieces.Tip Use a silicone spatula to scrape the sides of the slow cooker to ensure all ingredients are incorporated.
After two hours of heating, the mixture should appear fully melted. When you remove the lid, it will be soft and ready to be whisked. The texture should be starting to look unified, though vigorous whisking is still required to create that final, signature glossy finish that makes this spread so visually appealing and delicious.
Cooling and Thickening
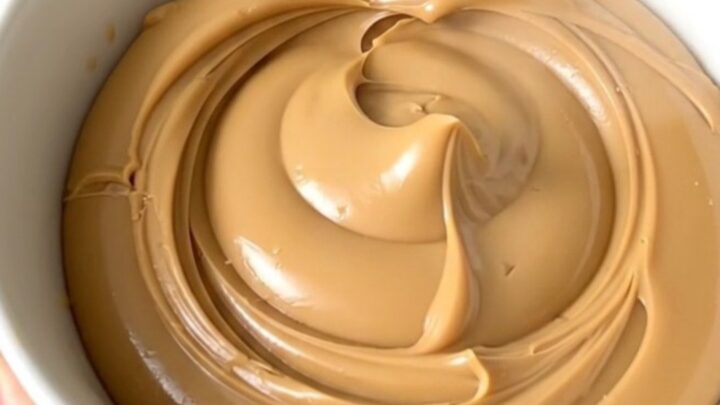
- Cool and serveTurn off the slow cooker and allow the spread to rest for 15 minutes before transferring to a clean jar or serving bowl. The mixture will thicken slightly as it cools to room temperature, achieving a perfect, spreadable consistency that is ideal for serving.Look for The spread should have a thick, pourable, and glossy appearance.Tip Allow the spread to cool completely before covering to prevent condensation from forming inside the container.
Once the spreading has rested for 15 minutes, it should be noticeably thicker and have a luxurious, pourable consistency. It will be smooth, shiny, and ready to be transferred into a jar. The aroma should be rich and nutty, signaling that the spread is perfectly prepared and ready to be enjoyed with your favorite accompaniments.
Common mistakes
One common mistake is using high heat on the slow cooker, which can cause the white chocolate to scorch or the fats to separate, leading to a grainy or oily texture. Always stick to the low setting to maintain a gentle melting process.
Another frequent issue is failing to scrape the sides of the slow cooker; leftover residue can burn or remain unmelted, preventing a perfectly smooth final product.
Finally, avoid rushing the cooling process, as the spread needs time to set properly to reach its ideal, spreadable consistency before it is ready to be stored or served.
How to tell it’s done
The spread is done when it has reached a perfectly smooth, uniform, and glossy consistency. When you lift your whisk from the mixture, the spread should fall back into the bowl in a thick, slow ribbon rather than in separate droplets.
There should be no visible lumps of white chocolate, and the color should be a consistent, creamy, light brown. Because there are no raw proteins involved in this recipe, you do not need to worry about internal temperatures, but the texture is your primary indicator of success.
Up next · Part 3 of 3
2 variations · storage & make-ahead · 3 answers · printable card
Tips, FAQ & printable recipe (Part 3)← Back to the ingredients (Part 1)