Dinner · Part 2 of 3: Instructions
Creamy White Chicken Enchiladas with Melted Monterey Jack Step-by-step instructions
- Prep
- Cook
- Total
- Serves
- 6
Before you start
Before beginning the cooking process, organize all ingredients and equipment on the workspace to ensure a smooth workflow. Shred the Monterey Jack cheese from the block and place it in a bowl. Shred the cooked chicken into bite-sized pieces.
Measure out the creamy white sauce and flour tortillas. Preheat the oven to 375°F (190°C) and lightly grease a 9x13-inch baking dish with non-stick cooking spray or a small amount of oil.
Having everything prepped and ready prevents any delays during assembly.
Ingredients at a glance (4)
- 3 cups shredded cooked chicken
- 8 flour tortillas
- 2 cups creamy white sauce
- 2 cups shredded Monterey Jack cheese
Instructions
Rolling and Arranging
- Prepare the DishLightly grease a 9x13-inch baking dish. Lay the flour tortillas flat on a clean work surface and distribute the shredded cooked chicken evenly down the center of each tortilla.Look for The chicken should be evenly distributed among all tortillas.Tip Warm the tortillas slightly in the microwave first to make them more pliable and prevent tearing.
- Roll the TortillasRoll each tortilla tightly around the chicken filling and place them seam-side down in the prepared baking dish, lining them up snugly next to one another to prevent them from unrolling.Look for The rolled tortillas should fit snugly across the width of the dish without overlapping.Tip Placing them seam-side down ensures they stay closed without needing toothpicks.
The tortillas are stuffed with shredded chicken, rolled tightly, and nestled side-by-side in the baking dish. They should look neat, compact, and fit snugly against each other with the seam sides facing downward to ensure they stay closed.
Sauce Coating
- Pour the SaucePour the creamy white sauce evenly over the rolled tortillas in the baking dish, ensuring they are fully covered from end to end so they soften beautifully during baking.Look for The sauce should completely cover the tortillas with no dry edges exposed.Tip Ensure the ends of the tortillas are completely covered in sauce to keep them from drying out.
The creamy white sauce is poured evenly over the rolled tortillas, completely enveloping them from end to end. The sauce should look smooth, rich, and velvety, with no dry tortilla edges exposed.
Baking and Broiling
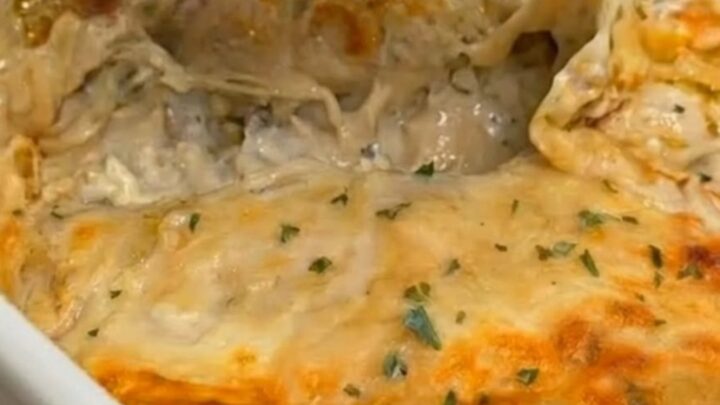
- Top and BakeSprinkle the shredded Monterey Jack cheese evenly over the sauce-covered enchiladas. Place the baking dish in the preheated oven and bake at 375°F (190°C) for 20 minutes until the casserole is heated through and bubbling around the edges. Turn on the broiler for the final 2 to 3 minutes to brown the cheese.Look for The cheese should be melted, bubbling, and blistered with beautiful golden-brown spots.Tip Watch the broiler closely during the final minutes to prevent the cheese from scorching.
The cheese melts entirely, forming a golden-brown, blistered crust with small bubbles sizzling along the edges of the white dish. Steam rises gently from the casserole, and a spatula lift reveals a dramatic, gooey cheese pull.
Common mistakes
One common mistake is failing to cover the ends of the tortillas with the creamy white sauce; any exposed tortilla edges will become hard and crunchy in the oven rather than tender and soft.
Another error is using a sauce that is too thin, which can cause the enchiladas to become soggy instead of holding their shape beautifully when sliced.
How to tell it’s done
The enchiladas are perfectly cooked when the sauce is bubbling vigorously around the edges of the baking dish and the Monterey Jack cheese on top is fully melted, showing beautiful golden-brown blisters from the broiler.
Since the chicken filling is pre-cooked, the baking time focuses on heating the dish completely through and melting the cheese rather than reaching a specific internal meat temperature.
Up next · Part 3 of 3
2 variations · storage & make-ahead · 3 answers · printable card
Tips, FAQ & printable recipe (Part 3)← Back to the ingredients (Part 1)