Dinner · Part 2 of 3: Instructions
Creamy Tuscan Parmesan Chicken: A One-Pan Dinner Step-by-step instructions
- Prep
- Cook
- Total
- Serves
- 4
Before you start
Before beginning, organize all ingredients near the stove to ensure a smooth cooking process. Grate the parmesan cheese finely so it melts quickly into the sauce.
Pat the chicken cutlets dry with paper towels to ensure they are moisture-free, which helps the flour coating stick and prevents the oil from splattering excessively during the searing phase.
Have your tongs and a clean plate ready for transferring the chicken once it is finished cooking.
Ingredients at a glance (9)
- 4 cutlets chicken breast cutlets
- 1/3 cup all-purpose flour, seasoned
- 2 tbsp olive oil and butter mixture
- 3/4 cup chicken bone broth
- 3/4 cup heavy cream
- 1/2 cup freshly grated parmesan cheese
- 1/2 cup sun-dried tomatoes
- 1 tsp crushed red pepper flakes
- Fresh basil leaves, for serving
Instructions
Dredging and Preparation
- Dredging the ChickenPlace the seasoned flour in a shallow dish. Press each chicken breast cutlet into the flour until evenly coated on both sides, shaking off any excess. This thin coating creates a beautiful golden crust when seared in the hot pan.Look for The chicken should be lightly dusted with flour.Tip Ensure the chicken is patted dry before dredging to help the flour adhere evenly.
The chicken should be evenly coated in a thin, uniform layer of seasoned flour. Ensure that the excess flour is shaken off, as a thick, gummy coating will not crisp up properly during the searing stage. Everything should be ready for the pan before you turn on the heat.
Searing the Chicken
- Searing the CutletsHeat the olive oil and butter in the braiser over medium-high heat. Once shimmering, add the floured chicken cutlets. Sear for 4 minutes per side. Ensure the chicken reaches an internal temperature of 165°F (74°C) before removing it from the pan to rest for at least 5 minutes.Look for The chicken should be golden brown and cooked through.Safe temperature 165°F (74°C) internal temperature (poultry)Tip Avoid overcrowding the pan to ensure a proper sear.
The chicken should have a deep, golden-brown crust on both sides. It should be cooked through to 165°F (74°C) with no pink remaining in the center. The pan should have some delicious browned bits of flour and chicken stuck to the bottom, which will form the base of your flavorful sauce.
Simmering the Sauce
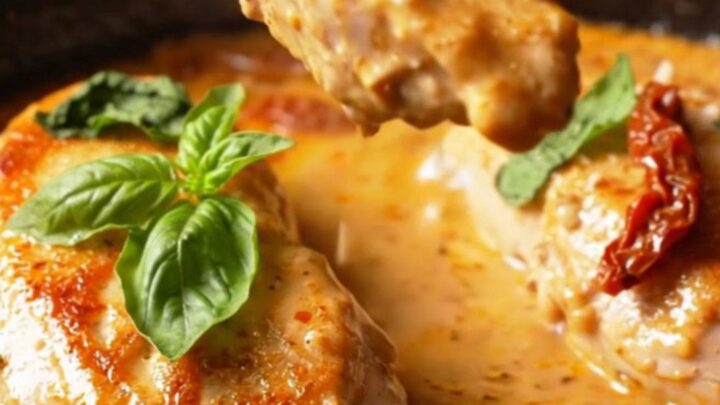
- Creating the SauceIn the same pan, deglaze with the chicken bone broth, scraping up the browned bits from the bottom. Stir in the heavy cream, sun-dried tomatoes, crushed red pepper flakes, and parmesan. Simmer until the sauce thickens to a glossy, velvety consistency. Serve the chicken topped with the sauce and fresh basil.Look for The sauce should be thick enough to coat the back of a spoon.Tip Keep the heat controlled so the parmesan melts smoothly into the cream.
The sauce should be smooth, creamy, and rich in color from the sun-dried tomatoes and red pepper flakes. It should have a slightly thickened consistency that clings to the chicken. When you swirl the pan, the sauce should look glossy and feel velvety to the touch.
Common mistakes
A common mistake is overcrowding the pan, which lowers the temperature and prevents the chicken from getting that essential golden-brown crust.
Another error is adding the parmesan while the heat is too high, which can cause the cheese to clump or the sauce to break. Always reduce the heat to a gentle simmer before adding the cheese, and stir continuously until it is fully incorporated into the cream.
How to tell it’s done
The chicken is done when it is golden brown on the outside and reaches an internal temperature of 165°F (74°C). Use a meat thermometer inserted into the thickest part of the cutlet to verify this temperature.
The sauce is finished when it has reduced slightly and becomes glossy and thick enough to coat the back of a spoon, which usually takes a few minutes of simmering over moderate heat.
- Poultry: 165°F (74°C) in the thickest part
Up next · Part 3 of 3
2 variations · storage & make-ahead · 3 answers · printable card
Tips, FAQ & printable recipe (Part 3)← Back to the ingredients (Part 1)