Dinner · Part 2 of 3: Instructions
Creamy Tuscan Chicken One-Pan Dinner Step-by-step instructions
- Prep
- Cook
- Total
- Serves
- 4
Before you start
Before turning on the heat, gather and prepare all the ingredients to ensure a smooth cooking process. Pat the chicken breasts completely dry with paper towels, as excess moisture prevents a proper sear. Measure out the olive oil, heavy cream, and cherry tomatoes.
Peel and finely mince the garlic cloves, and wash the fresh baby spinach, spinning it completely dry. Having everything arranged near the stove prevents the garlic from burning and keeps the sauce from over-reducing while searching for ingredients.
Ingredients at a glance (6)
- 4 boneless, skinless chicken breasts
- 2 tbsp olive oil
- 1 1/2 cups cherry tomatoes
- 3 cloves garlic, minced
- 1 cup heavy cream
- 2 cups fresh spinach
Instructions
Sear the Chicken
- Prepare the ChickenPat the chicken breasts dry with paper towels to ensure a perfect sear, preparing them for the hot skillet.Look for The chicken should be completely dry on all sides.Tip Drying the chicken is crucial; any surface moisture will cause it to steam instead of sear.
- Sear the ChickenHeat the olive oil in a heavy cast-iron skillet over medium-high heat. Add the chicken breasts and sear without moving for five minutes, then flip and sear the other side for another four to five minutes until a deep golden crust forms. Transfer the chicken to a plate and set aside.Look for The chicken should have a rich, golden-brown crust on both sides.Tip Do not crowd the skillet; sear in batches if necessary to prevent steaming.
At the end of this first phase, the chicken breasts should have a beautiful, deep golden-brown crust on both sides. The kitchen will smell of rich, savory seared meat.
The chicken will not be fully cooked through yet, but a layer of caramelized browned bits should be visible on the bottom of the skillet, which is essential for building the sauce in the next phase.
Build the Rich Sauce Base
- Blister the TomatoesIn the same skillet with the remaining oil and chicken drippings, add the cherry tomatoes. Cook over medium heat, stirring occasionally, for about four minutes until the skins begin to blister and burst, releasing their sweet juices.Look for The tomatoes should be softened and starting to release their juices.Tip Press gently on the tomatoes with a spoon to help them burst and release flavor.
- Sauté the GarlicReduce the heat to medium-low, then add the minced garlic to the skillet with the blistered tomatoes. Cook, stirring constantly, for about one minute until the garlic is highly fragrant and pale golden, taking care to avoid burning.Look for The garlic should smell aromatic and turn a light golden color.Tip If the pan is too hot, remove it from the heat briefly to prevent the garlic from burning.
The cherry tomatoes should be blistered, softened, and starting to burst, releasing their sweet juices into the pan oil. The minced garlic should be fragrant and pale golden, without any dark brown or burnt edges. The bottom of the skillet should be mostly deglazed, with the caramelized chicken drippings fully incorporated into the warm tomato oil.
Simmer and Combine
- Simmer the Cream and SpinachPour the heavy cream into the skillet, stirring to scrape up any browned bits from the bottom of the pan. Bring to a gentle simmer, then add the fresh spinach and fold it into the bubbling sauce until it wilts completely.Look for The cream should bubble gently and the spinach should be fully wilted.Tip Add the spinach in handfuls if it does not all fit in the skillet at once.
- Finish the ChickenReturn the seared chicken breasts and any accumulated juices to the skillet. Simmer gently in the sauce for three to five minutes, spooning the rich cream sauce over the chicken, until the poultry is cooked through and reaches an internal temperature of 165°F (74°C).Look for The sauce should be thick enough to coat a spoon and the chicken hot throughout.Safe temperature 165°F (74°C) internal temperature (poultry)Tip Use an instant-read thermometer to check the temperature without cutting into the meat.
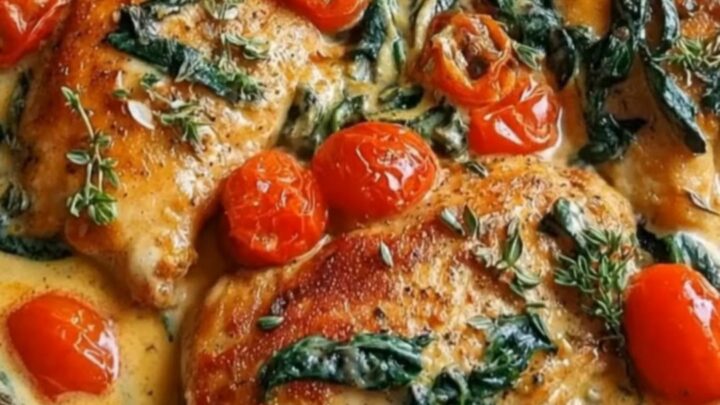
The heavy cream should be bubbling gently and slightly thickened, with the fresh spinach completely wilted and distributed throughout the sauce. The chicken breasts, returned to the pan, should be glistening with the cream sauce spooned over them. The sauce should be a rich, creamy orange-pink hue from the combined tomato juices and cream.
Common mistakes
One common mistake is crowding the skillet when searing the chicken, which traps steam and causes the meat to boil rather than sear. If the pan is too small, sear the chicken breasts in batches to ensure a proper golden crust.
Another error is adding the garlic too early or cooking it over heat that is too high, which burns the garlic and ruins the sauce with a bitter flavor. Always lower the heat before adding garlic, and stir constantly for no more than a minute.
How to tell it’s done
To determine when the dish is fully cooked, insert an instant-read meat thermometer into the thickest part of the largest chicken breast. The poultry is safe to eat and perfectly done when it reaches an internal temperature of 165°F (74°C).
The cream sauce should easily coat the back of a spoon, and the cherry tomatoes should be completely soft and collapsed, releasing their sweet juices to balance the rich cream.
- Poultry: 165°F (74°C) in the thickest part
Up next · Part 3 of 3
2 variations · storage & make-ahead · 3 answers · printable card
Tips, FAQ & printable recipe (Part 3)← Back to the ingredients (Part 1)