Dinner · Part 2 of 3: Instructions
Truffle Parmesan Gnocchi in 10 Minutes Step-by-step instructions
- Prep
- Cook
- Total
- Serves
- 4
Before you start
Before you start, make sure you have all your ingredients measured and ready. Bring a large pot of well-salted water to a boil. Grate the Parmigiano-Reggiano finely, shave the black truffle, and have the truffle butter and heavy cream measured.
The gnocchi should be at room temperature if fresh, or you can boil them directly from frozen, adding a minute to the cooking time. Set out your serving plates or bowls so you can plate immediately after cooking.
Ingredients at a glance (6)
- 500 g ricotta gnocchi
- 200 ml heavy cream
- 40 g truffle butter
- 120 g aged Parmigiano-Reggiano, finely grated
- 20 g fresh black winter truffle, shaved
- flaky sea salt, for serving
Instructions
Boil and Warm
- Boil the GnocchiBring a large pot of well-salted water to a boil. Add the ricotta gnocchi and cook according to package directions, usually 2-3 minutes or until they float to the surface. Drain gently, reserving about 1/2 cup of the pasta water.Look for The gnocchi are floating and look puffed and tender.Tip Do not overcook; they should be just cooked through and still hold their shape.
- Warm the Cream BaseIn a large skillet over medium heat, combine the heavy cream and truffle butter. Warm gently, stirring occasionally, until the butter melts and the cream is steaming but not boiling.Look for The cream is smooth and the butter has fully melted.Tip Keep the heat moderate to avoid curdling the cream.
The gnocchi are floating and tender, and the cream mixture is steaming with the butter melted. The kitchen smells of truffle and cream. The sauce should be smooth and not boiling.
Melt and Swirl
- Melt in the ParmesanReduce the heat to low and gradually whisk in the grated Parmigiano-Reggiano. Stir continuously until the cheese is fully melted and the sauce is glossy and slightly thickened.Look for The sauce coats the back of a spoon.Tip Add the cheese in small handfuls to ensure a smooth emulsion.
- Swirl in the GnocchiAdd the drained gnocchi to the skillet. Gently swirl them in the emulsion over low heat, about 80°C (175°F), for 90 seconds, until every gnocchi is coated in a glossy truffle glaze. If the sauce seems too thick, add a splash of reserved pasta water.Look for The sauce clings to the gnocchi like a shiny glaze.Tip Use a gentle swirling motion, not stirring, to keep the gnocchi intact.
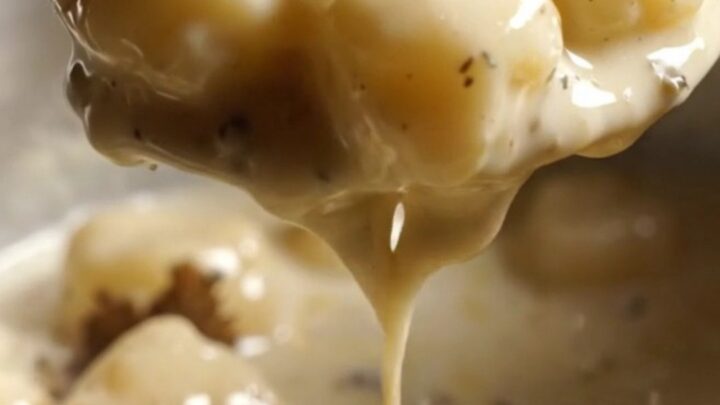
The Parmesan has melted into a glossy sauce, and the gnocchi are coated in a shiny, thick glaze. The sauce clings to the gnocchi, and the pan is fragrant with truffle and cheese.
Finish and Serve
- Finish with Truffle and SaltRemove the skillet from the heat. Shave the fresh black winter truffle generously over the gnocchi and sprinkle with flaky sea salt. Toss gently once to distribute.Look for The truffle shavings are visible and fragrant.Tip Shave the truffle directly over the dish just before serving to preserve its aroma.
The gnocchi are plated with visible shavings of black truffle and a sprinkle of flaky sea salt. The dish looks luxurious and inviting, with a glossy sheen on each gnocchi.
Common mistakes
The most common mistake is overcooking the gnocchi, which makes them mushy. Watch them carefully and remove them as soon as they float. Another pitfall is overheating the sauce, which can cause the cream to curdle or the cheese to separate.
Keep the heat low and stir gently. If the sauce becomes too thick, add a splash of reserved pasta water to loosen it. Also, don't skip the fresh truffle and sea salt—they add essential flavor and texture.
How to tell it’s done
The gnocchi are done when they float to the surface of the boiling water and are tender when bitten. The sauce is ready when it coats the back of a spoon and is glossy and slightly thickened.
When you swirl the gnocchi in the sauce, they should be evenly coated and the sauce should cling to them like a glaze.
The dish is finished when the truffle shavings are added and the sea salt has been sprinkled. Serve immediately for the best texture and flavor.
Up next · Part 3 of 3
4 variations · storage & make-ahead · 5 answers · printable card
Tips, FAQ & printable recipe (Part 3)← Back to the ingredients (Part 1)