Dinner · Part 2 of 3: Instructions
Creamy Tomato Turkey and Shells Bake: Easy One-Dish Dinner Step-by-step instructions
- Prep
- Cook
- Total
- Serves
- 6
Before you start
Before starting, gather all your ingredients: pasta shells, ground turkey, creamy tomato sauce, and shredded cheddar. Preheat the oven to 375°F (190°C) so it's ready when you are. Bring a large pot of salted water to a boil for the pasta.
Have a large skillet ready for browning the turkey, and a 9x13-inch baking dish or similar ovenproof dish for assembling the bake. If using a jarred sauce, you can warm it slightly to make it easier to pour. Shred the cheddar if you bought it in a block. This prep ensures a smooth cooking process.
Ingredients at a glance (4)
- 12 oz medium pasta shells
- 1 lb ground turkey
- 3 cups creamy tomato sauce
- 2 cups shredded cheddar cheese
Instructions
Phase 1: Cook Pasta and Turkey
- Cook the Pasta and TurkeyBring a large pot of salted water to a boil. Add the pasta shells and cook according to package directions until al dente. Drain and set aside. While the pasta cooks, heat a large skillet over medium-high heat. Add the ground turkey and cook, breaking it up with a spoon, until browned and cooked through, about 8-10 minutes. Season with salt and pepper if desired.Look for The turkey is no longer pink and the pasta is tender but still firm to the bite.Safe temperature 160°F (71°C) internal temperature (ground meat)Tip For extra flavor, sauté a diced onion or garlic in the skillet before adding the turkey.
- Combine Pasta and TurkeyIn a large bowl, combine the cooked pasta and cooked ground turkey. Stir gently to mix. Alternatively, you can combine them directly in the baking dish.Look for The pasta and turkey are evenly distributed.Tip If using the same pot, make sure to drain any excess grease from the turkey before mixing.
At the end of this phase, the pasta is tender but still firm, and the turkey is fully browned with no pink remaining. The kitchen smells savory from the cooked meat. The pasta and turkey are ready to be combined in the baking dish. Check that the pasta is drained well and the turkey is crumbled into small pieces for even distribution.
Phase 2: Assemble and Bake
- Assemble the BakePreheat the oven to 375°F (190°C). Spread the pasta and turkey mixture evenly in a large baking dish. Pour the creamy tomato sauce over the top, making sure it covers the pasta and turkey evenly. Sprinkle the shredded cheddar cheese over the sauce.Look for The sauce covers the pasta and the cheese forms an even layer on top.Tip Use a spatula to gently press the pasta down so it is submerged in the sauce.
- Bake Until Golden and BubblingPlace the baking dish in the preheated oven and bake for 25-30 minutes, until the sauce is bubbling around the edges and the cheese is melted and golden brown. If the top browns too quickly, loosely cover with foil.Look for The edges are bubbly and the cheese is golden in spots.Tip Let the bake rest for 5 minutes before serving to set.
The baking dish is filled with the pasta-turkey mixture, covered with creamy tomato sauce, and topped with a generous layer of shredded cheddar.
As it bakes, the cheese melts and turns golden, while the sauce bubbles around the edges. The aroma is rich and comforting. Check that the cheese is evenly melted and the top is browned to your liking.
Phase 3: Serve
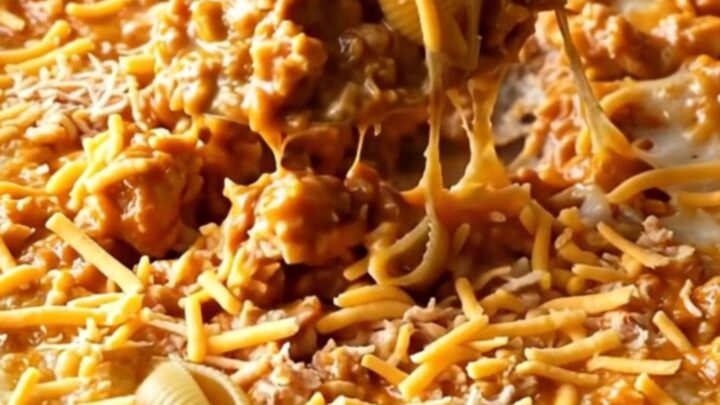
- ServeRemove the bake from the oven and let it stand for a few minutes. Use a large serving spoon to scoop out portions, making sure each serving has a good mix of pasta, turkey, and sauce. Serve hot.Look for The bake is steaming and the cheese is stretchy when lifted.Safe temperature 165°F (74°C) internal temperature (poultry)Tip Pair with a simple green salad or steamed vegetables for a complete meal.
The bake has rested for a few minutes, allowing the sauce to settle. When you lift a spoonful, the cheese stretches slightly and the pasta is coated in creamy sauce. The dish is hot and steaming, ready to be served. Check that each serving includes a good mix of pasta, turkey, and sauce, and that the temperature is safe to eat.
Common mistakes
One common mistake is overcooking the pasta before baking, which can lead to mushy shells. Cook the pasta just shy of al dente, as it will continue to cook in the oven. Another pitfall is not draining the ground turkey well after browning, which can make the bake greasy.
Use a slotted spoon to transfer the turkey to the baking dish, leaving excess fat behind. Also, be sure to spread the sauce evenly so every bite is coated. Finally, avoid overbaking, which can dry out the dish; remove it from the oven as soon as the cheese is golden and the sauce is bubbling.
How to tell it’s done
The bake is done when the sauce is bubbling around the edges and the cheese on top is melted and golden brown in spots. The internal temperature of the turkey should reach 160°F (71°C) as measured with an instant-read thermometer.
To check, insert the thermometer into the center of the bake, making sure it touches the turkey. If the top is browning too quickly before the center is hot, cover loosely with foil and continue baking. Let the dish rest for 5 minutes before serving to allow the sauce to set slightly and the cheese to firm up.
- Ground meat: 160°F (71°C) in the thickest part
- Poultry: 165°F (74°C) in the thickest part
Up next · Part 3 of 3
4 variations · storage & make-ahead · 5 answers · printable card
Tips, FAQ & printable recipe (Part 3)← Back to the ingredients (Part 1)