Dinner · Part 2 of 3: Instructions
Creamy Taleggio Polenta with Garlic Butter Mushrooms in One Skillet Step-by-step instructions
- Prep
- Cook
- Total
- Serves
- 4
Before you start
Take your time with each step, and the result will be worth every minute spent in the kitchen.
Keep all tools and bowls close at hand on the counter so the cooking flow stays calm, clean and steady from start to finish.
Ingredients at a glance (11)
- 4 cups water
- 1 tsp kosher salt, plus more to taste
- 1 cup coarse yellow polenta
- 3 tbsp unsalted butter, melted, divided
- 1 lb white button mushrooms, sliced, plus a few whole
- 1 shallot, finely chopped
- 3 cloves garlic, minced
- 4 sprigs fresh thyme, leaves stripped, plus 1 sprig for garnish
- 4 oz Taleggio cheese, rind removed, coarsely grated, plus more for topping
- 2 tbsp finely grated Parmesan, for serving
- freshly ground black pepper, to taste
Instructions
Prep and Aromatics
- Cook the polenta until thickBring the water and salt to a boil in a heavy saucepan. Whisk in the polenta slowly, reduce the heat to low, and stir often for about 25 minutes until the grains are tender and the polenta pulls away from the sides of the pan.Look for Polenta is thick, smooth, and tender, and it holds its shape on the spoon.Tip Whisk the polenta into the water in a slow stream to prevent lumps from forming.
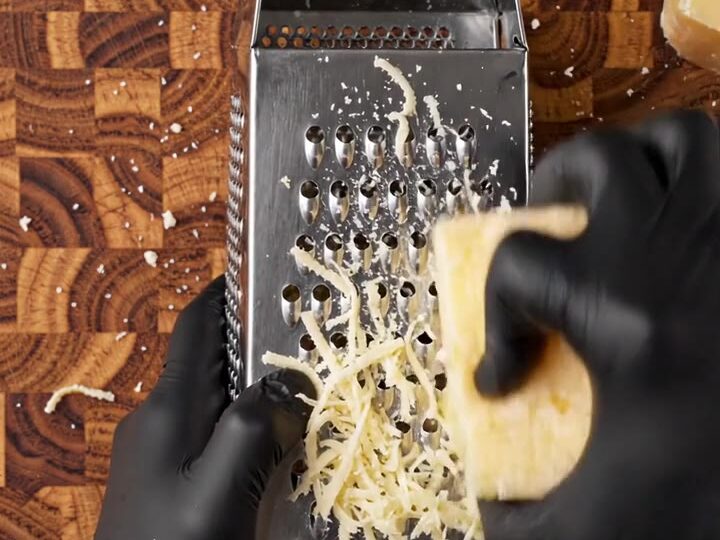
- Slice and prep the aromaticsWhile the polenta cooks, slice the mushrooms with a chef's knife, leaving a few whole. Finely chop the shallot, mince the garlic, and strip the thyme leaves from their stems. Grate the Taleggio on a box grater over a plate.Look for Mushroom slices are even, and the grated Taleggio falls in soft, pale shreds.Tip Chill the Taleggio for 10 minutes so it grates into clean shreds instead of smearing.
Every ingredient is evenly coated, fragrant and progressing at a steady gentle sizzle without sticking to the pan surface.
Take a moment to check the color, texture and aroma before moving on to the next stage.
Main Cooking Stage
- Brown the mushrooms in garlic butterMelt 2 tablespoons of the butter in a black cast-iron skillet over medium-high heat. Add the sliced mushrooms and cook for 6 to 8 minutes, stirring occasionally, until they turn golden brown. Add the shallot, garlic, and thyme leaves, plus the remaining butter, and cook 2 minutes until foamy and fragrant.Look for Mushrooms are golden brown, and the butter turns foamy and smells nutty and garlicky.Tip Do not crowd the skillet, or the mushrooms will steam instead of browning.
- Melt the Taleggio into the polentaSpoon the hot polenta into the center of the skillet, scatter the grated Taleggio over the top, and add a little more cheese. Stir with a wooden spoon until the cheese melts into the warm, smooth polenta and the mixture turns creamy.Look for Cheese has melted fully, and the polenta looks glossy and creamy.Tip Stir in a splash of hot water if the polenta stiffens before the cheese melts.
Every ingredient is evenly coated, fragrant and progressing at a steady gentle sizzle without sticking to the pan surface. Take a moment to check the color, texture and aroma before moving on to the next stage.
Final Glaze and Plating
- Plate the polenta and mushroomsTransfer the cheesy polenta to rustic ceramic bowls. Top each portion with the garlic butter mushrooms, a sprinkle of grated Parmesan, and black pepper. Finish each bowl with a fresh thyme sprig and serve while warm.Look for Bowls are golden and creamy, with melted cheese and glossy mushrooms on top.Tip Serve immediately, because polenta thickens quickly as it cools.
Every ingredient is evenly coated, fragrant and progressing at a steady gentle sizzle without sticking to the pan surface. Take a moment to check the color, texture and aroma before moving on to the next stage.
Common mistakes
Take your time with each step, and the result will be worth every minute spent in the kitchen.
Keep all tools and bowls close at hand on the counter so the cooking flow stays calm, clean and steady from start to finish.
How to tell it’s done
Take your time with each step, and the result will be worth every minute spent in the kitchen.
Keep all tools and bowls close at hand on the counter so the cooking flow stays calm, clean and steady from start to finish.
Up next · Part 3 of 3
2 variations · storage & make-ahead · 3 answers · printable card
Tips, FAQ & printable recipe (Part 3)← Back to the ingredients (Part 1)