Dinner · Part 2 of 3: Instructions
Creamy Swiss Ham and Noodle Casserole Step-by-step instructions
- Prep
- Cook
- Total
- Serves
- 6
Before you start
Before beginning, ensure all ingredients are measured and ready to go. Dice the ham into small, even cubes to ensure every serving has plenty of meat. Preheat the oven to 375°F (190°C) so it is ready once the assembly is complete.
Have a large mixing bowl ready for tossing the ingredients, and make sure the baking dish is clean and ready for the oven. Clearing the workspace helps maintain efficiency during the assembly process.
Ingredients at a glance (3)
- 12 oz wide egg noodles
- 2 cups diced ham
- 2 cups shredded Swiss cheese
Instructions
Noodle Preparation
- Prepare the noodlesBring a large pot of salted water to a boil. Add the wide egg noodles and cook according to the package directions until al dente. Drain the noodles thoroughly using a colander and set them aside.Look for Noodles should be firm to the bite, not mushy.Tip Ensure you do not overcook the noodles as they will continue to soften in the oven.
The noodles should be cooked to an al dente state, meaning they are tender but still retain a slight bite. Drain them well so that excess water does not dilute the rich cheese sauce later in the process. Once drained, they should be slightly warm when mixed with the other ingredients.
Mixing and Assembly
- Assemble the casseroleIn a large mixing bowl, combine the cooked noodles with the diced ham and half of the shredded Swiss cheese. Toss until the ingredients are evenly distributed. Transfer the mixture into a fluted baking dish.Look for The mixture should be well-combined.Tip Press the mixture down slightly into the dish for even heating.
The mixture should look uniform, with the ham and cheese evenly distributed among the noodles. The cheese should coat every strand of pasta thoroughly.
When transferred to the baking dish, the mixture should be leveled out to ensure it cooks evenly and creates a consistent base for the final cheese layer.
Baking to Perfection
- Bake and servePreheat the oven to 375°F (190°C). Sprinkle the remaining Swiss cheese over the top of the casserole. Bake for 20 to 25 minutes until the cheese is melted and bubbling. Let the casserole rest for 5 minutes before serving with a spoon.Look for The cheese should be golden and bubbling.Tip Watching for the cheese to brown slightly adds a nice texture to the top.
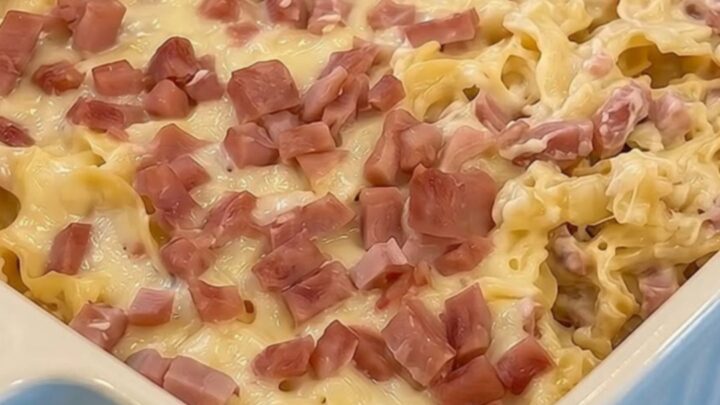
At the end of the baking phase, the casserole should look golden and inviting on top. The cheese should be completely melted and slightly browned in spots. The internal temperature should be hot throughout, and the dish should release a fragrant, savory aroma when pulled from the oven.
Common mistakes
Avoid overcooking the noodles during the initial boil, as they will continue to absorb moisture in the oven; aim for a firm al dente texture.
Do not skimp on the cheese, as it is the primary component of the sauce that prevents the casserole from becoming dry. Ensure the oven is fully preheated before placing the dish inside to promote even melting and proper browning of the cheese.
How to tell it’s done
The casserole is considered done when the cheese on top is fully melted and shows light golden spots. The sauce should be bubbling around the edges of the baking dish, indicating that the cheese has heated through.
A quick check with a spoon in the center confirms that the noodles are tender and the entire dish is piping hot throughout.
Up next · Part 3 of 3
2 variations · storage & make-ahead · 3 answers · printable card
Tips, FAQ & printable recipe (Part 3)← Back to the ingredients (Part 1)