Dinner · Part 2 of 3: Instructions
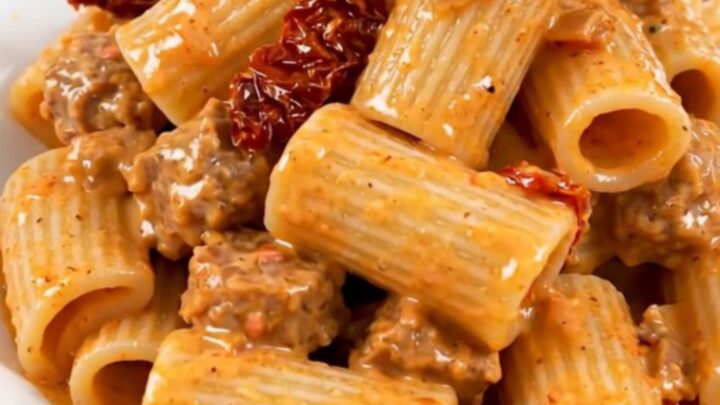
Creamy Sun-Dried Tomato and Italian Sausage Rigatoni Step-by-step instructions
- Prep
- Cook
- Total
- Serves
- 6
Before you start
Before starting, ensure you have a clean workspace and all ingredients measured and ready. If your Italian sausage is in casings, remove them before browning. Chop the sun-dried tomatoes into small, uniform pieces to ensure they distribute evenly throughout the dish.
Set your slow cooker on a level, heat-resistant surface and ensure the power cord is clear of any water or obstructions. Having your ingredients prepared in advance ensures a smooth, quick assembly process, allowing you to get the meal started without any unnecessary delays.
Ingredients at a glance (4)
- 1 lb Italian sausage, browned and drained
- 3/4 cup sun-dried tomatoes, chopped
- 1 packet Italian seasoning packet
- 8 oz cream cheese, cubed
Instructions
Browning the Sausage
- Prepare the BaseBrown the Italian sausage in a skillet over medium-high heat until fully cooked. Drain the excess fat thoroughly. Place the cooked sausage into the bottom of the slow cooker.Look for Sausage is browned and no longer pink.Safe temperature 160°F (71°C) internal temperature (ground meat)Tip Ensure the sausage is well-drained to keep the final sauce from becoming greasy.
The sausage should be thoroughly browned and crumbled into small pieces. Ensure all pink color is gone and the meat has reached a safe internal temperature. Drain the fat well before transferring to the slow cooker to maintain the proper sauce consistency.
Layering the Ingredients
- Combine IngredientsScatter the chopped sun-dried tomatoes over the sausage layer. Sprinkle the Italian seasoning packet evenly over the top, then place the cubed cream cheese directly in the center of the mixture.Look for Ingredients are layered as directed.Tip Do not stir yet; the slow cooker will melt the cheese into the sauce as it cooks.
All ingredients should be layered carefully in the slow cooker without mixing. The cream cheese cube should be placed in the center. Verify that the tomatoes are distributed across the surface to ensure their flavor permeates the entire dish during the cooking process.
Slow Cooking and Emulsification
- Slow Cook and FinishCover the slow cooker and cook on low for 4 hours. Once finished, stir the mixture vigorously until the cream cheese and seasonings combine into a smooth, glossy sauce. Serve immediately over cooked rigatoni pasta.Look for The sauce is creamy and uniform in color.Tip If the sauce seems too thick, add a splash of warm water or pasta cooking liquid until the desired consistency is reached.
After four hours, the mixture should be fragrant and the cheese should be fully softened. Stir the sauce vigorously until it becomes completely smooth and glossy. Check for consistency; if it is too thick, add a small amount of liquid to reach your preferred texture.
Common mistakes
A common mistake is failing to brown the sausage before adding it to the slow cooker. Browning is essential for building a deep, savory flavor and removing excess fat that would otherwise leave the sauce greasy.
Another error is stirring too early; allow the ingredients to sit undisturbed during the cooking cycle to ensure the cream cheese melts at the correct rate.
Finally, avoid using high heat settings, as this can cause the dairy to scorch or separate, ruining the texture of the sauce.
How to tell it’s done
The dish is ready when the cream cheese has fully melted and been stirred into a smooth, thick sauce. The sausage, having been browned beforehand, will be tender and infused with the flavors of the tomatoes and seasoning.
The sauce should be glossy and coat the back of a spoon. Because the sausage was cooked to 160°F (71°C) during the initial browning phase, it remains safe to eat. Ensure the final mixture is heated through before serving over your choice of pasta.
- Ground meat: 160°F (71°C) in the thickest part
Up next · Part 3 of 3
2 variations · storage & make-ahead · 3 answers · printable card
Tips, FAQ & printable recipe (Part 3)← Back to the ingredients (Part 1)