Desserts · Part 2 of 3: Instructions
Creamy Sugar-Free Rice Pudding Step-by-step instructions
- Prep
- Cook
- Total
- Serves
- 4
Before you start
Before starting the cooking process, ensure all your ingredients are measured and ready at your workstation. Rinse the short-grain white rice in a fine-mesh strainer under cold running water until the water runs mostly clear, then drain it thoroughly.
This step removes excess surface dust while keeping the core starch intact for thickening. Have a heavy-bottomed medium saucepan and a sturdy wooden spoon or silicone spatula ready, as frequent stirring is essential to prevent scorching.
Ingredients at a glance (4)
- 1/2 cup short-grain white rice, rinsed
- 4 cups whole milk
- 1/3 cup granular erythritol
- 1/2 tsp ground cinnamon, plus extra for dusting
Instructions
Initial Heating and Simmering
- Combine the rice and milkIn a medium saucepan, combine the rinsed short-grain white rice and the whole milk. Place the saucepan over medium heat and bring the mixture to a gentle boil, stirring frequently to prevent the rice from sticking to the bottom of the pan.Look for The milk will begin to foam and bubble gently around the edges.Tip Stir constantly during this initial stage to ensure the rice grains do not clump together.
At the end of this first phase, the milk and rice mixture should reach a very gentle boil on the stovetop. You will see small, active bubbles forming around the edges of the pan and a light steam rising from the surface. The rice grains will still be quite firm and settled at the bottom, requiring continuous and gentle stirring to keep them suspended in the heating milk.
Slow Cook and Thicken
- Simmer the rice until tenderReduce the heat to low to maintain a very gentle simmer. Cook the mixture uncovered for about thirty to thirty-five minutes, stirring frequently. Make sure to scrape the sides and bottom of the pan to prevent the milk from scorching.Look for The rice grains should be completely soft and tender, and the liquid should be thick.Tip Keep the heat as low as possible; a rapid boil will scorch the dairy and make the rice tough.
By the end of the second phase, the mixture will have completely transformed from a thin liquid into a thick, slowly bubbling porridge. The rice grains should be plump, swollen, and completely tender to the bite with no hard center remaining. They will be beautifully suspended in a creamy, reduced milk base that easily coats the back of your wooden spoon or spatula, indicating that the starch has done its job.
Sweetening and Final Rest
- Incorporate the sweetener and cinnamonStir in the granular erythritol and the ground cinnamon. Continue to cook the pudding over low heat for another five minutes, stirring constantly, until the sweetener is fully dissolved and the cinnamon is evenly distributed throughout the mixture.Look for The pudding will become glossy and slightly thicker as the sweetener dissolves.Tip Taste the pudding at this stage and adjust the sweetness or spice level to your preference.
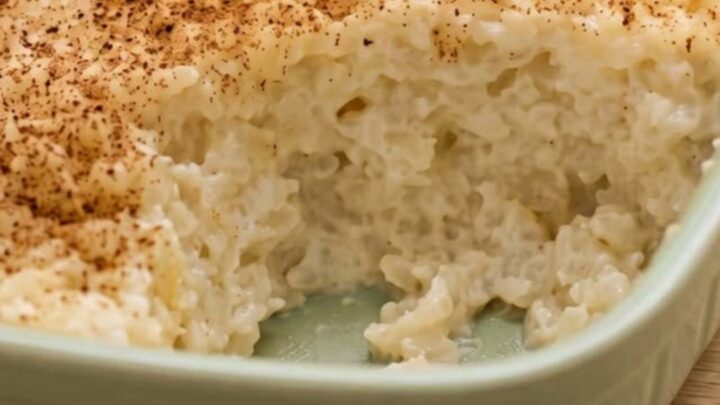
- Cool and dust with cinnamonRemove the saucepan from the heat. Let the rice pudding rest and cool for ten minutes at room temperature, stirring occasionally. The pudding will continue to thicken significantly as it cools. Spoon the warm pudding into serving dishes and dust the top with extra ground cinnamon before serving.Look for The pudding will achieve a rich, spoonable, and custard-like consistency.Tip Serve warm, or cover and refrigerate if you prefer a chilled dessert.
In the final phase, the sugar-free sweetener dissolves completely into the hot mixture, giving the rice pudding a beautiful glossy and appetizing sheen.
As the saucepan is removed from the heat and allowed to rest, the starches continue to bind with the remaining liquid as it cools down. This creates an incredibly thick, luxurious, and spoonable texture that is perfectly ready for a generous dusting of ground cinnamon before serving.
Common mistakes
The most common mistake when making stovetop rice pudding is using heat that is too high, which quickly scorches the milk on the bottom of the pan and creates burnt, bitter black flecks throughout the dish.
Another frequent error is failing to stir the mixture often enough, causing the rice to clump together or stick to the pan. Lastly, washing the rice too aggressively or soaking it beforehand can strip away the essential surface starches needed to naturally thicken the pudding into a rich, creamy consistency.
How to tell it’s done
You can tell the rice pudding is perfectly cooked and done when the individual rice grains are completely soft, tender, and yield easily to the bite with no chalky or hard core remaining.
The cooking liquid should have reduced significantly, leaving behind a thick, custard-like consistency that easily coats the rice and holds its shape slightly when scooped with a spoon. Keep in mind that the pudding will continue to thicken substantially as it cools during the resting period.
Up next · Part 3 of 3
2 variations · storage & make-ahead · 3 answers · printable card
Tips, FAQ & printable recipe (Part 3)← Back to the ingredients (Part 1)