Desserts · Part 2 of 3: Instructions
Creamy Strawberry Banana Wafer Dessert Step-by-step instructions
- Prep
- Cook
- Total
- Serves
- 6
Before you start
Before beginning, ensure all ingredients are ready and at the appropriate temperature. Wash and dry the strawberries thoroughly before slicing. Peel and slice the bananas just before assembly to prevent them from turning brown.
Ensure your glass dish is prepared and that your vanilla pudding is smooth and free of any lumps. Having all components organized on your counter will make the assembly process much faster and more enjoyable.
Ingredients at a glance (4)
- 2 cups vanilla pudding, prepared
- 1 cup fresh strawberries, sliced
- 3 ripe bananas, sliced
- 1 cup golden wafers, crushed
Instructions
Preparation of ingredients
- Prepare the layersBegin by slicing the fresh strawberries and ripe bananas into uniform rounds. Prepare the vanilla pudding if not already done, ensuring it has a smooth and velvety consistency before you start assembling the dessert.Look for The fruit should be sliced evenly to ensure consistent texture throughout the dessert.Tip Keep the fruit slices uniform to ensure each bite has a balanced ratio of fruit and cream.
The fruit should be sliced into uniform pieces, and the pudding should be smooth and ready for layering. Check that your work surface is clear and all necessary equipment is gathered to facilitate a seamless assembly process.
Layering the dessert
- Assemble the dishSpread a thin, even layer of the creamy vanilla pudding into the bottom of the glass dish. Follow this with a layer of sliced bananas and strawberries. Sprinkle a portion of the crushed golden wafers over the fruit, then repeat the layering process until all ingredients are used, finishing with a final layer of fruit and wafers.Look for The pudding should completely cover the fruit layer to prevent oxidation.Tip Press down gently with a spatula to ensure the layers are compact and visually appealing.
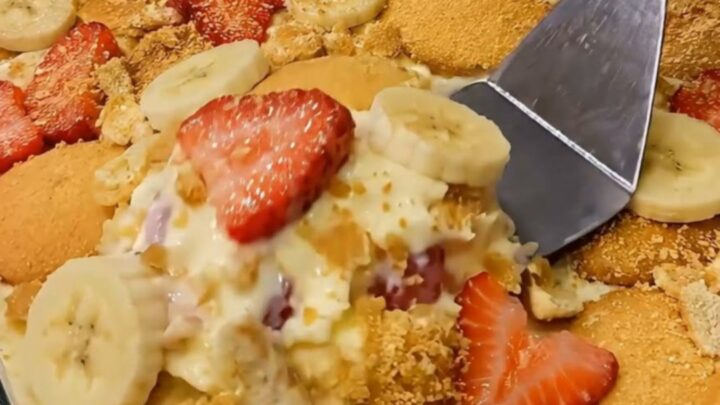
The dish should show distinct, even layers of pudding, fruit, and wafers. Ensure the final layer is topped with a decorative arrangement of fruit and wafers to create an inviting visual appeal before the chilling process begins.
Chilling and serving
- Chill and serveOnce assembled, place the dish in the refrigerator for at least one hour to allow the flavors to meld and the pudding to set properly. After chilling, serve the dessert chilled, ensuring each scoop captures every layer for the best presentation.Look for The dessert is ready once the pudding feels firm and the wafers have slightly softened from the moisture.Tip Use a sharp knife to clean the edges of the glass dish before serving for a professional look.
The dessert should be firm and chilled throughout. Before serving, verify that the pudding has set and the flavors have fully melded, resulting in a cohesive texture that is easy to scoop and serve to your guests.
Common mistakes
A common mistake is using overripe bananas that are too soft, which can make the dessert mushy; choose firm, ripe bananas instead.
Another issue is adding too much liquid to the pudding, which can prevent the layers from setting properly.
Always use a gentle hand when layering to maintain the visual distinction between the fruit, cream, and wafer sections, and avoid overworking the mixture during the assembly process.
How to tell it’s done
The dessert is considered done once it has been chilled for at least one hour. The pudding should be firm to the touch, and the wafers should have softened slightly while retaining a subtle crunch.
There are no raw proteins to worry about, so simply ensure the layers have set sufficiently to allow for clean scooping and serving without the dessert collapsing into the dish.
Up next · Part 3 of 3
2 variations · storage & make-ahead · 3 answers · printable card
Tips, FAQ & printable recipe (Part 3)← Back to the ingredients (Part 1)