Desserts · Part 2 of 3: Instructions
Creamy Strawberry Banana Pudding with Vanilla Wafers Step-by-step instructions
- Prep
- Cook
- Total
- Serves
- 8
Before you start
Before you begin assembling the dessert, ensure that all your ingredients are prepared and ready at your workstation. Wash, hull, and slice the strawberries into uniform pieces. Peel and slice the bananas, keeping the slices relatively even so they layer flat.
If you are preparing your own pudding from a mix, ensure it has been allowed to cool to room temperature or chilled slightly before use. Have your casserole dish clean and dry, and set your vanilla wafers out for easy access during the layering process.
Ingredients at a glance (4)
- 2 cups vanilla pudding, prepared
- 12 oz vanilla wafers
- 2 cups fresh strawberries, sliced
- 3 large bananas, sliced
Instructions
Base assembly
- Prepare the base layersBegin by spreading a thin, even layer of the prepared vanilla pudding across the bottom of the casserole dish. This creates a solid foundation for the cookies and fruit to adhere to, ensuring that the dessert remains stable when serving. Use a large spoon to smooth the pudding out to the edges of the dish, maintaining a consistent thickness throughout the base layer.Look for The pudding should cover the entire bottom surface of the dish smoothly.Tip Ensure the pudding is chilled before starting to help the layers set more effectively.
At the end of this phase, you should have a smooth, even layer of vanilla pudding covering the entire bottom of your casserole dish. Check that there are no gaps or dry spots, as this base layer is crucial for holding the subsequent layers in place. The pudding should be thick enough to prevent the cookies from sliding, providing a stable foundation for the fruit and wafer layers that follow in the next steps.
Layering the ingredients
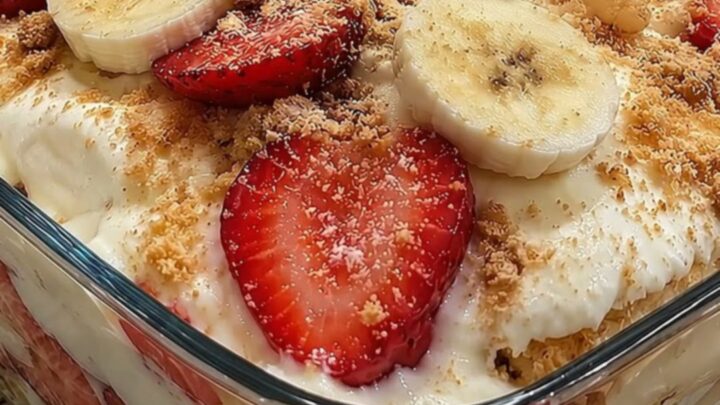
- Layer the cookies and fresh fruitPlace a single layer of vanilla wafers over the pudding base. Follow this with a generous layer of sliced strawberries and bananas. Continue repeating these layers of pudding, wafers, and fresh fruit until all ingredients are used, finishing with a final layer of pudding topped with a decorative arrangement of crushed cookies and sliced fruit pieces.Look for The dish should be filled to the top with alternating layers of fruit and wafers.Tip Distribute the fruit slices evenly so every serving contains a good mix of flavors.
As you finish layering, the dish should be filled with visible, distinct stripes of pudding, fruit, and wafers. Check that the fruit slices are distributed evenly across the surface of each layer to ensure consistency in every bite. The final layer should be neatly arranged, with the pudding smoothed over the top and a light dusting of crushed cookies and fresh fruit pieces to provide a visually appealing finish to the dessert.
Chilling and setting
- Chill and serveCover the casserole dish securely and place it in the refrigerator. Allow the pudding to chill for at least one hour before serving. This resting period is essential as it allows the cookies to soften slightly from the moisture of the pudding and fruit, creating that signature harmonious texture. Once chilled, serve cold directly from the dish with a large spoon.Look for The pudding should feel firm and the cookies softened when pierced with a spoon.Tip If preparing for a large gathering, chill for up to four hours for the best texture.
Once the chilling phase is complete, the entire dish should feel cold and solid. When you press slightly on the top, it should offer a gentle resistance.
The cookies should have absorbed enough moisture from the pudding and fruit to become tender, and the entire structure should hold together when scooped. Ensure the dish has been kept in the refrigerator for the full required time to guarantee the best texture and flavor development.
Common mistakes
A common mistake is using bananas that are overly ripe or mushy, which can cause the pudding to become watery. Always choose bananas that are yellow with just a few brown spots for the best structure.
Another error is rushing the chilling process; if you serve the pudding too soon, the wafers will remain hard and the flavors will not have time to meld. Ensure the pudding is fully chilled to achieve the desired consistency, and avoid over-mixing the layers during assembly to keep the fruit slices intact.
How to tell it’s done
The dessert is considered done once it has been properly chilled in the refrigerator for at least one hour. You will know it is ready when the pudding feels slightly firm to the touch and the vanilla wafers have softened significantly.
When you insert a serving spoon, it should glide through the layers with ease, indicating that the moisture has been well-distributed. There is no protein to cook, so you are simply looking for the correct chilled temperature and integrated texture.
Up next · Part 3 of 3
2 variations · storage & make-ahead · 3 answers · printable card
Tips, FAQ & printable recipe (Part 3)← Back to the ingredients (Part 1)