Dinner · Part 2 of 3: Instructions
Creamy Sour Cream Chicken Enchiladas Step-by-step instructions
- Prep
- Cook
- Total
- Serves
- 4
Before you start
Before beginning the cooking process, organize all ingredients and kitchen tools to ensure a smooth workflow. Measure out the sour cream and shredded cheese. Shred the cooked chicken if not already prepared.
Lightly grease a 9x13-inch baking dish with cooking spray or a small amount of butter. Preheating the oven to 375°F (190°C) ensures it reaches the correct temperature by the time the enchiladas are assembled and ready to bake.
Ingredients at a glance (5)
- 3 cups shredded cooked chicken, store-bought or made ahead
- 8 flour tortillas
- 1 1/2 cups sour cream
- 2 cups shredded Monterey Jack cheese
- 2 tbsp chopped fresh parsley
Instructions
Assembling the Tortillas
- Prepare the Oven and DishPreheat the oven to 375°F (190°C). Lightly grease a 9x13-inch baking dish. Lay out the flour tortillas on a clean work surface, ready for assembly.Look for The oven should be fully preheated and the baking dish lightly coated.Tip Using a light spray of cooking oil prevents the tortillas from sticking.
- Roll the EnchiladasDivide the shredded cooked chicken evenly among the tortillas. Roll each tortilla up tightly around the chicken and place them seam-side down in the prepared baking dish.Look for The rolled tortillas should fit snugly in a single layer.Tip Placing them seam-side down keeps them from opening during baking.
When rolling the tortillas, they should feel snug and secure, placed seam-side down in the baking dish so they do not unfurl. The assembled dish should show a neat row of rolled tortillas filled with savory chicken, waiting for their creamy blanket.
Adding the Creamy Layer
- Pour the Sour CreamSpread the sour cream evenly over the rolled tortillas, covering them completely to ensure they stay tender and moist during baking.Look for The tortillas should be fully blanketed in a smooth layer of sour cream.Tip Use the back of a spoon or a spatula to smooth the cream evenly.
At the end of this phase, the sour cream should be spread in a thick, even layer over the tortillas, completely covering them. The dish is now ready for the cheese topping, ensuring every bite will be rich and creamy.
Baking to Golden Perfection
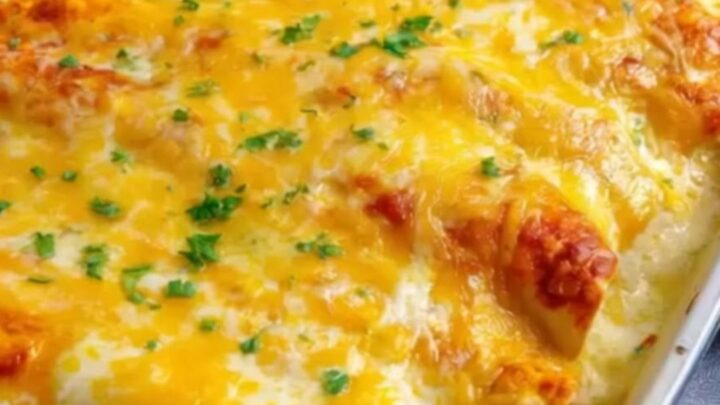
- Add Cheese and BakeSprinkle the shredded Monterey Jack cheese evenly over the sour cream layer. Bake for 20 to 25 minutes until the cheese is completely melted, bubbling, and sizzling golden-brown.Look for Look for a bubbling edge and a beautifully browned cheese crust.Tip If the cheese is not browning enough, broil for the final 2 minutes.
- Garnish and ServeRemove the hot casserole from the oven and let it rest for 5 minutes. Garnish with the fresh chopped parsley. Use a spatula to lift and serve, enjoying the gooey melted cheese pull.Look for The dish should release a gentle steam and hold its shape slightly when sliced.Tip Letting the casserole rest prevents the creamy sauce from running too much.
As the baking time concludes, the kitchen should be filled with a rich, savory aroma.
The cheese on top must be completely melted, bubbling vigorously around the edges, and showing beautiful golden-brown spots. Gentle steam should rise from the casserole.
Common mistakes
A common mistake is using light sour cream or sour cream alternatives, which contain more water and can split or become watery during baking, leaving a thin texture. Always opt for standard full-fat sour cream for the richest, most stable results.
Another error is overfilling the tortillas, which leads to tearing and messy assembly. Keep the chicken portions balanced so each tortilla rolls up cleanly and fits neatly in the baking dish.
How to tell it’s done
The enchiladas are perfectly done when the sour cream is bubbling hot throughout the dish and the cheese on top has transformed into a melted, golden-brown crust.
Since the chicken is pre-cooked, the main goal of baking is to heat the interior thoroughly and melt the cheese. Ensure the chicken filling is heated through to guarantee food safety and optimal warmth upon serving.
Up next · Part 3 of 3
2 variations · storage & make-ahead · 3 answers · printable card
Tips, FAQ & printable recipe (Part 3)← Back to the ingredients (Part 1)