Dinner · Part 2 of 3: Instructions
Creamy Sour Cream Chicken Enchilada Casserole Step-by-step instructions
- Prep
- Cook
- Total
- Serves
- 6
Before you start
Before beginning, ensure that the chicken is fully cooked and shredded into manageable pieces. Preheat the oven to 375°F (190°C) so it is ready for the casserole.
Have all ingredients measured and the baking dish placed on a stable, flat surface to facilitate easy layering.
Ingredients at a glance (4)
- 8 count flour tortillas, torn into pieces
- 3 cups cooked shredded chicken
- 2 cups sour cream and green chile sauce
- 2 cups shredded Monterey Jack cheese
Instructions
Preparation and Layering
- Layering the basePreheat the oven to 375°F (190°C). Begin by arranging half of the torn flour tortillas at the bottom of a 9x13 inch ceramic baking dish, ensuring an even layer to create the base for the casserole.Look for The bottom of the dish should be covered with a layer of tortilla pieces.Tip Tear the tortillas into large bite-sized pieces to ensure they hold their structure during the baking process.
- Adding chicken and sauceDistribute the shredded chicken evenly over the tortilla layer. Pour half of the sour cream and green chile sauce over the chicken, using a spatula to spread it gently so it coats the meat and tortillas thoroughly.Look for The sauce should be distributed evenly across the surface of the chicken.Tip Ensure the chicken is fully shredded to allow the creamy sauce to penetrate every layer of the dish.
At this stage, the base layers of tortillas, chicken, and sauce should be neatly arranged in the baking dish.
The ingredients should look uniform, with the sauce covering the chicken adequately to ensure moisture retention throughout the baking process.
Final Assembly
- Building the second layerRepeat the layering process by adding the remaining torn tortillas, the rest of the shredded chicken, and the remaining sour cream sauce on top. Finish by scattering the shredded Monterey Jack cheese over the entire surface.Look for The cheese should form a complete, even layer over the top of the casserole.Tip Spread the cheese right to the edges of the baking dish for a delicious crusty finish on the sides.
The casserole should now be fully layered with the final portion of cheese covering the top surface. The dish should feel heavy and well-composed, ready to be moved into the oven for the baking phase.
Baking and Finishing
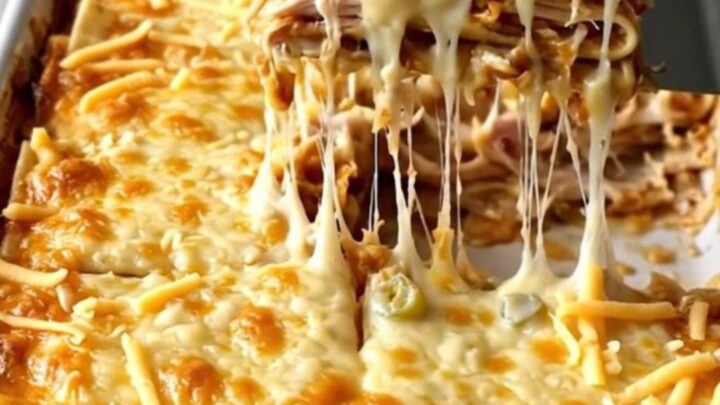
- Baking to perfectionPlace the dish in the preheated oven and bake for 30 minutes. The casserole is ready when the cheese is melted, spotted golden brown, and the sauce is bubbling at the edges, ensuring the internal temperature of the chicken reaches 165°F (74°C).Look for The cheese should be golden and the edges should show active bubbling.Safe temperature 165°F (74°C) internal temperature (poultry)Tip Let the casserole rest for 5 minutes before serving to allow the layers to set for easier scooping.
When finished, the casserole will be bubbling with a golden, melted cheese crust. The kitchen should smell savory and slightly tangy, indicating that the flavors have melded perfectly during the cooking time.
Common mistakes
Avoid over-crowding the layers, as this can prevent the sauce from reaching the bottom tortillas, leading to uneven cooking.
Additionally, ensure that the cheese is spread evenly; concentrated piles of cheese may burn before the rest of the dish is adequately heated. Finally, do not skip the resting period, as the sauce needs time to stabilize for clean serving portions.
How to tell it’s done
The casserole is considered done when the cheese on top has developed a golden-brown hue and the sauce is bubbling vigorously around the edges of the dish.
The internal temperature of the chicken should reach at least 165°F (74°C). Allow the dish to rest for 5 minutes after removing it from the oven to ensure the layers hold together when serving.
- Poultry: 165°F (74°C) in the thickest part
Up next · Part 3 of 3
2 variations · storage & make-ahead · 3 answers · printable card
Tips, FAQ & printable recipe (Part 3)← Back to the ingredients (Part 1)