Dinner · Part 2 of 3: Instructions
Creamy Slow Cooker Swiss Chard Gratin Step-by-step instructions
- Prep
- Cook
- Total
- Serves
- 4
Before you start
Before beginning, ensure the Swiss chard is thoroughly washed to remove any grit or soil from the leaves. Use a sharp chef's knife to chop the greens into uniform, bite-sized pieces. Grate the garlic finely to ensure it disperses evenly throughout the dish.
Gather all necessary dry seasonings and the crème fraîche. Check that the slow cooker insert is clean and dry. Having all components ready for immediate assembly will make the process smooth and efficient, allowing for a quick transition from preparation to cooking.
Ingredients at a glance (5)
- 2 lbs Swiss chard, washed and chopped into bite-sized pieces
- 3 cloves garlic, finely grated
- 1/4 tsp ground nutmeg
- 1/4 tsp black pepper
- 1 cup crème fraîche
Instructions
Preparation and layering
- Layer the greensPlace the chopped Swiss chard pieces into the bottom of the slow cooker insert, ensuring they are evenly distributed to allow for uniform cooking throughout the process.Look for The slow cooker should be filled with raw chard leaves.Tip Remove thick stems if a softer texture is desired.
At the end of this phase, the slow cooker should be filled with layers of raw Swiss chard, finely grated garlic, and seasonings. The chard should be distributed evenly to ensure that the heat will penetrate the mass uniformly. The appearance will be bulky initially, but the volume will reduce significantly as the greens cook. Ensure the crème fraîche is dolloped evenly on top to facilitate a smooth melt as the cooking begins.
Infusion and braising
- Season and add creamScatter the grated garlic over the chard, then sprinkle the ground nutmeg and black pepper over the top. Spoon the crème fraîche over the ingredients to create a creamy coating.Look for The crème fraîche should be dolloped across the surface.Tip Do not stir yet; the slow cooking process will distribute the flavors naturally.
During this phase, the slow cooker works to break down the tough fibers of the chard while infusing the leaves with the flavors of the garlic and nutmeg. The crème fraîche will begin to liquefy and trickle down through the layers.
You should notice a pleasant, aromatic scent filling the kitchen. The greens will lose their vibrant raw appearance, turning a deep, cooked green, and the sauce will begin to thicken as it incorporates the juices from the chard.
Final reduction and serving
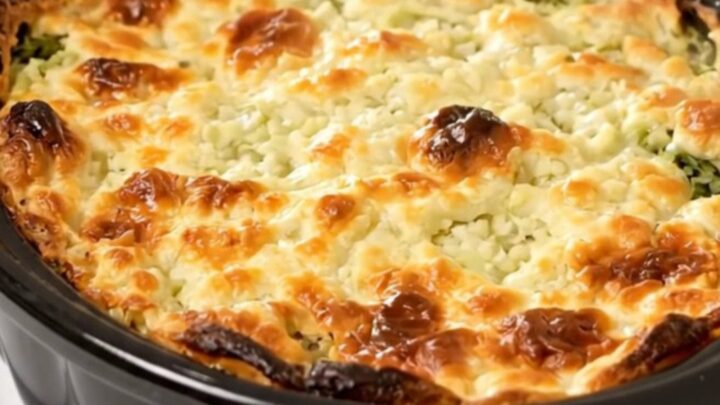
- Slow cook and finishCover the slow cooker and cook on low for 3 hours. Once finished, check that the chard is tender and the sauce is bubbling. Serve hot on a clean plate.Look for The greens should be wilted and tender with a golden-brown edge.Tip Ensure the lid stays closed to trap the steam and moisture.
In this final stage, the gratin reaches its peak texture. The greens are soft and succulent, fully enveloped in a rich, creamy sauce. The edges will show a slight golden color, indicating the gratin is ready. Check that the moisture level is to your preference; if it is too runny, you may leave the lid ajar for a short time to reduce the sauce. The final dish should be served warm, with the creamy elements holding everything together perfectly.
Common mistakes
A common mistake is overcrowding the slow cooker without allowing the greens to wilt down, which can lead to uneven cooking. Ensure the chard is processed as directed to avoid large, tough pieces.
Another error is stirring the gratin too early or too often; the beauty of this dish is the layering method, which allows the flavors to meld during the long, slow cook time. Finally, avoid using alternative dairy products that may curdle or separate under the heat.
How to tell it’s done
The gratin is done when the Swiss chard is completely tender and has collapsed significantly in volume. The crème fraîche should have reduced slightly, forming a cohesive, creamy sauce that coats the greens.
The edges of the gratin touching the ceramic insert may appear slightly golden-brown, which indicates the sugars have developed nicely. The entire dish should be steaming hot throughout and emit a fragrant, savory aroma. No specific temperature is required for this vegetarian dish, but it should be piping hot when served.
Up next · Part 3 of 3
2 variations · storage & make-ahead · 3 answers · printable card
Tips, FAQ & printable recipe (Part 3)← Back to the ingredients (Part 1)