Dinner · Part 2 of 3: Instructions
Slow Cooker Creamed Peas and Pearl Onions Step-by-step instructions
- Prep
- Cook
- Total
- Serves
- 6
Before you start
Before starting, measure the frozen peas and pearl onions. If using fresh pearl onions, peel them and blanch them briefly. Soften the cream cheese by leaving it at room temperature for 30 minutes or microwaving it for a few seconds. Have the slow cooker ready and the garlic powder measured. No other preparation is needed; this recipe is truly set-and-forget.
Ingredients at a glance (4)
- 4 cups frozen green peas
- 1 cup frozen pearl onions
- 1 tsp garlic powder
- 8 oz cream cheese, softened
Instructions
Assembling the Ingredients
- Add the peas and onionsPlace the frozen peas in the slow cooker insert and spread them into an even layer. Scatter the frozen pearl onions over the peas, distributing them evenly.Look for The bottom of the slow cooker is covered with a green layer of peas and onions.Tip No need to thaw the vegetables; they will cook perfectly from frozen.
- Season and top with cream cheeseSprinkle the garlic powder over the vegetables. Place the block of cream cheese in the center of the slow cooker, on top of the peas and onions.Look for The cream cheese block sits in the middle, surrounded by peas and onions.Tip Soften the cream cheese beforehand so it melts more quickly and evenly.
At this stage, the slow cooker contains a layer of bright green peas and pearl onions, with garlic powder sprinkled over the top. The cream cheese block sits in the center, looking like a white island in a sea of green.
The aroma is clean and fresh, with a hint of garlic. Before moving on, ensure the ingredients are evenly distributed and the cream cheese is centered.
Slow Cooking
- Cook on lowCover the slow cooker and cook on low for 2 1/2 to 3 hours, until the peas are tender and the cream cheese has melted into a creamy sauce.Look for The cream cheese has melted and the sauce looks smooth and creamy.Tip Stir gently once halfway through, if possible, to help the cream cheese incorporate.
As the slow cooker heats, the cream cheese begins to soften and melt, pooling around the peas and onions. The sauce gradually becomes creamy and the peas turn a deeper green.
The kitchen fills with a warm, savory scent. After about 2 1/2 hours, the cream cheese should be mostly melted; a gentle stir will help it fully incorporate. The peas should be tender but not falling apart.
Finishing and Serving
- Stir and serveStir the mixture well to combine the melted cream cheese with the peas and onions, creating a thick, creamy sauce. Serve warm directly from the slow cooker or transfer to a serving bowl.Look for The sauce is thick and coats the peas and onions evenly.Tip For a thinner sauce, stir in a splash of milk or chicken broth.
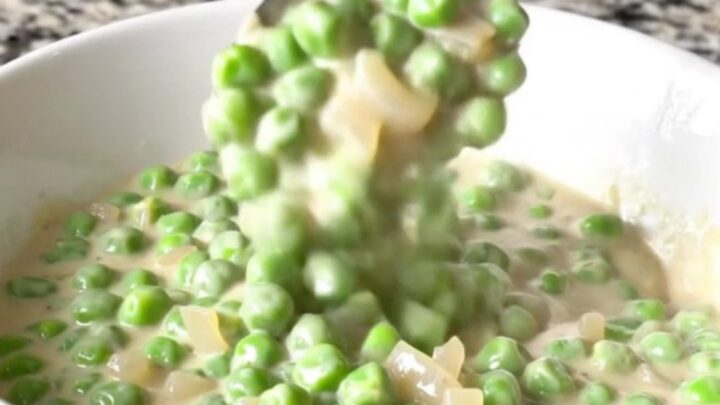
The final dish has a thick, creamy sauce that coats every pea and onion. The color is a soft, appetizing green with a glossy sheen. The onions are translucent and tender, and the sauce is smooth and rich.
Stir well to ensure everything is evenly coated, then serve warm. The texture should be creamy and comforting, with a delicate balance of sweet peas and savory garlic.
Common mistakes
The most common mistake is overcooking the peas, which can make them mushy and dull in color. Stick to the recommended cooking time and check for doneness early. Another mistake is adding the cream cheese in cold chunks; this can lead to lumps.
Always soften the cream cheese and stir well after cooking. Finally, avoid opening the slow cooker lid frequently, as this releases heat and extends cooking time.
How to tell it’s done
The dish is done when the peas are tender but still hold their shape, and the pearl onions are soft enough to be pierced easily with a fork. The cream cheese should be completely melted and the sauce smooth and creamy. If the sauce seems too thin, let it cook uncovered for an additional 15-20 minutes to thicken. If it is too thick, stir in a splash of milk or broth.
Up next · Part 3 of 3
4 variations · storage & make-ahead · 5 answers · printable card
Tips, FAQ & printable recipe (Part 3)← Back to the ingredients (Part 1)