Dinner · Part 2 of 3: Instructions
Creamy Slow Cooker Parsnip and Pear Soup with Blue Cheese Step-by-step instructions
- Prep
- Cook
- Total
- Serves
- 4
Before you start
Before you begin, ensure your slow cooker insert is clean and placed on a stable, heat-resistant surface near an electrical outlet. Peel the parsnips thoroughly to remove any bitter skin, and wash the pears before slicing them into thick wedges.
Having all ingredients measured and ready to go will make the assembly phase seamless. Ensure your immersion blender is clean and stored nearby so it is ready for the final blending step once the cooking time is complete.
Ingredients at a glance (5)
- 4 cups parsnips, peeled and chopped
- 2 medium pears, sliced
- 1 cube vegetable bouillon cube
- 4 cups water
- 1/2 cup blue cheese, crumbled
Instructions
Preparation and assembly
- Assemble ingredientsPlace the chopped parsnips into the bottom of the slow cooker insert. Arrange the sliced pears evenly over the top of the parsnips to ensure even softening during the cooking process.Look for Parsnips should be peeled and cut into uniform chunks for even cooking.Tip Keep the parsnip chunks approximately one inch in size so they tenderize simultaneously with the pear slices.
At the end of this phase, the slow cooker is filled with uniform pieces of parsnip and pear, topped with the bouillon cube and water. The ingredients should look orderly, and the water level should be just enough to cover the solids without floating them excessively, ensuring the heat distribution remains efficient throughout the long cooking cycle.
Slow cooking process
- Season and add liquidCrumble the vegetable bouillon cube directly over the fruit and vegetables. Carefully pour the water over the mixture, ensuring the bouillon is distributed to flavor the liquid base as it heats.Look for The water should just cover the vegetables and pears to create a balanced soup consistency.Tip Use warm water to help the bouillon cube dissolve faster as the slow cooker begins to heat up.
After four hours on high, the kitchen should be filled with a mild, sweet, and savory aroma. The parsnips should look significantly softer and have absorbed the liquid, while the pears should be mostly translucent. The bouillon will have fully integrated into the cooking liquid, creating a fragrant base ready to be blended into a smooth soup.
Blending and finishing
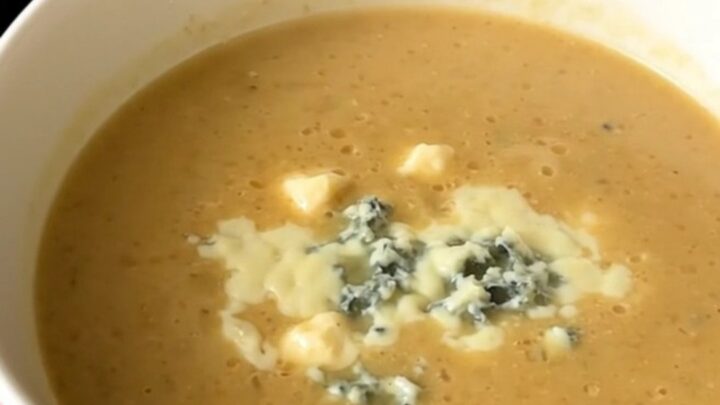
- Slow cook and finishCover the slow cooker and cook on high for four hours. Once tender, use an immersion blender to process the mixture until completely smooth and velvety. Serve in bowls topped with a generous sprinkle of crumbled blue cheese.Look for The soup is ready when the parsnips are fork-tender and the mixture is glossy after blending.Tip Let the soup cool for a few minutes after blending before stirring in the blue cheese to prevent it from melting away entirely.
The soup is ready when the immersion blender has processed the mixture into a perfectly smooth, glossy puree with no visible chunks remaining. It should look creamy and light-colored.
Once ladled into bowls, the final checkpoint is the addition of the blue cheese, which should stand out as a beautiful, contrasting garnish against the smooth, pale soup.
Common mistakes
A common mistake is overcrowding the slow cooker or using unevenly sized chunks of parsnips, which leads to some pieces being mushy while others remain hard. Always cut your vegetables to a similar size.
Another error is adding the blue cheese during the cooking process; always reserve the cheese as a topping to be added just before serving. Adding it too early will cause it to melt completely into the soup, losing the distinct texture and sharp flavor pockets.
How to tell it’s done
The soup is finished when the parsnips are completely tender and can be easily pierced with a fork with no resistance. The pears should have completely softened and essentially disappeared into the broth.
When using an immersion blender, the soup should transform into a thick, glossy, and uniform puree. If the soup appears too thick for your preference, you may stir in a small amount of warm water or vegetable broth until the desired consistency is achieved.
Up next · Part 3 of 3
2 variations · storage & make-ahead · 3 answers · printable card
Tips, FAQ & printable recipe (Part 3)← Back to the ingredients (Part 1)