Desserts · Part 2 of 3: Instructions
Creamy Slow Cooker Orange Zest Rice Pudding Step-by-step instructions
- Prep
- Cook
- Total
- Serves
- 4
Before you start
Before beginning, ensure that your slow cooker is clean and positioned on a stable, heat-resistant surface near a power outlet. Gather all your ingredients, including the round dessert rice, fresh orange, sugar, and whole milk, so they are ready for assembly.
Using a fresh orange is recommended, as the oils in the zest provide the most vibrant flavor. Have a vegetable peeler or a sharp paring knife ready to remove the orange zest in a single, clean strip, which will be easy to identify and remove once the cooking process has finished.
Ingredients at a glance (4)
- 1 cup round dessert rice
- 1 strip orange peel
- 1/2 cup white sugar
- 4 cups whole milk
Instructions
Phase 1: Assembly
- Combine IngredientsPlace the round dessert rice into the base of the slow cooker. Add the strip of orange peel, sprinkle the white sugar evenly over the rice, and pour in the whole milk. Ensure the ingredients are distributed well in the base of the cooking vessel before starting.Look for The milk should cover the rice completely.Tip Using a vegetable peeler helps remove only the colored part of the orange peel, avoiding the bitter white pith.
At the end of this phase, the ingredients are layered in the slow cooker. The rice is at the bottom, topped with the orange peel and sugar, and covered with milk. Ensure the milk has fully submerged the rice grains so they cook evenly throughout the process. The slow cooker should be clean on the outside and ready to be plugged in to begin the gentle heating cycle.
Phase 2: Slow Cooking
- Slow Cook the PuddingCover the slow cooker with its lid. Cook the mixture on low heat for approximately 3 hours. Periodically check the consistency to ensure the rice is absorbing the milk and thickening into a creamy, luscious pudding texture. Maintain a steady heat throughout the process for even cooking.Look for The mixture should look thick and creamy.Tip Avoid lifting the lid too often during the first two hours to maintain consistent internal temperature for the rice.
During this phase, the pudding transforms as the rice grains swell and absorb the milk. The mixture will begin to smell fragrant and sweet, with the citrus notes permeating the entire kitchen. Check that the lid is tightly sealed to trap the steam, which is essential for cooking the rice through. The pudding should look thicker and more cohesive as the starches continue to release into the milk.
Phase 3: Final Resting
- Rest and ServeOnce the cooking time is complete, turn off the slow cooker and remove the orange peel strip. Allow the pudding to rest for 15 minutes before serving. This rest period is crucial as it allows the pudding to settle and reach its final, perfect creamy consistency. Serve warm in individual bowls.Look for The pudding will thicken as it cools slightly.Tip Stir the pudding gently before serving to incorporate any milk that may have settled at the bottom.
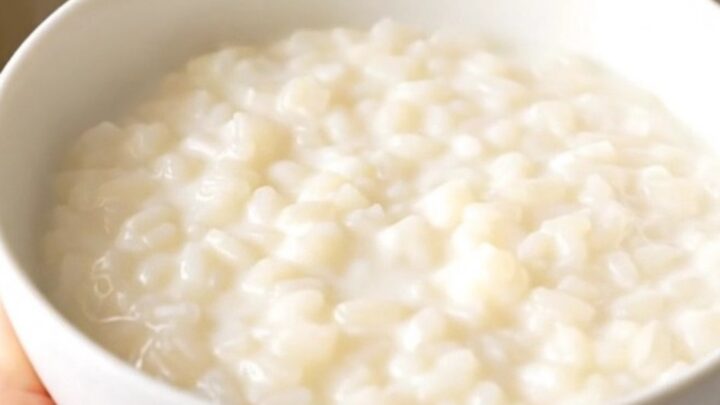
Once the cooking is complete, the pudding should be thick, creamy, and fragrant. The orange peel has infused its essential oils into the dish. After the 15-minute rest, the pudding will have settled into a perfect, spoonable consistency.
Verify that the peel is removed entirely before serving, and stir once to ensure the creamy texture is uniform throughout the final dish, ready to be portioned into bowls.
Common mistakes
A common mistake is using the wrong type of rice. Avoid long-grain or parboiled rice, as these will remain firm and fail to create the necessary creamy base.
Another oversight is failing to remove the orange peel before serving; while it provides excellent flavor during the cooking process, the peel itself can be bitter and tough, so it must be discarded. Finally, ensure the slow cooker is not overcrowded, as this can lead to uneven cooking and potential spills during the long heating cycle.
How to tell it’s done
The pudding is done when the rice is tender and the liquid has thickened into a creamy, glossy consistency that coats the back of a spoon. Because this recipe does not involve raw proteins, there is no specific temperature to monitor, but the pudding should be steaming hot throughout.
If the mixture appears too thick, a small splash of warm milk can be stirred in just before serving to reach your desired consistency, ensuring it remains smooth and inviting for every guest.
Up next · Part 3 of 3
2 variations · storage & make-ahead · 3 answers · printable card
Tips, FAQ & printable recipe (Part 3)← Back to the ingredients (Part 1)