Dinner · Part 2 of 3: Instructions
Creamy Slow Cooker Jerk Chicken for an Easy Weeknight Dinner Step-by-step instructions
- Prep
- Cook
- Total
- Serves
- 6
Before you start
Before beginning, ensure your slow cooker is positioned on a level, heat-resistant surface away from any water sources. Take the chicken thighs out of the refrigerator approximately 20 minutes before cooking to help them reach a more uniform temperature.
Prepare the red and green peppers by washing them thoroughly and slicing them into uniform strips, removing the seeds and stems as you work.
Ingredients at a glance (4)
- 6 boneless skinless chicken thighs
- 1 cup red and green pepper strips
- 2 tbsp jerk seasoning
- 1 cup coconut milk
Instructions
Phase 1: Preparation
- Layering the ingredientsPlace the boneless skinless chicken thighs into the stoneware of the slow cooker, arranging them in a single layer to ensure even cooking throughout the process.Look for The chicken should be tiled edge to edge.Tip Avoid overcrowding the slow cooker to keep the cooking time consistent.
The chicken should be arranged in a single, tight layer across the bottom of the slow cooker stoneware. This ensures that every piece of meat is in contact with the base, promoting even heat conduction and consistent cooking throughout the initial stages of the braising process.
Phase 2: Seasoning
- Seasoning and adding liquidScatter the red and green pepper strips over the chicken. Sprinkle the jerk seasoning evenly across the surface, then pour the coconut milk over the top to submerge the ingredients.Look for The peppers should be distributed evenly.Tip Pouring the milk slowly helps keep the seasoning in place.
The peppers should be scattered visibly over the chicken, and the jerk seasoning should be distributed evenly to cover all surfaces.
Once the coconut milk is poured over, it should begin to settle around the chicken and peppers, creating the base for the flavorful, creamy sauce that will develop.
Phase 3: Final Braising
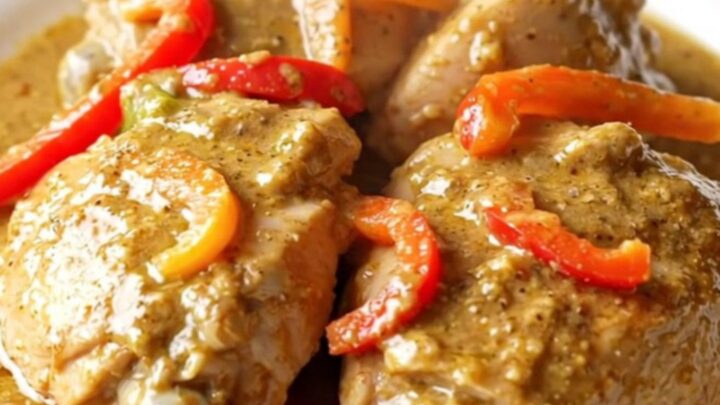
- Cooking and servingCover and cook on low for 4 hours until the chicken reaches an internal temperature of 165°F (74°C). Allow the chicken to rest for 5 minutes before serving to ensure the juices redistribute.Look for The chicken should be tender and the sauce thickened.Safe temperature 165°F (74°C) internal temperature (poultry)Tip Use a meat thermometer to verify the temperature is at least 165°F (74°C).
The chicken will look pale and soft, having absorbed the aromatics of the jerk spices. The sauce will have thickened and turned into a rich, creamy consistency. Check that the chicken is fully cooked through by confirming an internal temperature of 165°F (74°C) before turning off the heat.
Common mistakes
Avoid lifting the lid frequently during the cooking process, as this releases heat and moisture, which can significantly extend the cooking time and affect the texture of the chicken.
Additionally, do not use chicken breasts in place of thighs, as the lower fat content of breast meat will result in a dry, stringy final dish that lacks the desired tenderness.
How to tell it’s done
The chicken is perfectly cooked when it reaches an internal temperature of 165°F (74°C) as measured with a digital food thermometer inserted into the thickest part of the thigh.
The meat should be tender and easily pull apart with a fork, while the sauce should have thickened into a rich, creamy consistency that coats the back of a spoon.
- Poultry: 165°F (74°C) in the thickest part
Up next · Part 3 of 3
2 variations · storage & make-ahead · 3 answers · printable card
Tips, FAQ & printable recipe (Part 3)← Back to the ingredients (Part 1)