Desserts · Part 2 of 3: Instructions
Creamy Slow Cooker Dark Chocolate Rice Pudding Step-by-step instructions
- Prep
- Cook
- Total
- Serves
- 6
Before you start
Ensure the slow cooker insert is clean and dry. Gather all ingredients and measure the rice and sugar accurately to maintain the correct ratio of starch to liquid. If using a large chocolate bar, chop it into small, even pieces.
Have a silicone spatula ready for the final stir, as it is the most effective tool for scraping the sides of the cooker and ensuring the chocolate is fully incorporated into the mixture before serving.
Ingredients at a glance (4)
- 1 cup round dessert rice
- 4 oz dark chocolate squares
- 1/3 cup granulated sugar
- 4 cups whole milk
Instructions
Initial Layering
- Layering the ingredientsPlace the round dessert rice into the base of the slow cooker insert. Distribute the dark chocolate squares evenly over the rice, sprinkle the granulated sugar on top, and pour the whole milk into the cooker.Look for ensure all ingredients are evenly distributed in the cookerTip Do not stir the ingredients yet, as the layers will incorporate naturally during the slow cooking process.
At the start, ensure the ingredients are layered in the order described. The rice should form an even base, and the chocolate pieces should be scattered to avoid clumping.
The milk should just cover the top, creating a stable environment for the long cook ahead. Once the lid is secure, the slow cooker will begin the gentle, consistent heating process required for a perfect pudding.
Controlled Cooking
- Slow cooking the puddingCover the slow cooker with its lid. Cook on the low setting for approximately three hours, checking halfway through to ensure the milk is not boiling over and the rice is beginning to absorb the liquid.Look for the pudding should be thick and glossy with the rice tenderTip If the pudding appears too dry, add a splash of additional milk during the final hour of cooking.
During the cooking phase, the rice will slowly expand as it absorbs the milk and chocolate. The mixture will transition from a loose assembly to a unified, thick pudding. You should notice a subtle, sweet aroma filling the room. At the end of this phase, the rice should be soft, and the liquid should have reduced to a thick, creamy sauce that holds its shape on a spoon.
Final Emulsification
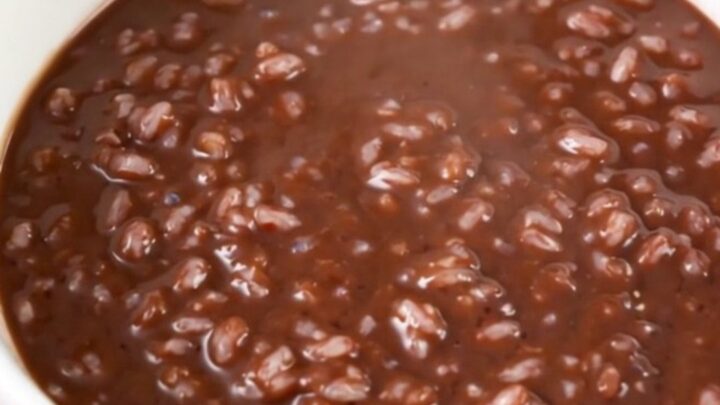
- Final resting and servingTurn off the slow cooker and remove the lid. Let the pudding rest for ten minutes to allow the texture to set and the chocolate to fully emulsify with the milk. Stir gently before serving warm.Look for the mixture should be a smooth, uniform chocolate colorTip Stirring gently at the end ensures the chocolate is perfectly combined throughout the creamy rice base.
After the resting period, the pudding will have thickened further as it cools slightly. A gentle stir with a spatula will reveal a glossy, uniform texture with no streaks of melted chocolate remaining. The final consistency should be rich, velvety, and smooth. Once this stage is reached, the pudding is ready to be portioned into bowls for immediate enjoyment while still warm.
Common mistakes
A common mistake is using the wrong type of rice; long-grain varieties will remain firm and fail to thicken the milk, leading to a thin, watery result. Another error is checking the slow cooker too frequently.
Every time the lid is removed, heat and moisture escape, which can significantly increase the cooking time and potentially dry out the pudding. Trust the slow cooker to do its work and keep the lid closed until the final stages.
How to tell it’s done
The pudding is done when the rice is tender and has absorbed most of the liquid, resulting in a thick, creamy consistency. The chocolate should be completely melted and integrated, creating a uniform, glossy brown appearance.
When tested with a spoon, the mixture should coat the back of the utensil comfortably, indicating that the starches have fully hydrated and the pudding has reached the ideal thickness for serving.
Up next · Part 3 of 3
2 variations · storage & make-ahead · 3 answers · printable card
Tips, FAQ & printable recipe (Part 3)← Back to the ingredients (Part 1)