Dinner · Part 2 of 3: Instructions
Creamy Slow Cooker Chicken Pot Pie Pasta Step-by-step instructions
- Prep
- Cook
- Total
- Serves
- 6
Before you start
Before starting, ensure the chicken is properly prepared by trimming any excess fat and cutting it into uniform, bite-sized pieces. This consistency ensures that all pieces cook at the same rate. Have all your measured ingredients, including the broth, ready to go near the slow cooker.
Clean your workspace thoroughly and wash your hands after handling raw poultry to prevent cross-contamination. Having everything measured and organized makes the assembly process smooth and efficient, allowing the slow cooker to do the heavy lifting.
Ingredients at a glance (4)
- 2 lbs boneless skinless chicken breasts, cut into bite-sized pieces
- 1 lb rotini pasta, uncooked
- 1 cup frozen peas
- 3 cups chicken broth
Instructions
Initial Chicken Cooking
- Combine Base IngredientsPlace the chicken breast pieces and chicken broth into the slow cooker. Ensure the chicken is evenly distributed. Cover and cook on high for approximately 2.5 hours until the chicken is tender and cooked through.Look for The chicken should be opaque and tender throughout.Safe temperature 165°F (74°C) internal temperature (poultry)Tip Check the internal temperature of the chicken to ensure it reaches at least 165°F (74°C).
At the end of this phase, the chicken should be fully cooked, tender, and swimming in a flavorful, seasoned broth. The liquid will have reduced slightly, concentrating the savory notes.
Ensure the chicken is opaque throughout and reaches the required safe temperature before proceeding to add the pasta.
Pasta Integration
- Add PastaStir in the uncooked rotini pasta into the slow cooker. Ensure the pasta is submerged in the liquid to cook evenly. Cover and continue cooking on high for an additional 30 minutes, or until the pasta is al dente.Look for The sauce will begin to thicken as the starch from the pasta releases.Tip Stir halfway through this phase to prevent the pasta from clumping together.
Once the pasta has been added, the slow cooker will begin to transform the liquid into a creamy, cohesive sauce. The pasta should be softening, and the mixture should start to look thicker. Check that the pasta is fully submerged to ensure even cooking throughout this critical phase.
Final Finishing
- Final Stir and ServiceFold in the frozen peas during the last 5 minutes of cooking. Once the peas are heated through and the sauce has reached a creamy consistency, turn off the slow cooker and serve immediately while hot.Look for The peas should be bright green and the sauce should coat the back of a spoon.Tip If the sauce seems too thick, add a splash of warm chicken broth to thin it to the desired consistency.
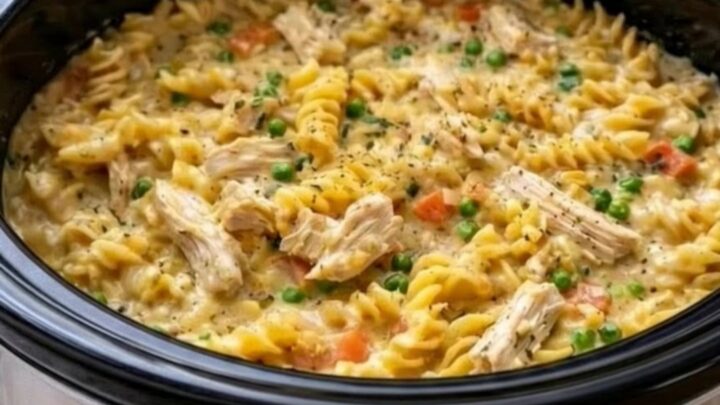
The final phase brings everything together with the addition of the frozen peas. The dish should now look vibrant, with the creamy sauce clinging to the rotini and chicken. The peas should be heated through, adding a pop of color and texture, signaling that the meal is ready for service.
Common mistakes
A common mistake is adding the pasta too early, which can cause it to become mushy and absorb all the liquid, resulting in a dry dish. Always add the pasta during the final phase of cooking as indicated.
Another error is failing to stir the pasta periodically during the final 30 minutes; this can lead to clumping. Finally, ensure the chicken is fully cooked before adding the pasta, as the pasta cooking time is insufficient to safely cook raw poultry from scratch.
How to tell it’s done
The dish is done when the pasta is al dente—firm to the bite but tender throughout—and the sauce has thickened sufficiently to coat the back of a spoon. The chicken must reach an internal temperature of 165°F (74°C) to be safely consumed.
Use a digital meat thermometer to verify the temperature in the thickest part of a chicken piece. When everything is perfectly cooked, the mixture will appear glossy, creamy, and uniform, with a pleasant aroma of savory chicken and herbs.
- Poultry: 165°F (74°C) in the thickest part
Up next · Part 3 of 3
2 variations · storage & make-ahead · 3 answers · printable card
Tips, FAQ & printable recipe (Part 3)← Back to the ingredients (Part 1)